Computes
Overview
The Computes section is where you define the compute configurations that back every workload on the platform — pipeline jobs, workstations, file activity, and more. A compute configuration ties together a cluster, a node pool specification, and a set of permitted workload types. Researchers never interact with computes directly.
You can create compute configurations matched to the workload types and capacity requirements of each project.
Navigation: Select Computes from the left-hand navigation pane.
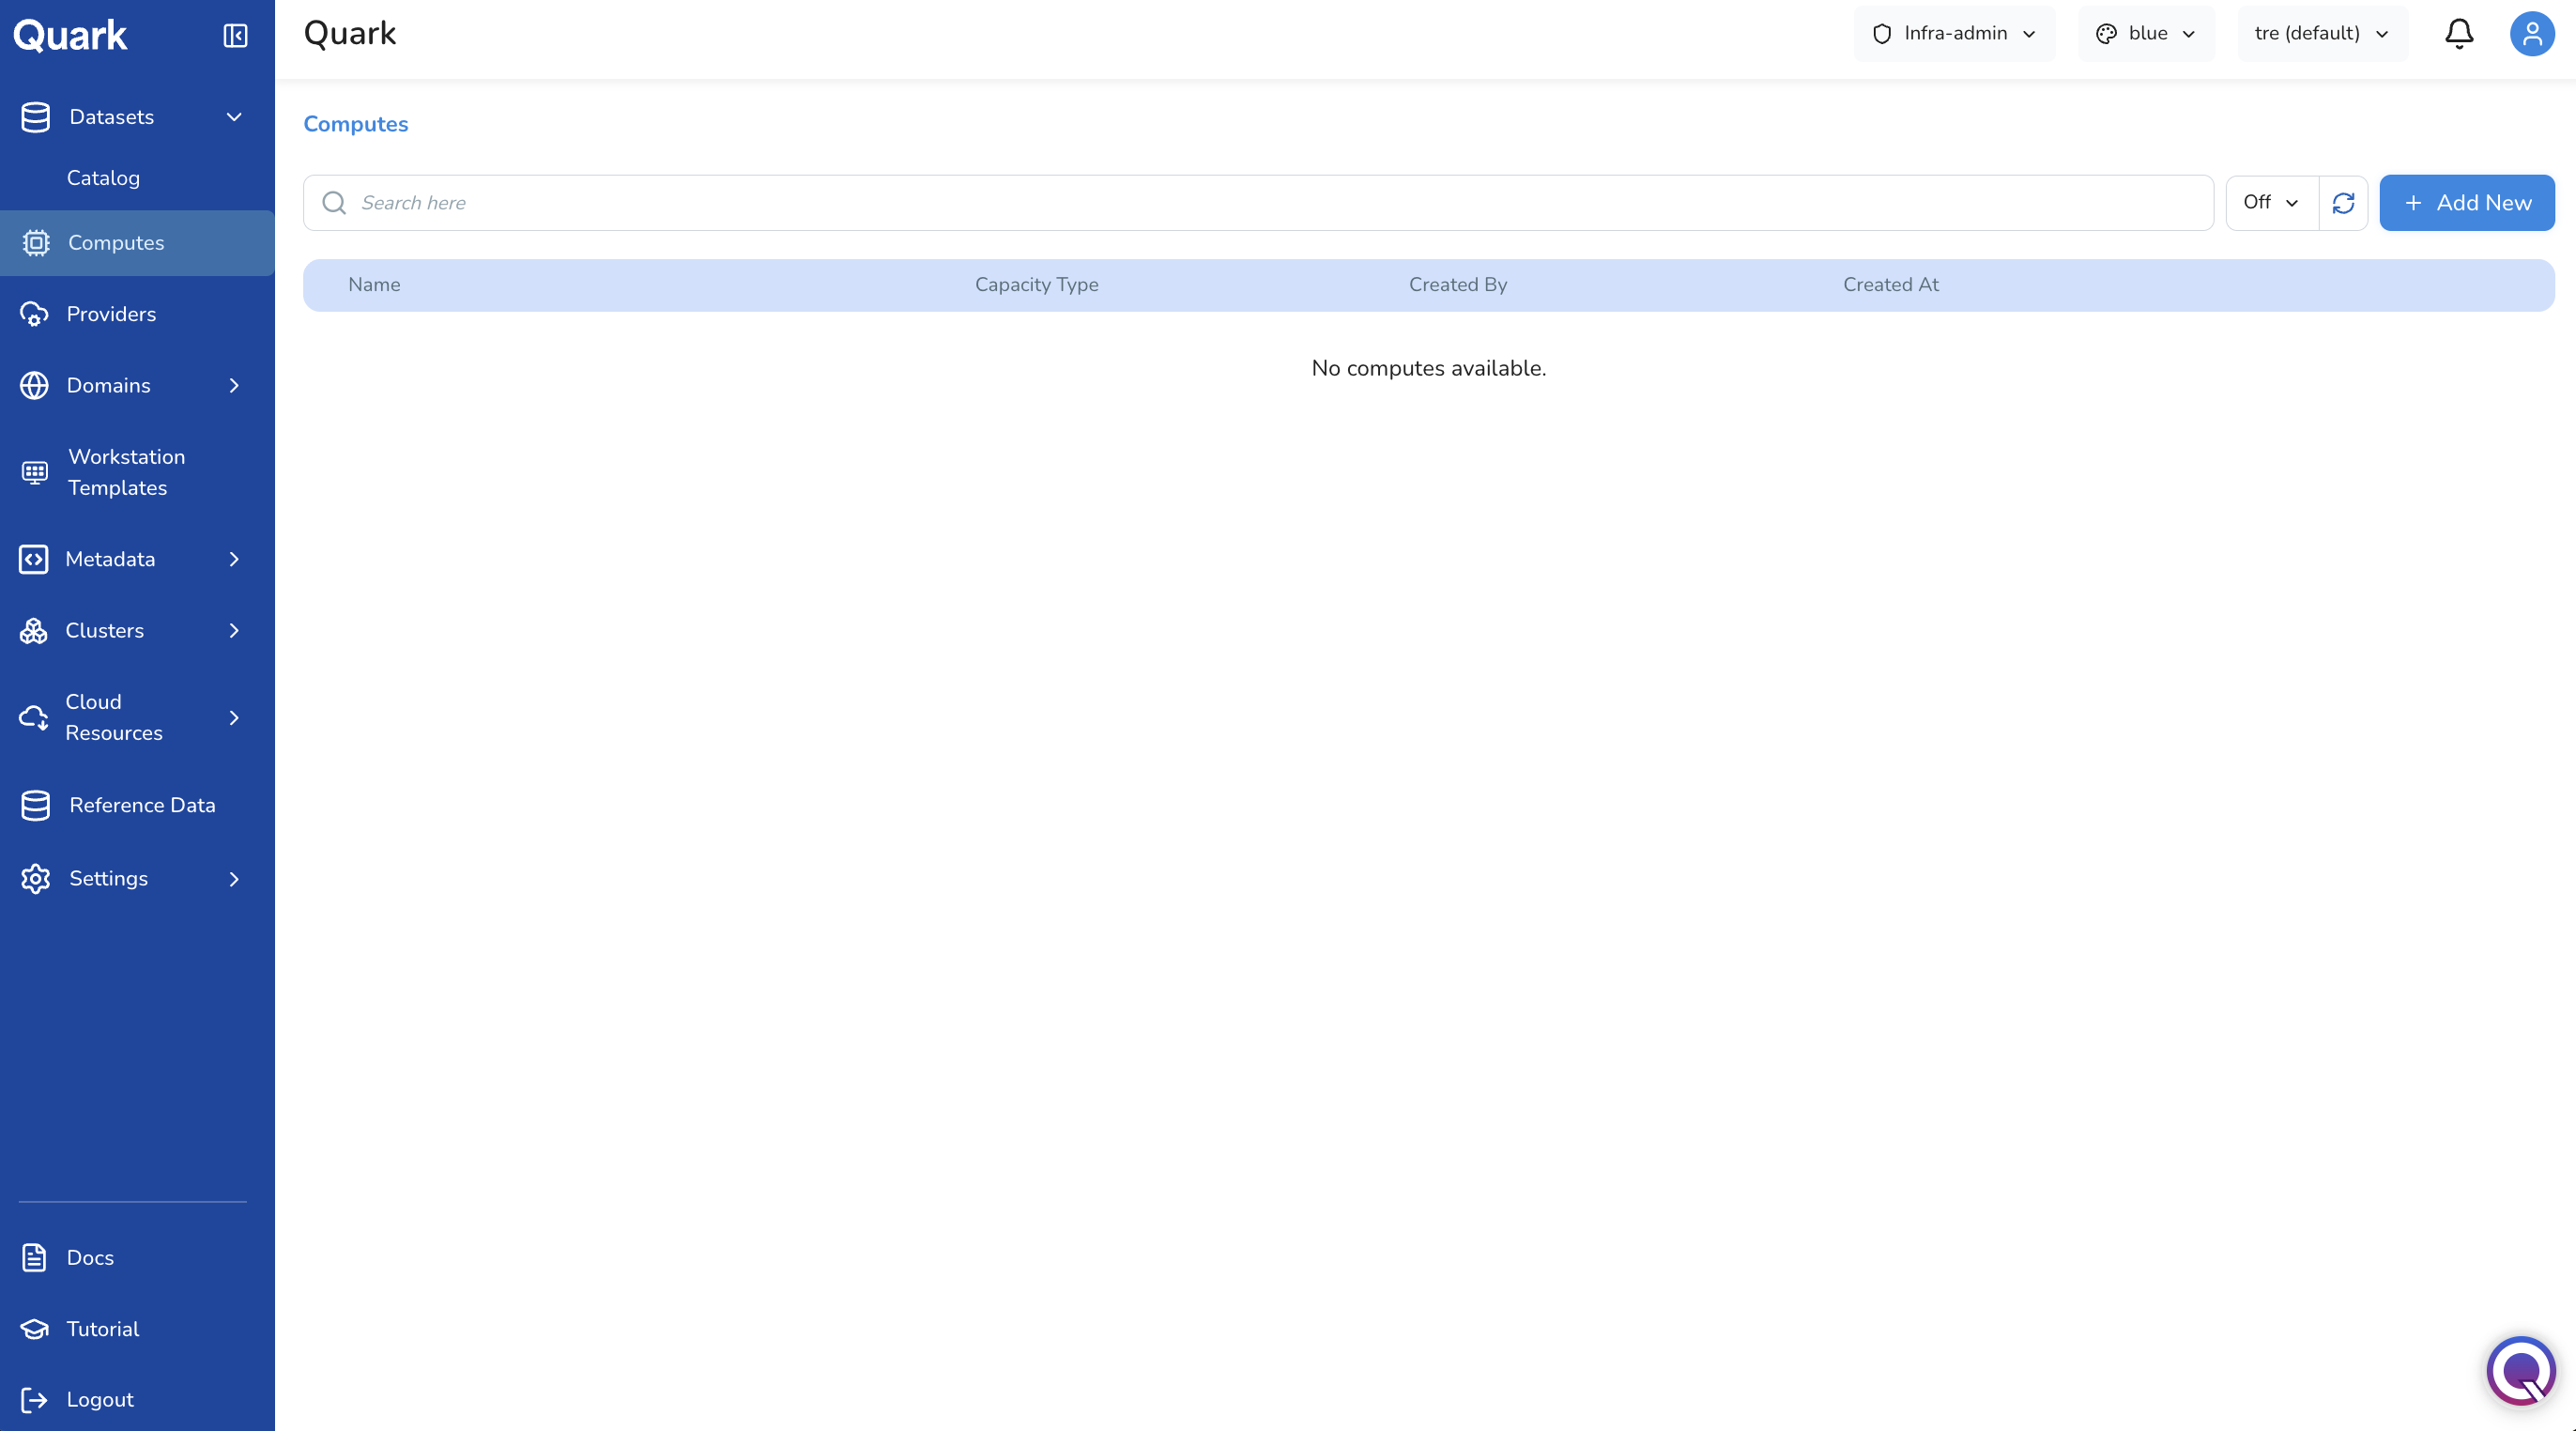
The Computes Page
When you open Computes, the dashboard lists all compute configurations created on the platform. Each row shows the compute name, its associated cluster, capacity type, and the projects it has been scoped to.
Use the search bar to filter by name, or click Refresh to pull the latest status from the cluster.
Tip: Each compute profile is referenced by name when platform workloads are scheduled. If a compute is edited or disabled, any workload that depends on it will be affected — review dependencies before making changes to an existing profile.
Creating a New Compute
To define a new compute configuration:
- Select Computes from the left-hand navigation pane.
- Click Add New in the top-right corner of the dashboard.
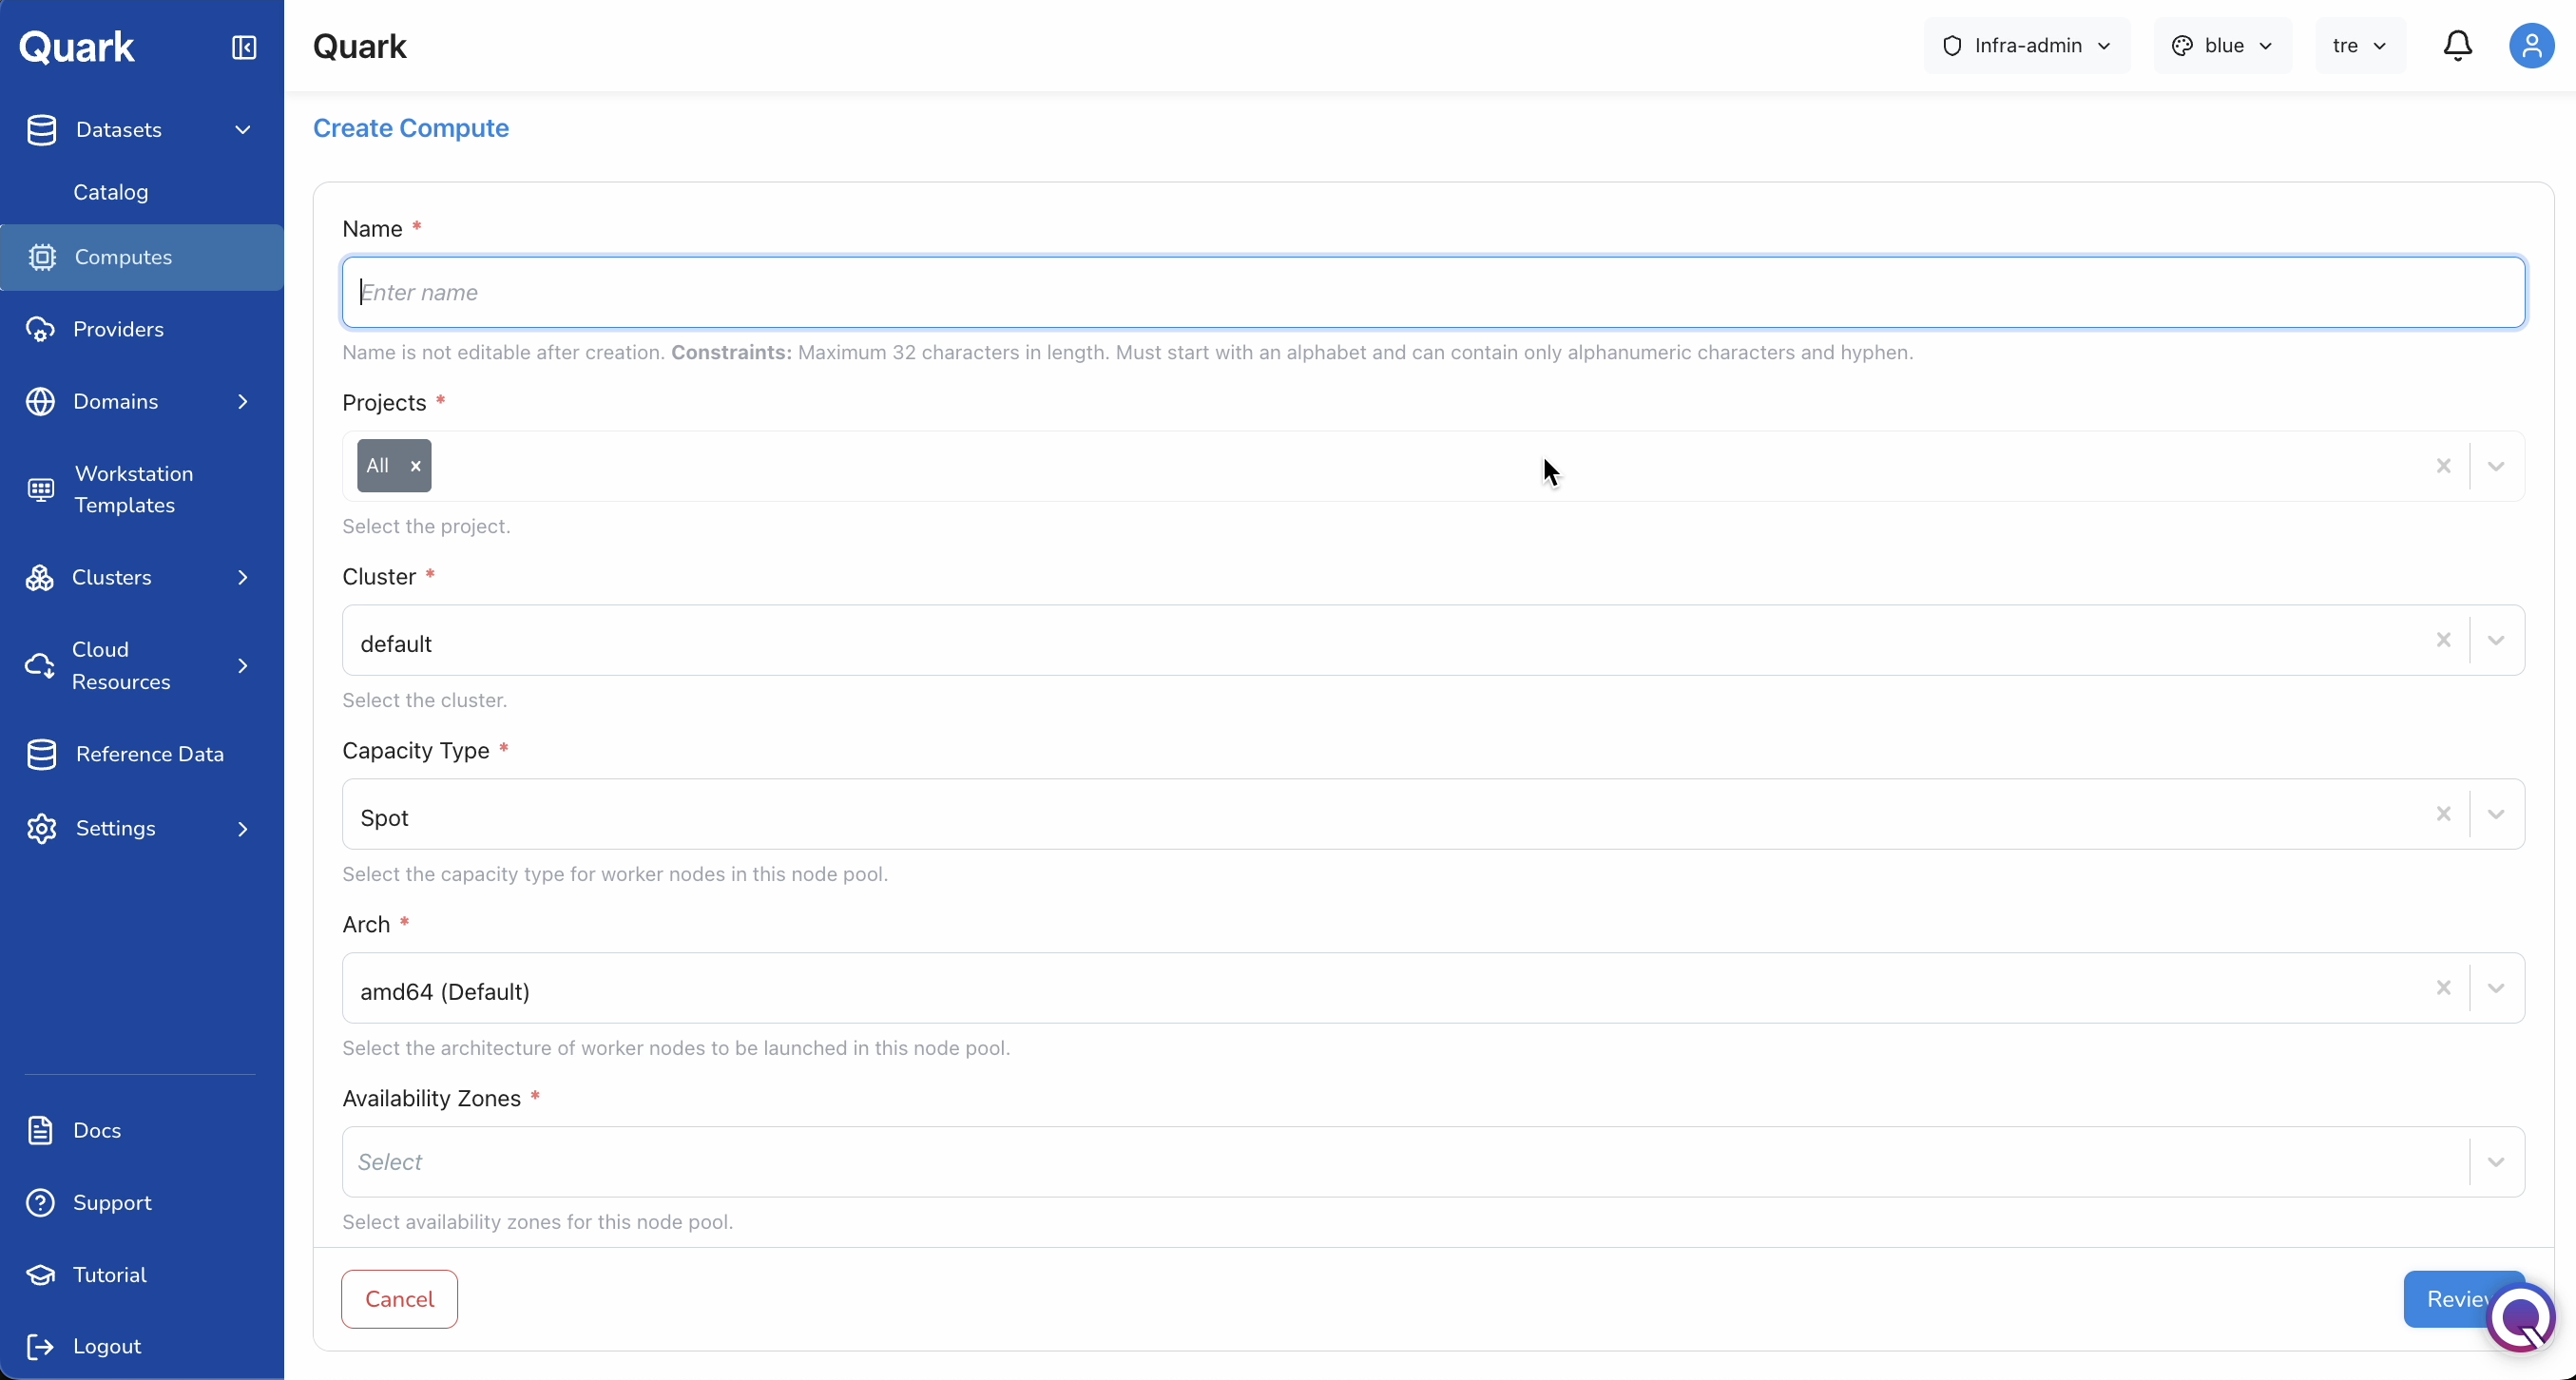
This opens the Create Compute form — a single scrolling page covering all configuration fields.
Name, Projects, and Cluster
| Field | Description |
|---|---|
| Name (mandatory) | A unique identifier for this compute profile. Maximum 32 characters. Must start with a letter and contain only alphanumeric characters and hyphens (e.g., prod-cpu-ondemand, gpu-spot-east). |
| Projects (mandatory) | The project or projects that will have access to this compute. Select All for platform-wide availability, or select one or more specific projects. |
| Cluster (mandatory) | The underlying Kubernetes cluster this compute will run on, selected from the clusters configured under your platform's infrastructure setup. |
| Capacity Type (mandatory) | The pricing and availability model for the worker nodes: On-demand (guaranteed availability, higher cost) or Spot (lower cost, may be interrupted — best suited for fault-tolerant workloads such as batch pipelines). |
| Arch (mandatory) | The CPU architecture of the worker nodes: amd64 (default) or arm64 (typically lower cost per vCPU). |
| Availability Zones (mandatory) | The cloud availability zones this compute's node pool can use. Selecting multiple zones increases resilience. |
Important: The compute Name cannot be changed after creation. Choose a name that clearly conveys the compute's purpose, capacity type, and intended workload — for example,
genomics-ondemand-amd64orgpu-spot-us-east.
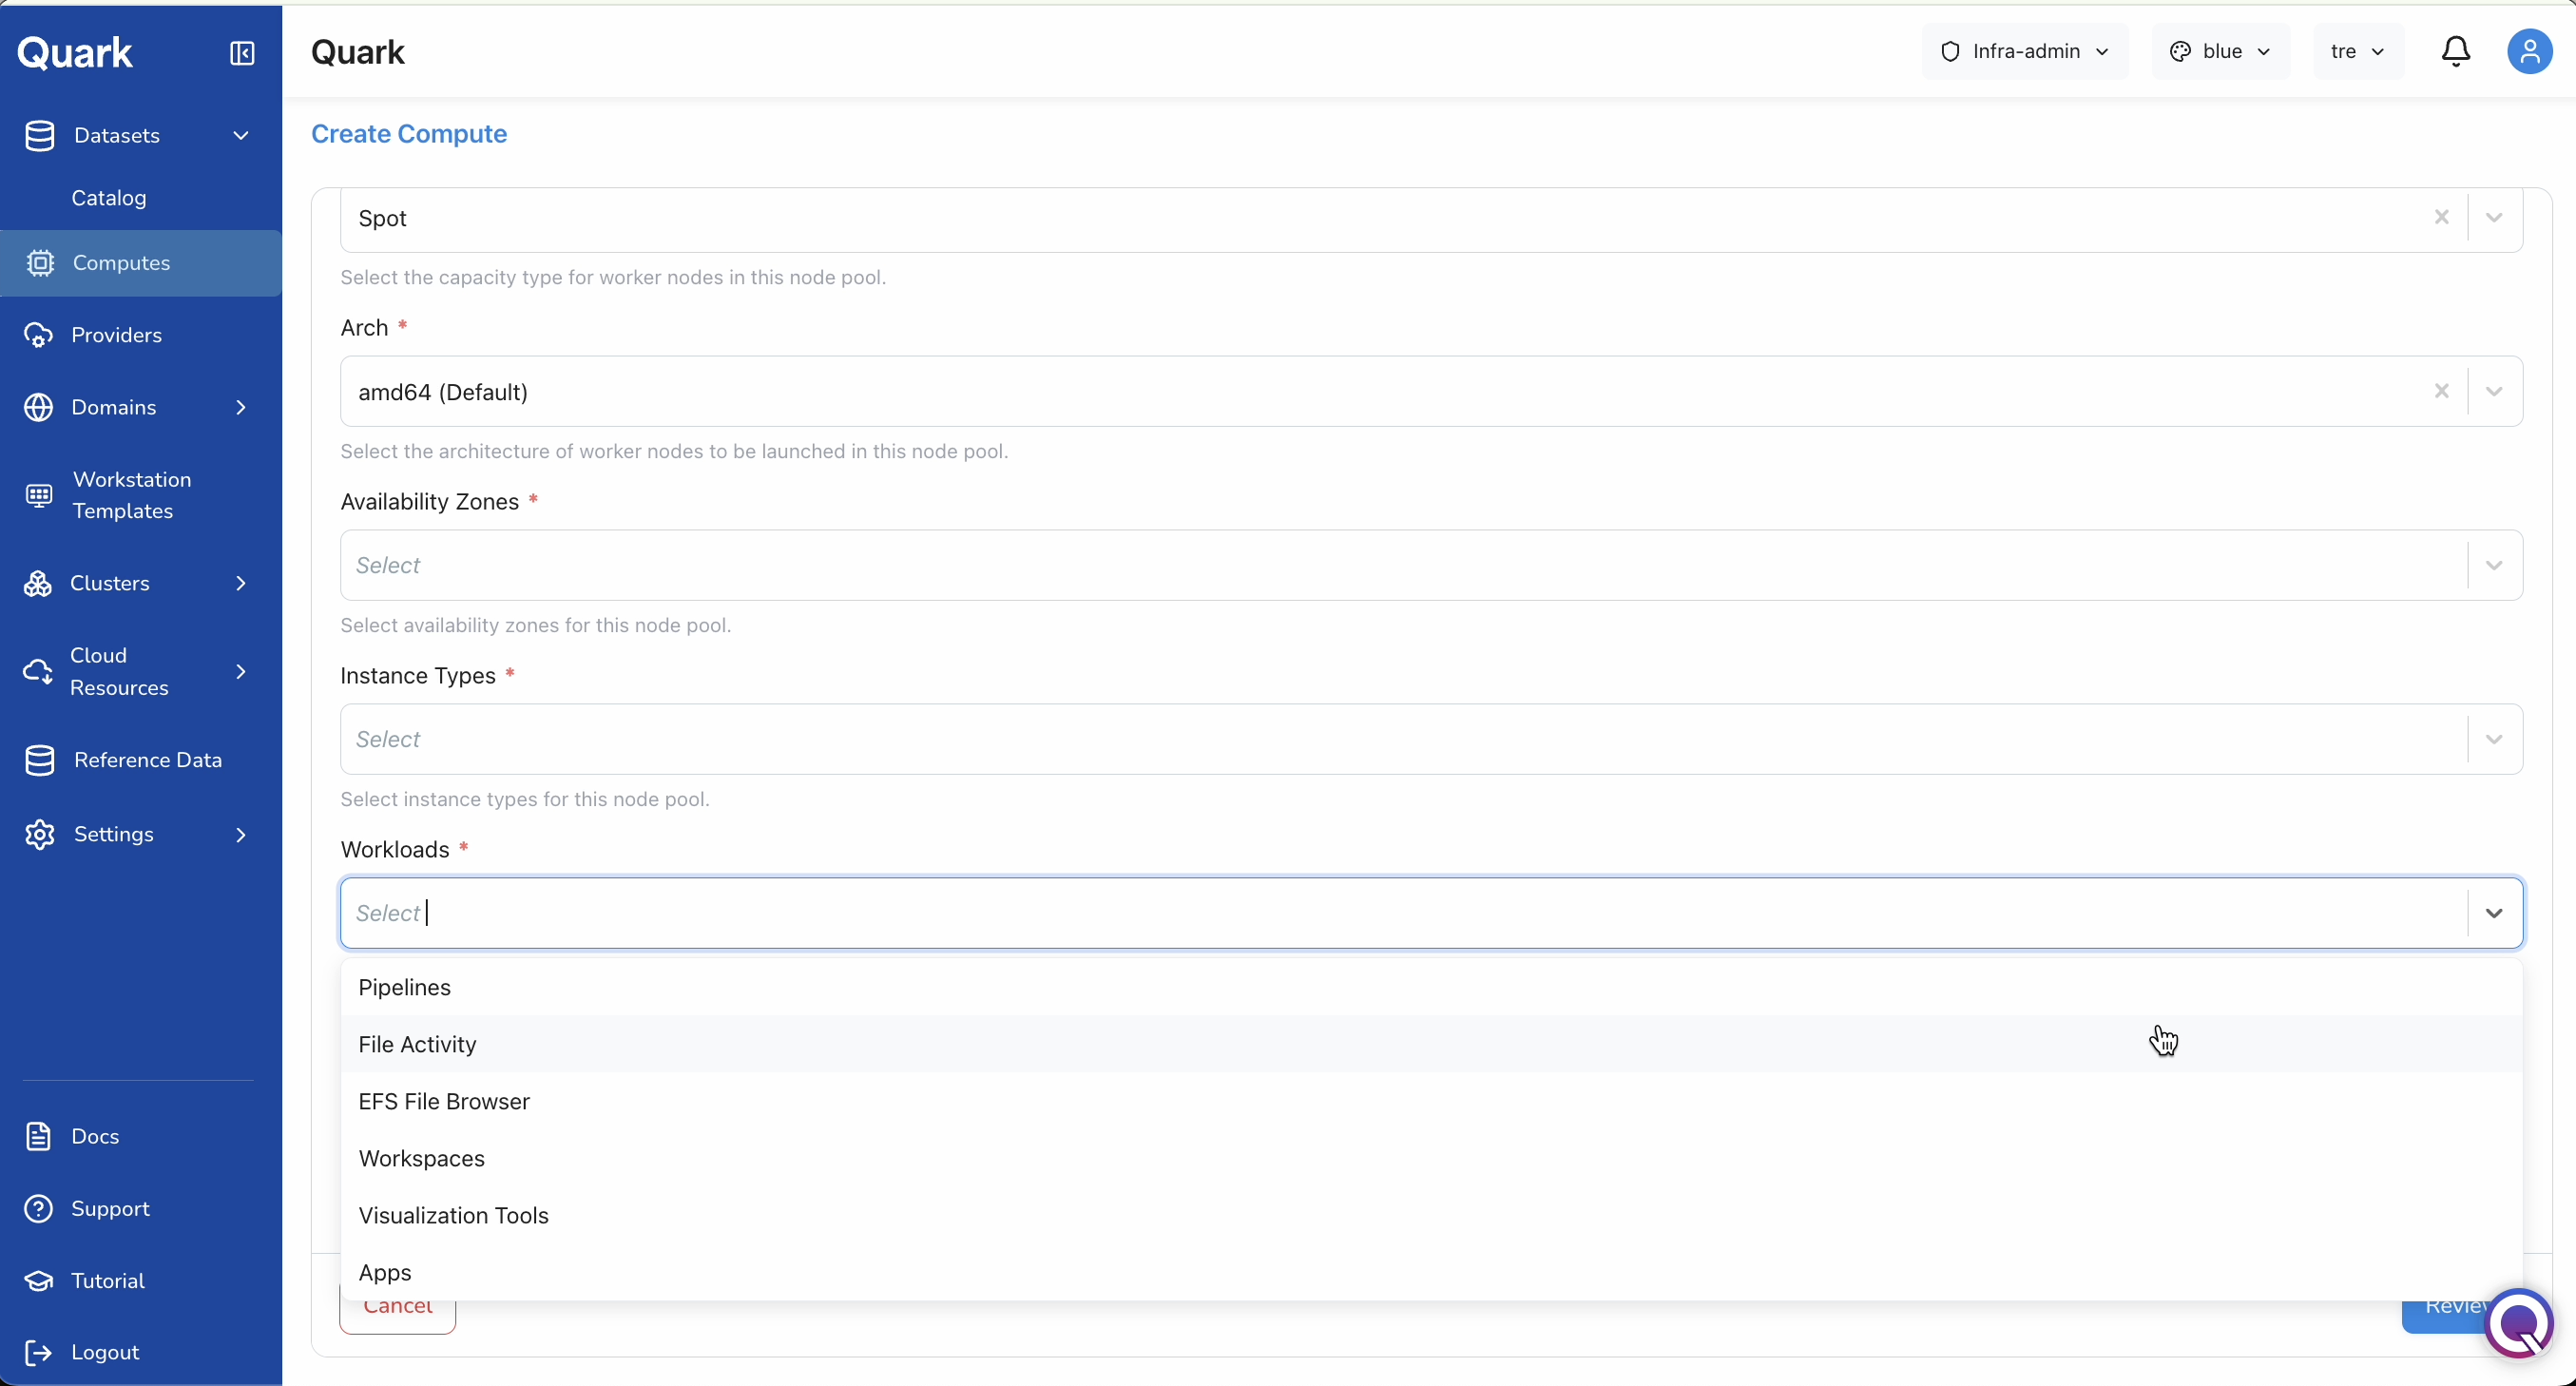
Instance Types and Workloads
| Field | Description |
|---|---|
| Instance Types (mandatory) | The cloud instance types available to this compute's node pool (e.g., c3.2xlarge, m5.4xlarge). Selecting multiple types gives the scheduler flexibility. |
| Workloads (mandatory) | The workload categories permitted to run on this compute. Select one or more from: Pipelines, File Activity, EFS File Browser, Workspaces, Visualization Tools, Apps. A compute only serves the workload types explicitly enabled here. |
Note: A compute can be extended to additional workload types at any time by editing its configuration — for example, a compute initially configured for Pipelines only can later be updated to also support Workspaces without recreating it.
Capacity Limits
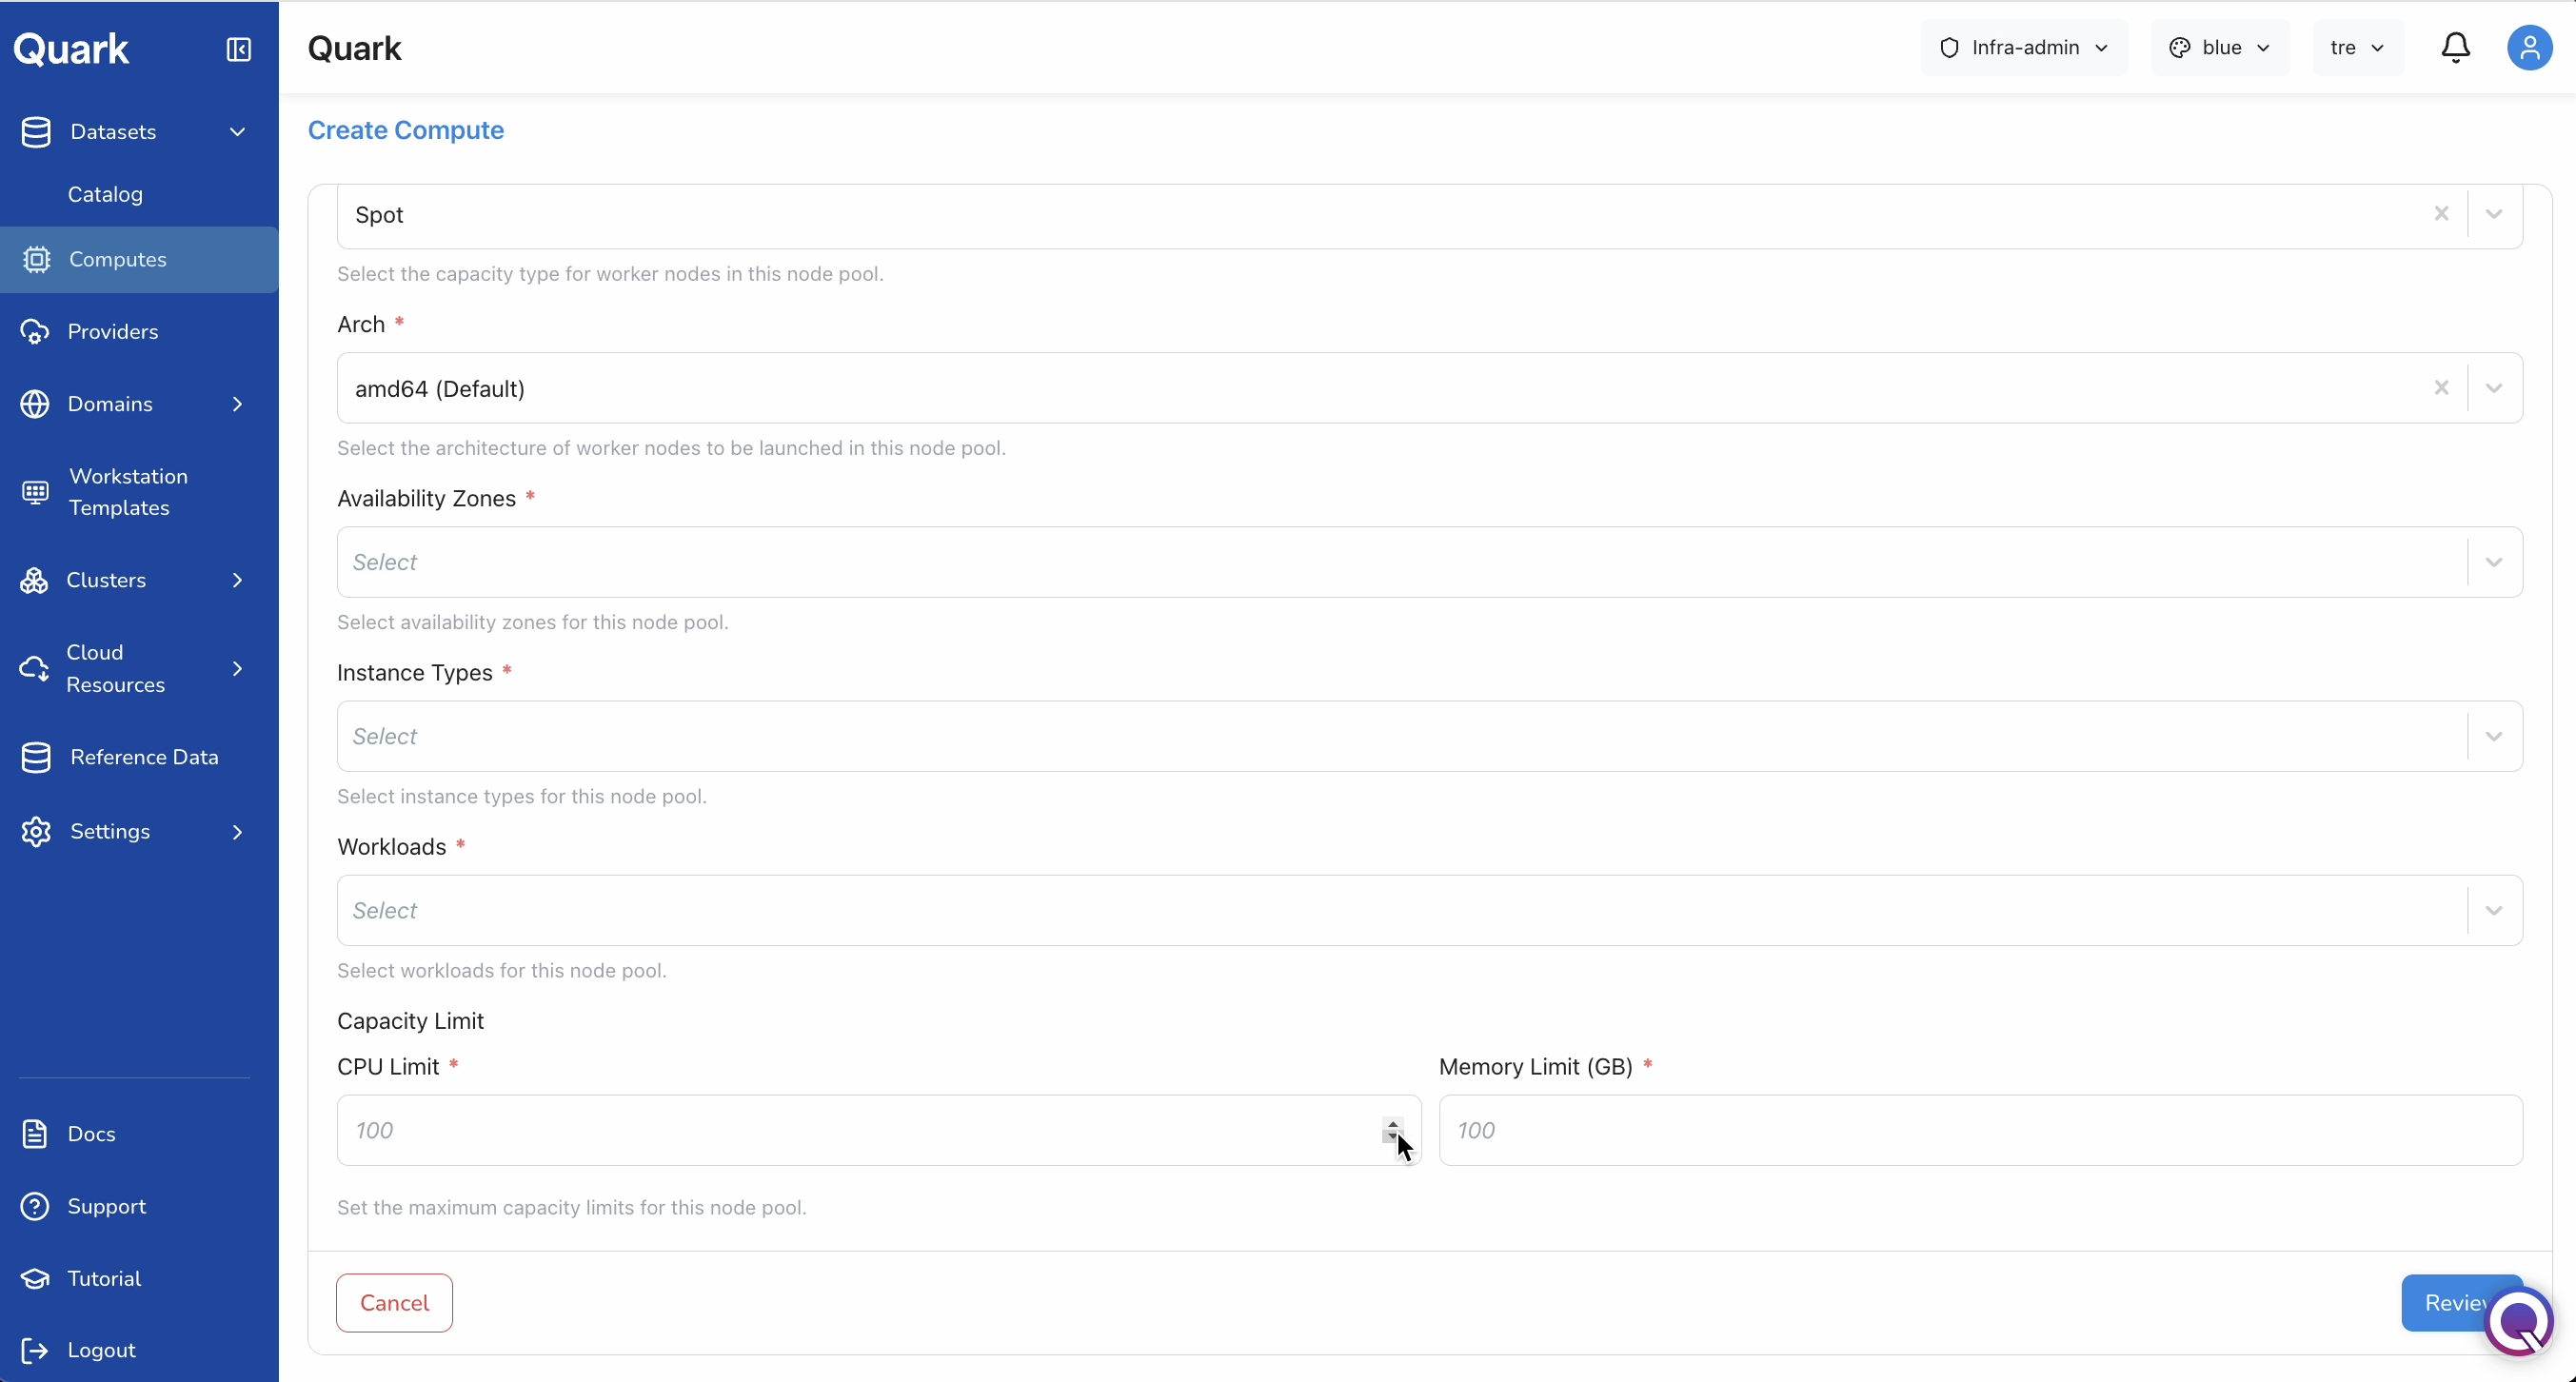
Sets upper bounds on the total resources this compute's node pool is allowed to consume across all workloads at once, preventing runaway consumption.
| Field | Description |
|---|---|
| CPU Limit (mandatory) | The maximum number of vCPUs this compute can consume concurrently. Defaults to 100. |
| Memory Limit (GB) (mandatory) | The maximum total memory in GB this compute can consume concurrently. Defaults to 100. |
| GPU Limit (GB) | The maximum GPU memory in GB this compute can consume — set when configuring profiles with GPU-capable instance types. |
Review and Create
Once all fields are filled, click Review in the bottom-right corner to verify the full configuration. Confirm that the cluster, instance types, workloads, and capacity limits are correct, then click Create. The compute profile is provisioned immediately and becomes available to the selected projects.
Managing Existing Computes
From the Computes list, each existing profile supports two actions:
- Edit — Modify any field except the Name. Use this to adjust instance types, extend workload permissions, update capacity limits, or change project scope. Changes take effect immediately.
- Disable — Suspend the compute profile without deleting it. Disabled computes cannot accept new workload scheduling but their configuration is preserved. Re-enable at any time to restore availability.
What's Next
- Workstation Templates — workstation templates reference compute profiles; confirm the right compute is available for each template's intended use case.
- Publishing a Dataset — verify that projects receiving access to this compute also have the datasets they need available in the catalog.