Users
Overview
The Users section is where the Admin manages the full directory of platform users — creating new accounts, reviewing existing members, and editing user details when needed. Every person who accesses Quark V3 must have a user account created here first.
Navigation: Select Users from the left-hand navigation pane.
The Users List
When you open Users, the dashboard displays all user accounts currently on the platform.
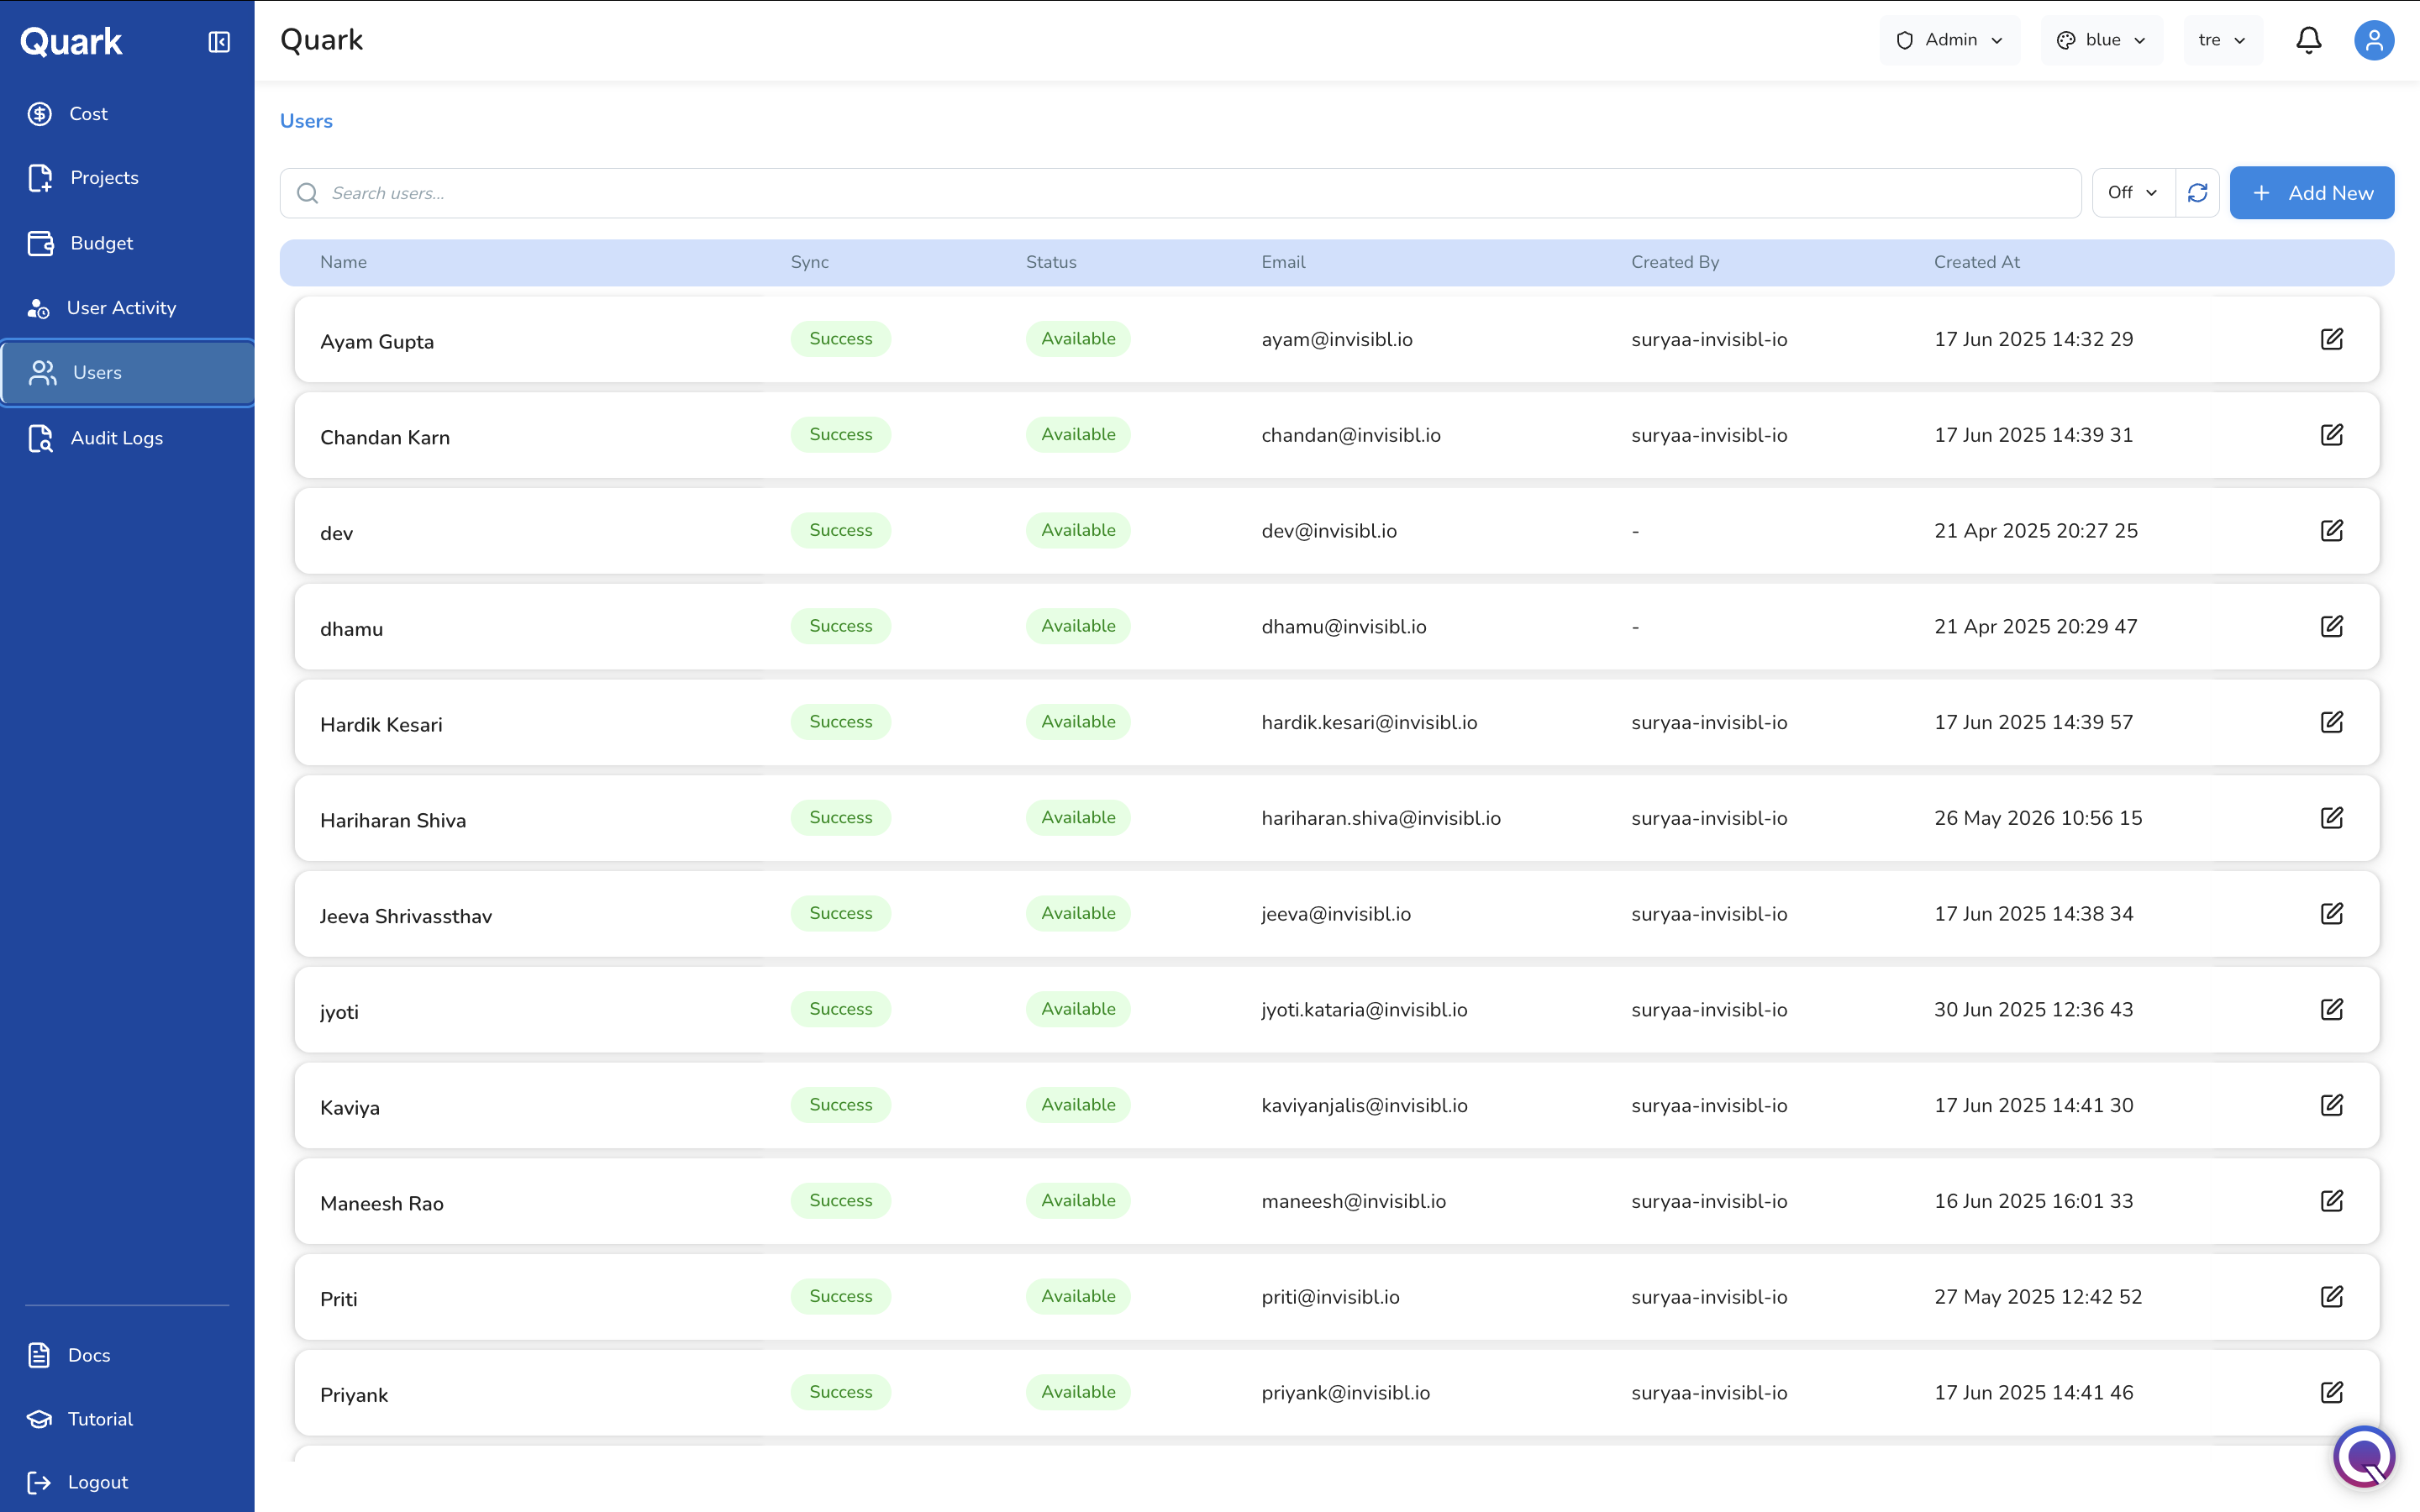
Each row in the list shows:
| Column | Description |
|---|---|
| Name | The user's display name or username. |
| Status | The current account state (e.g., Available). |
| The user's registered email address. | |
| Created By | The admin account that created this user, if recorded. |
| Created At | The date and time the account was created. |
Click the edit icon (pencil) on any row to open and modify that user's details.
Search
Use the search bar at the top of the list to find a user by name or email. Results filter in real time as you type.
Creating a New User
To add a new user to the platform:
- Click + Add New in the top-right corner of the Users screen.
- Complete the General step of the Create User form, then click Review to confirm.
Step 1: General
All user configuration is completed in a single form before review.

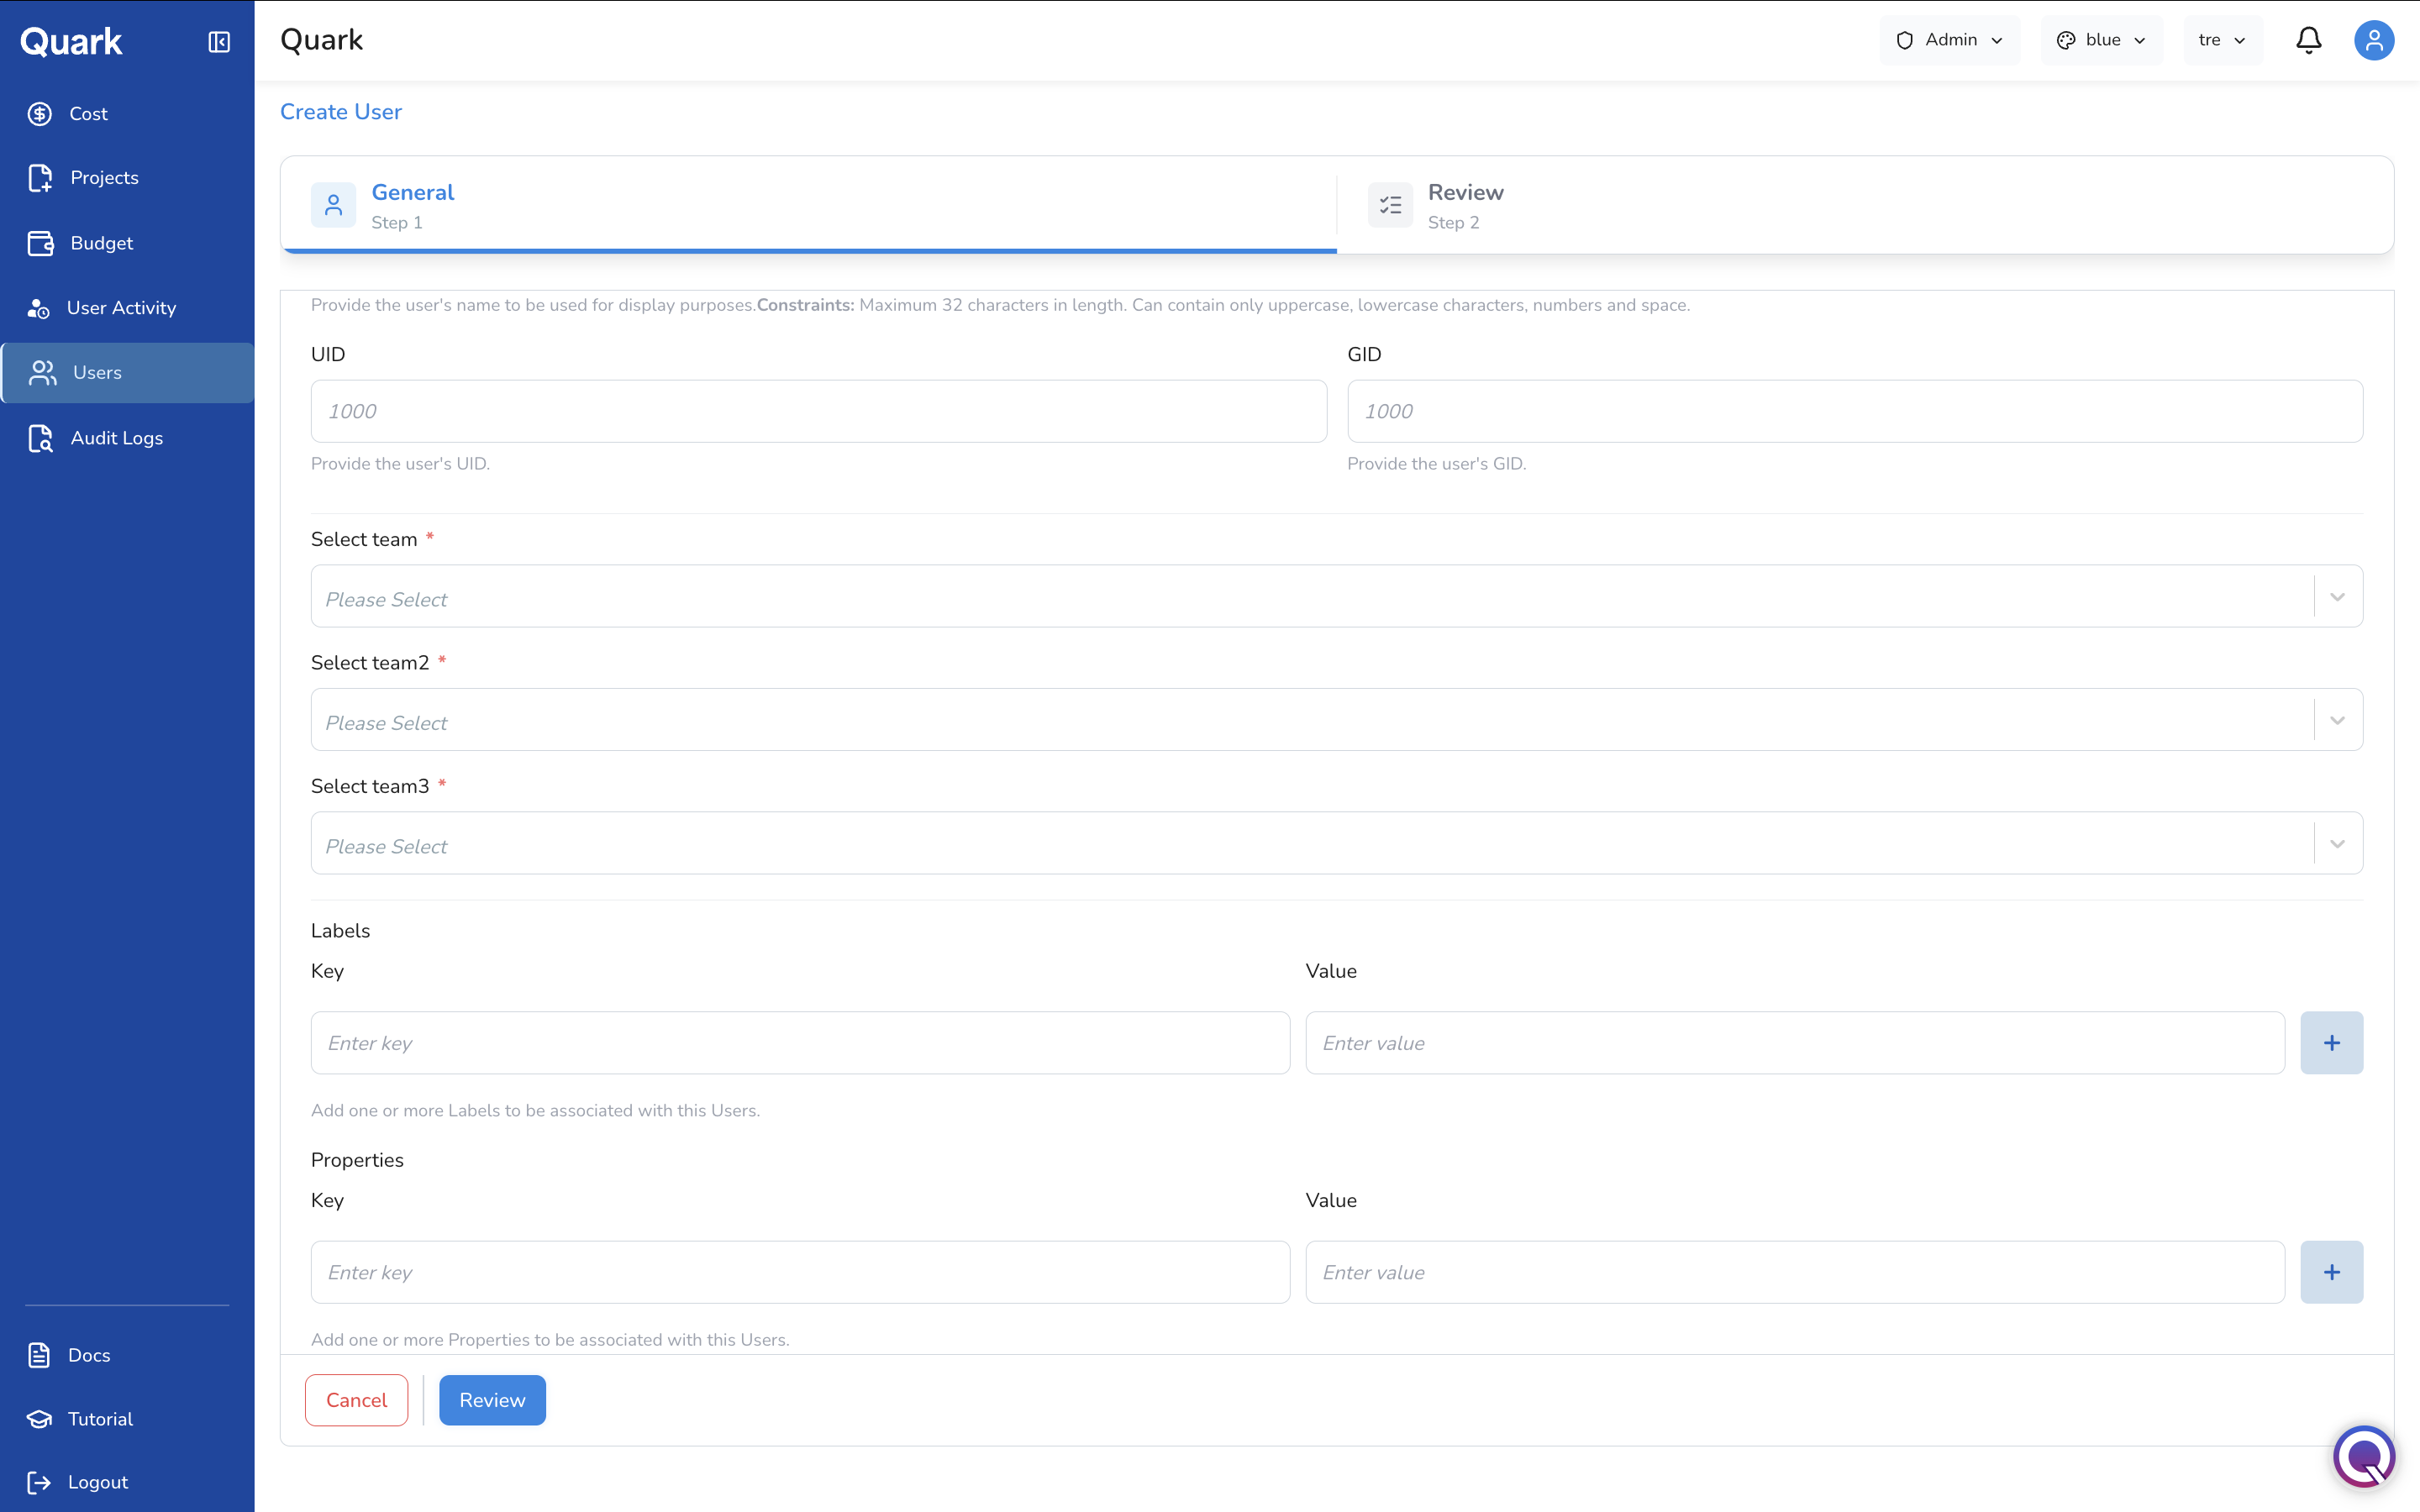
Identity
| Field | Description | Constraints |
|---|---|---|
| Email * | The user's email address. Used for login and platform notifications. | Must be a valid email address. Not editable after creation. |
| Username * | The system-level identifier for this user, used when creating system resources such as the user's home directory. | Maximum 32 characters. Must start with a letter and end with an alphanumeric character. Can contain lowercase letters, numbers, hyphens, underscores, and periods. Not editable after creation. |
| Display Name | The name shown for this user across the platform interface. | Maximum 32 characters. Can contain uppercase and lowercase letters, numbers, and spaces. |
Important: Both Email and Username are permanent — they cannot be changed after the account is created. Confirm both are correct before clicking Review.
System Identity
| Field | Description |
|---|---|
| UID | The user's numeric system user ID. Defaults to 1000. |
| GID | The user's numeric system group ID. Defaults to 1000. |
Organisation Hierarchy
Assign the user to the correct position in your organisation's team structure. This determines how the user's activity and resource consumption are attributed across the Cost and User Activity views.
| Field | Description |
|---|---|
| Select team * | The top-level team this user belongs to. Required. |
| Select team2 * | The second-level team within the selected top-level team. Required. |
| Select team3 * | The third-level team, representing the most granular organisational unit. Required. |
Labels
Key-value metadata tags to associate with the user account — useful for filtering, reporting, or integration with external systems. Add one or more key-value pairs using the + button.
Properties
Additional key-value pairs for storing custom attributes against the user account. Add one or more key-value pairs using the + button.
Step 2: Review
Review the user's details before creating the account. Pay particular attention to the Email and Username fields — neither can be changed after this point.
Click Create to finalise the account. The user will appear in the Users list immediately and can be assigned to projects from Projects.
What's Next
- Projects — Assign the new user to one or more projects using the Add Member action on the Projects list.
- User Activity — Monitor what the user does across the platform once their account is active.
- Audit Logs — All user creation and account changes are captured in the audit log.