Running Pipelines in Quark as a Bench Scientist
This document explains how bench scientists can launch and configure pipelines in Quark using the Launchpad, without needing any coding experience. It covers locating a pipeline, reviewing its details, configuring inputs and run settings, validating parameters, and submitting a pipeline run.
Before you begin: Make sure any input files your pipeline requires have been uploaded to My Files → Data. See Managing Files.
Overview
Running a pipeline in Quark V3 involves five steps:
- Open the Launchpad
- Find your Pipeline
- Configure Run Settings
- Provide Pipeline Inputs
- Review and Submit
Step 1: Open the Launchpad
Navigate to the Pipelines tab in the navigation pane.
Select Launchpad to view all available pipelines.
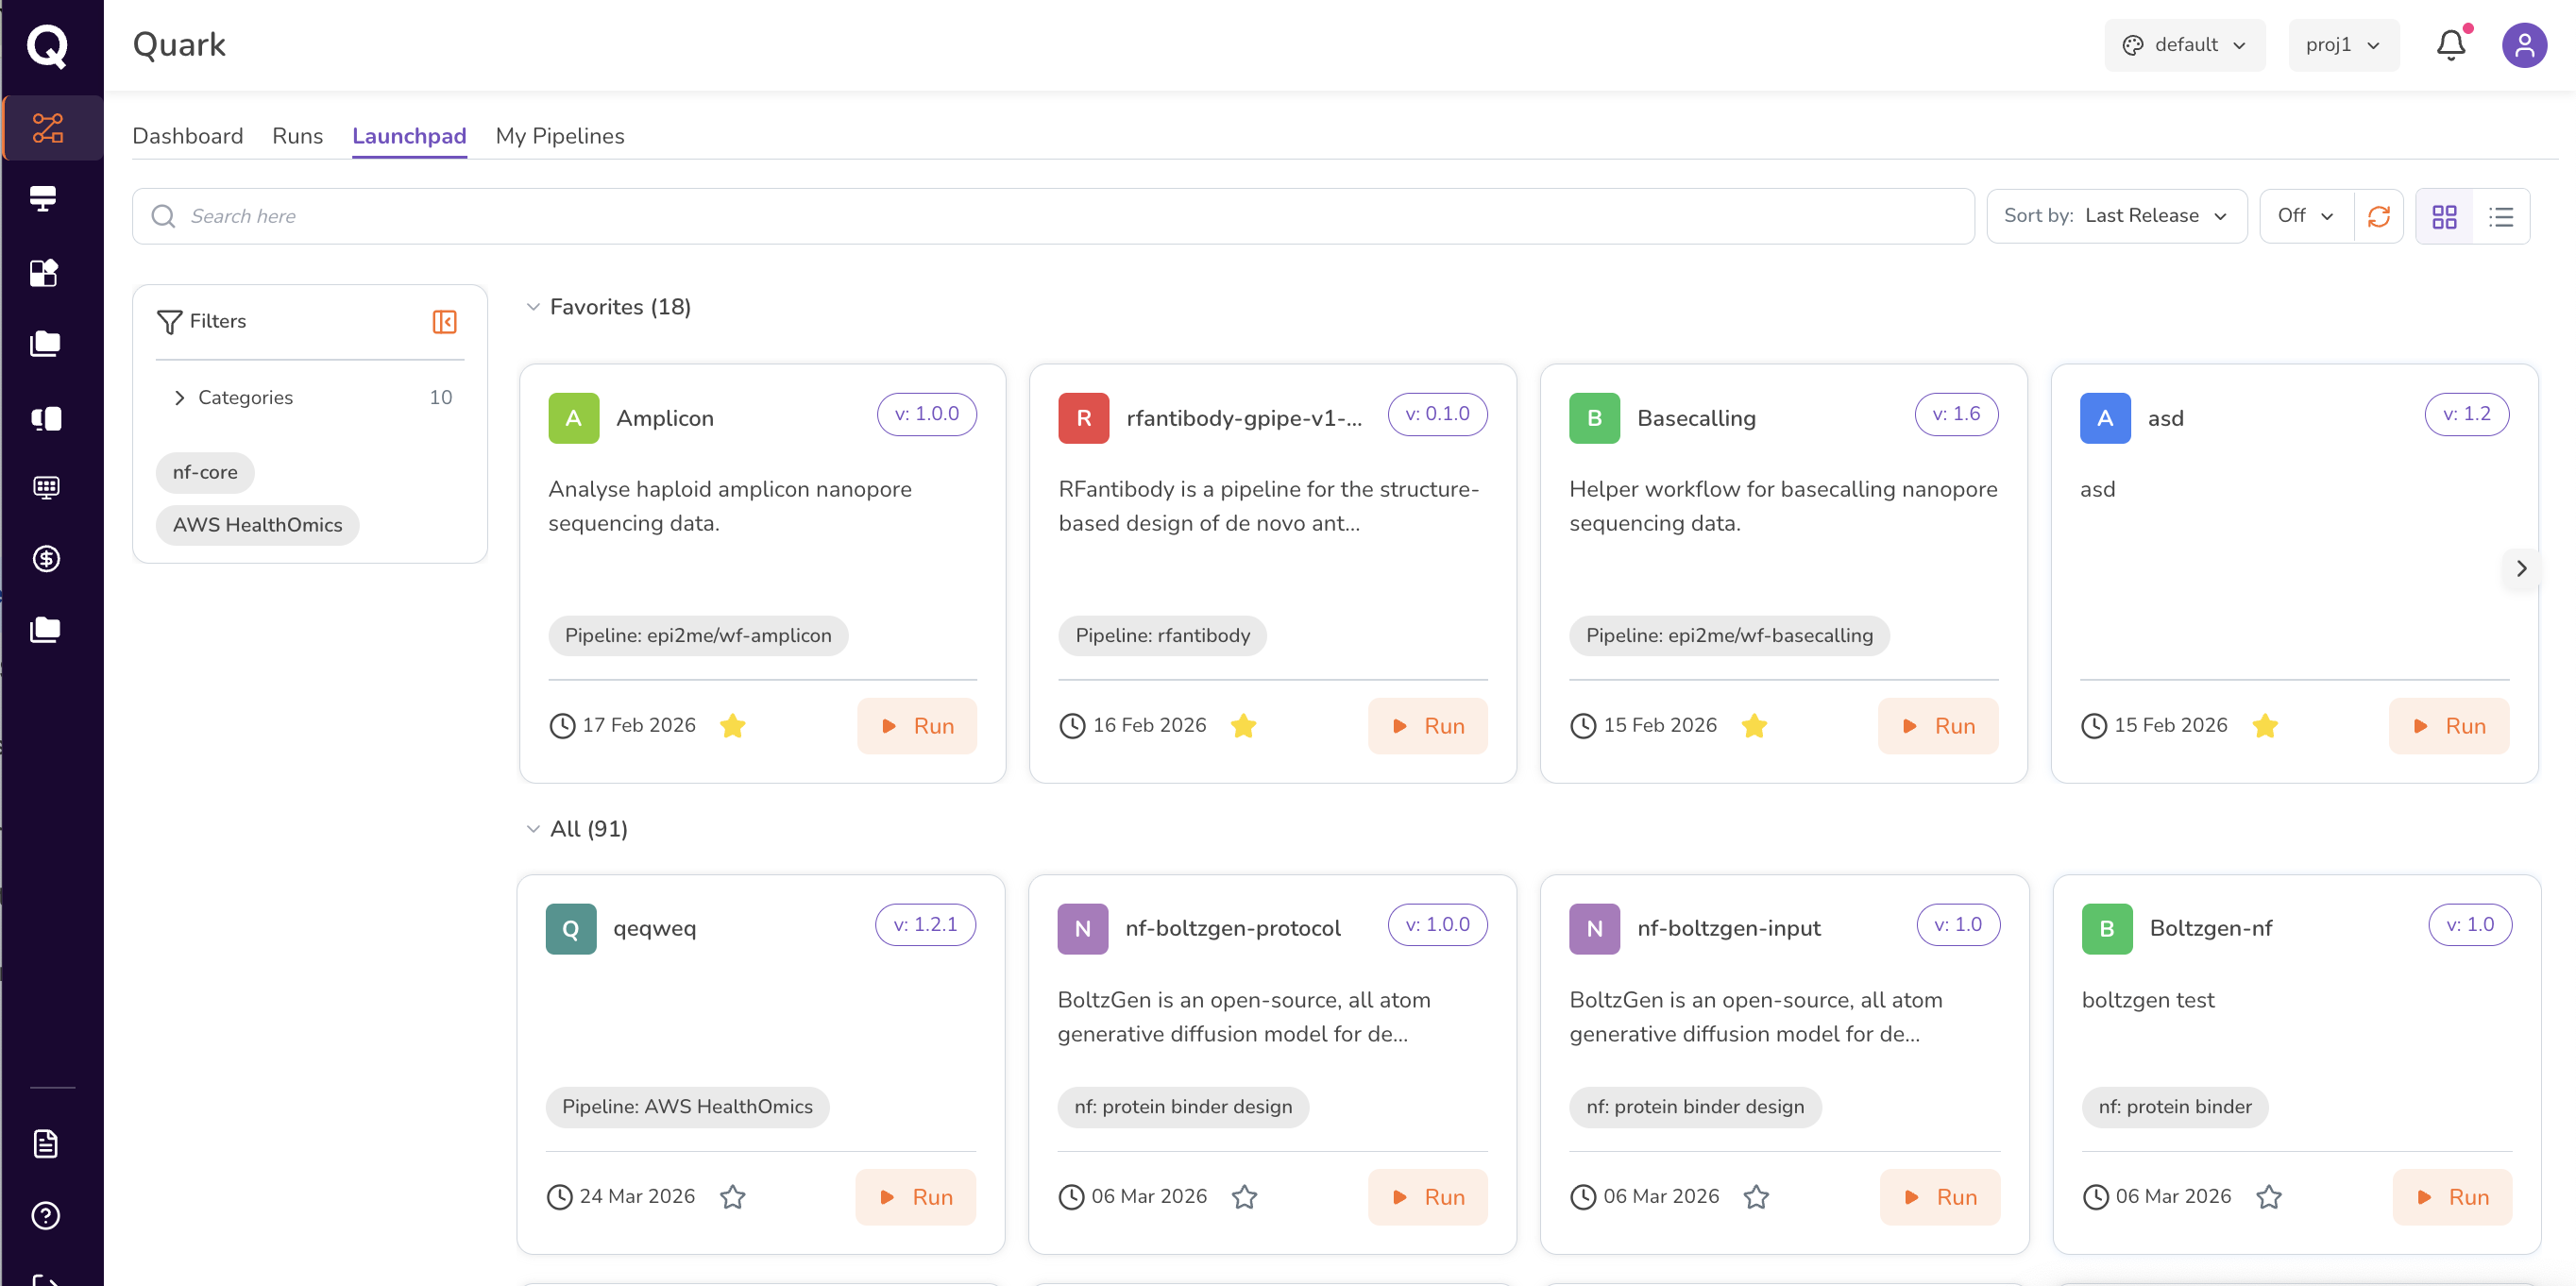
The Launchpad displays a brief overview of every pipeline available on the platform.
Step 2: Find Your Pipeline
You can locate a pipeline in two ways:
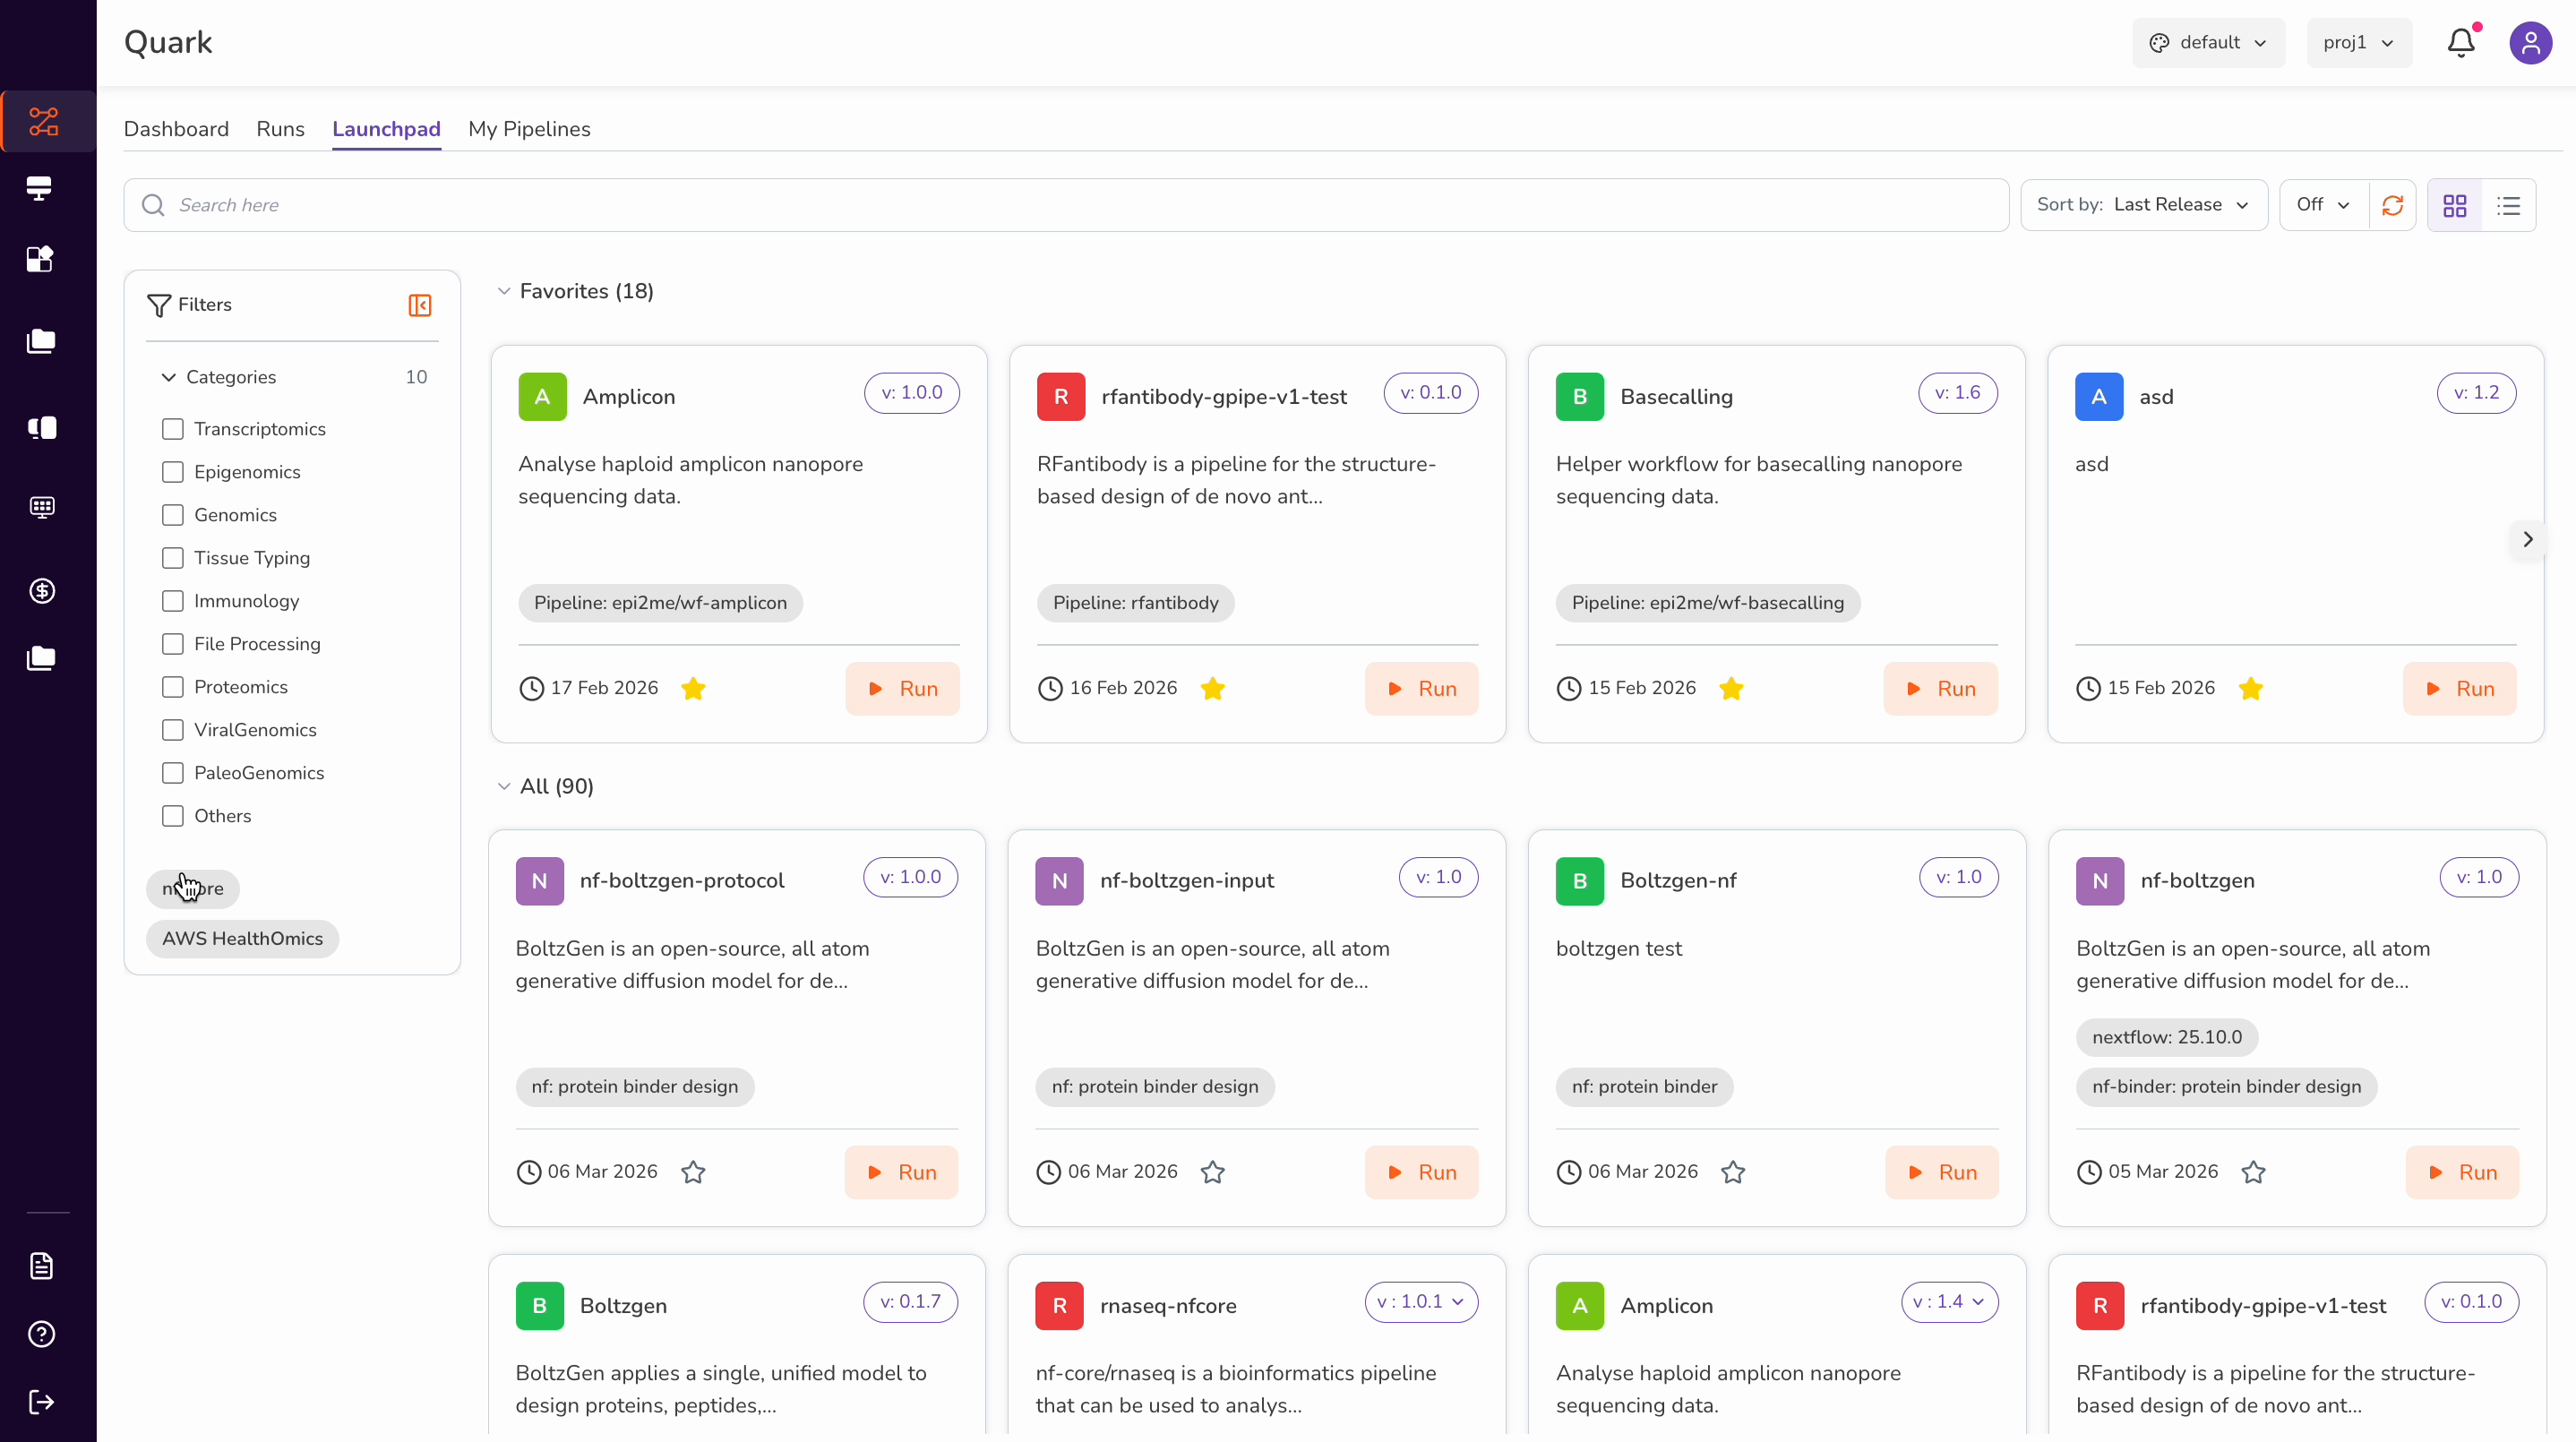
Browse by category: Use the Filter option next to the search bar to narrow results by category. For example, select nf-core to find all nf-core-based pipelines. You can also sort results by Name or Last Release using the Sort By function.
Search by name: Use the search bar at the top of the Launchpad to type a pipeline name directly. For this example, search for "Boltzgen".
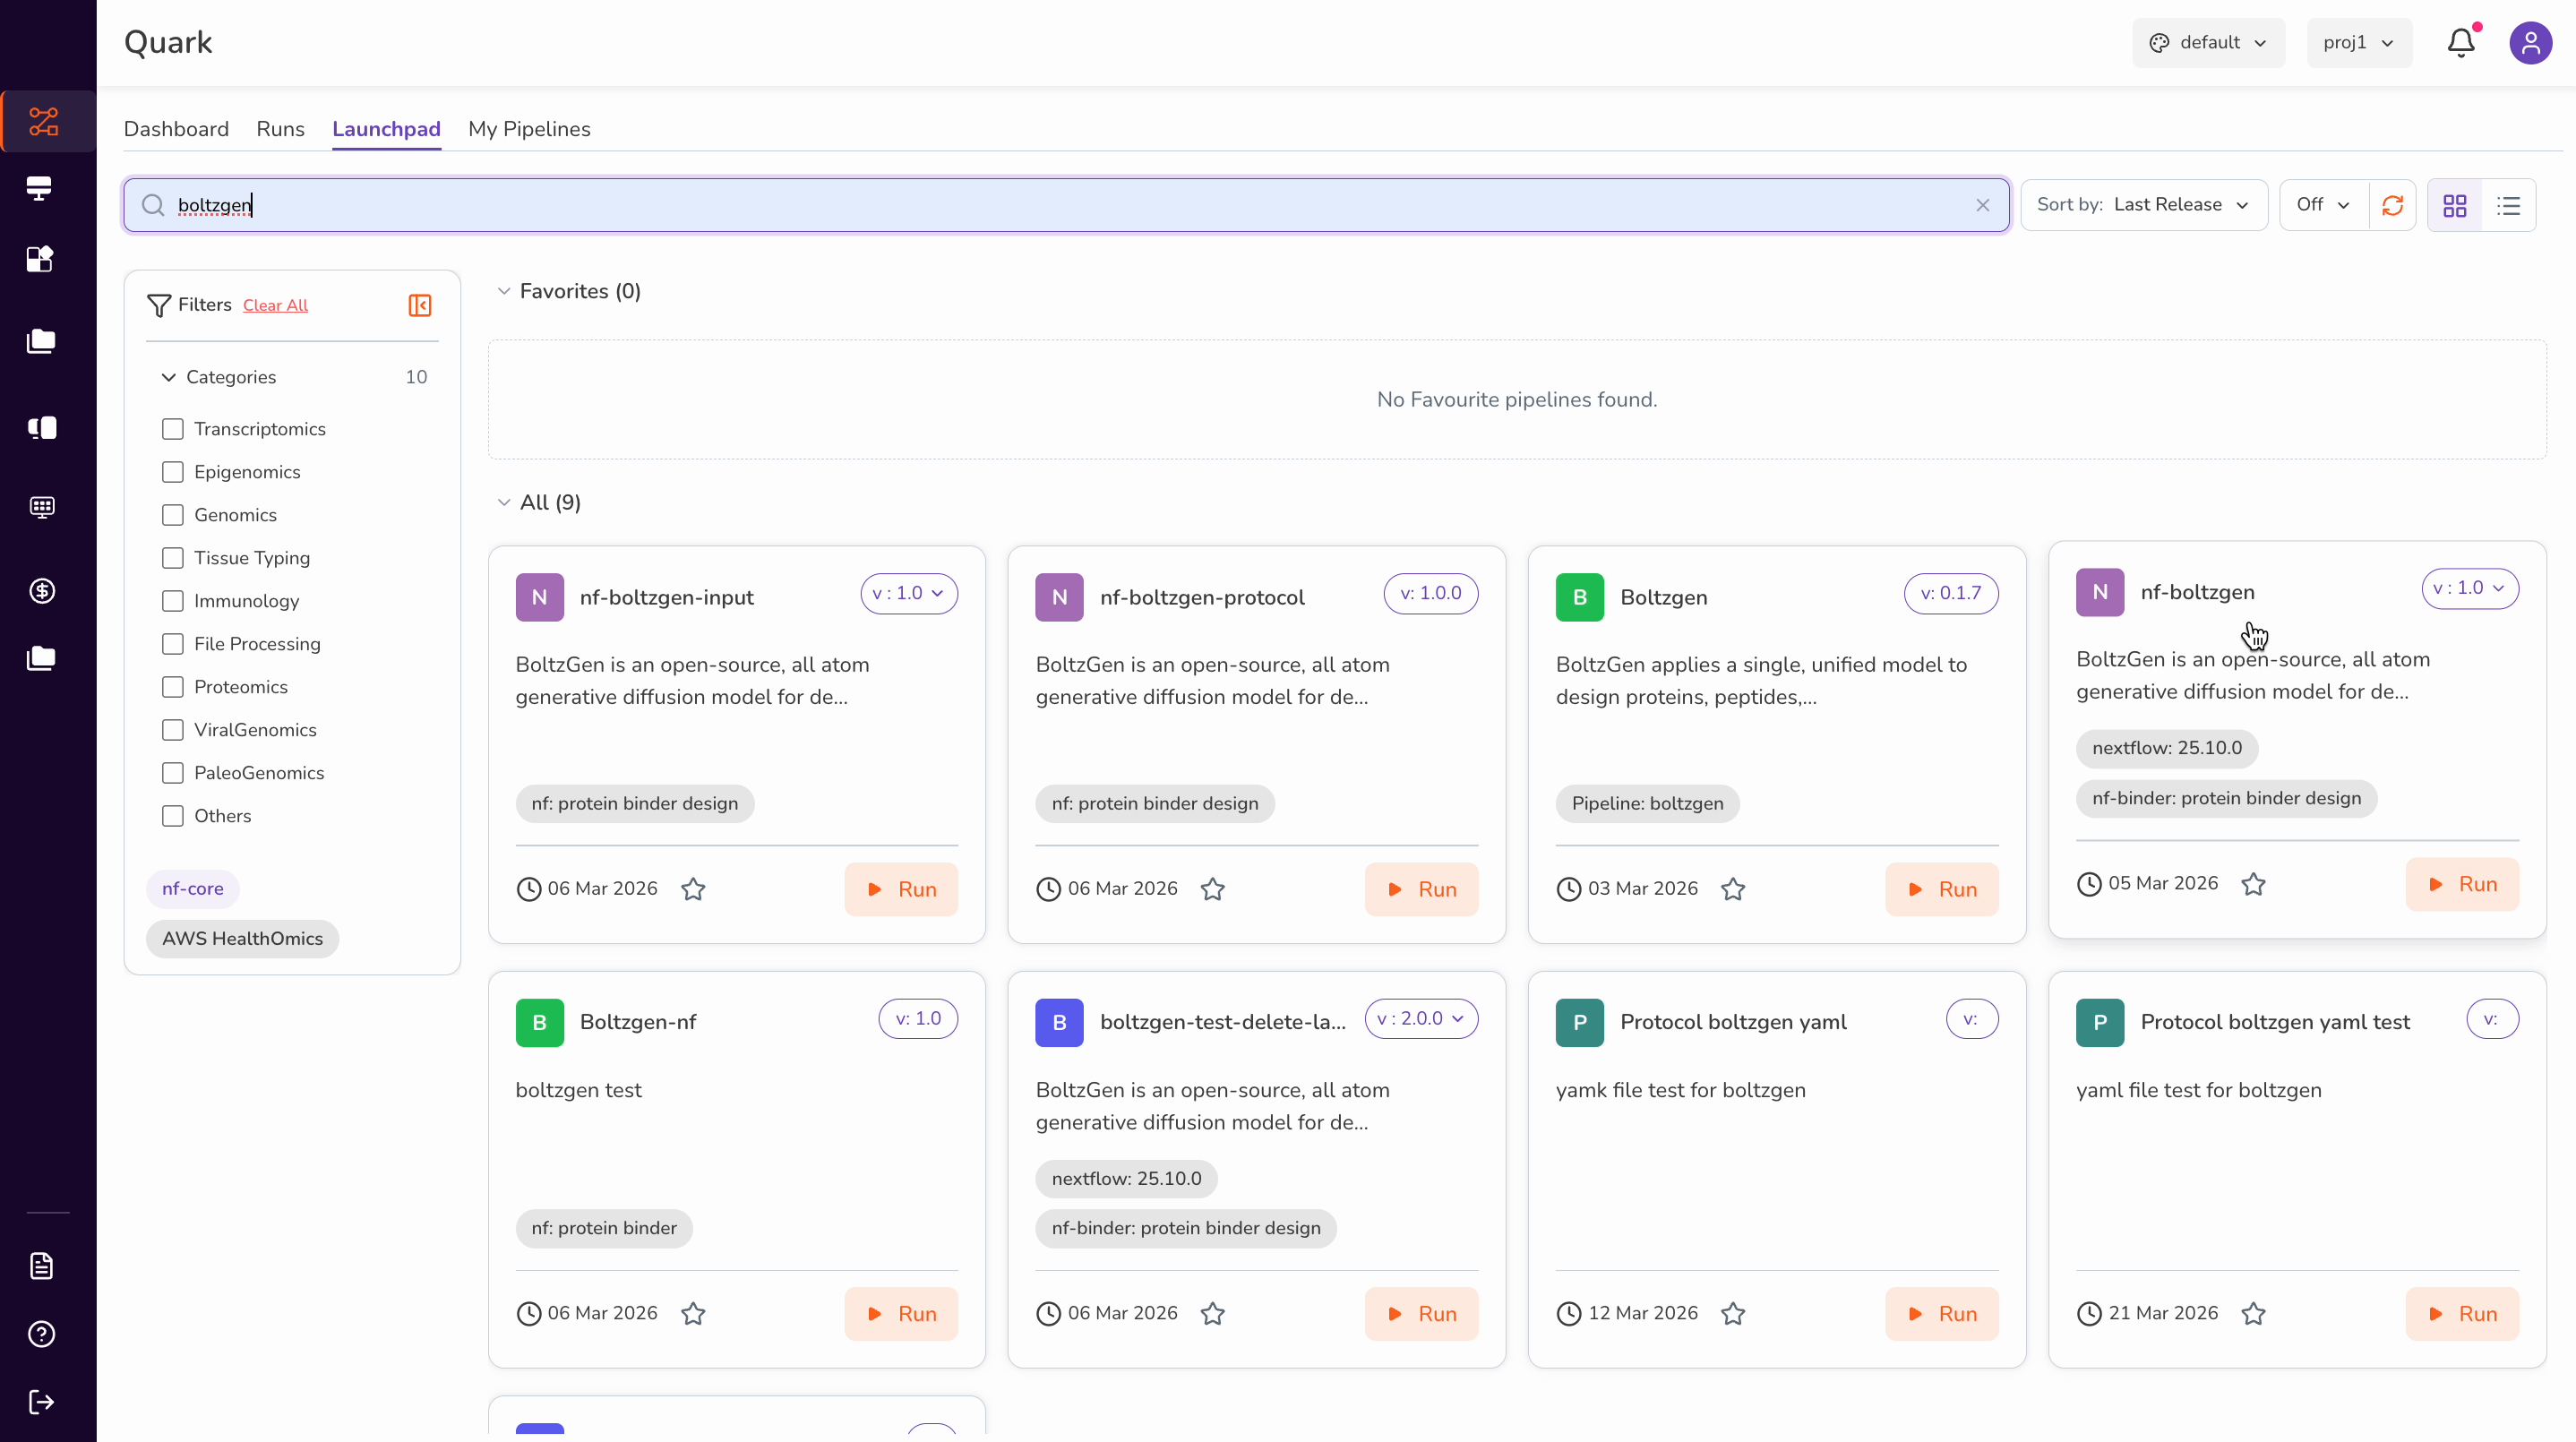
Once you locate the nf-Boltzgen pipeline, click on it. This opens the About panel, which displays:
- A brief overview of what the pipeline does
- Requirements needed to run the pipeline
- The current pipeline version
- Tags indicating the pipeline's category and type
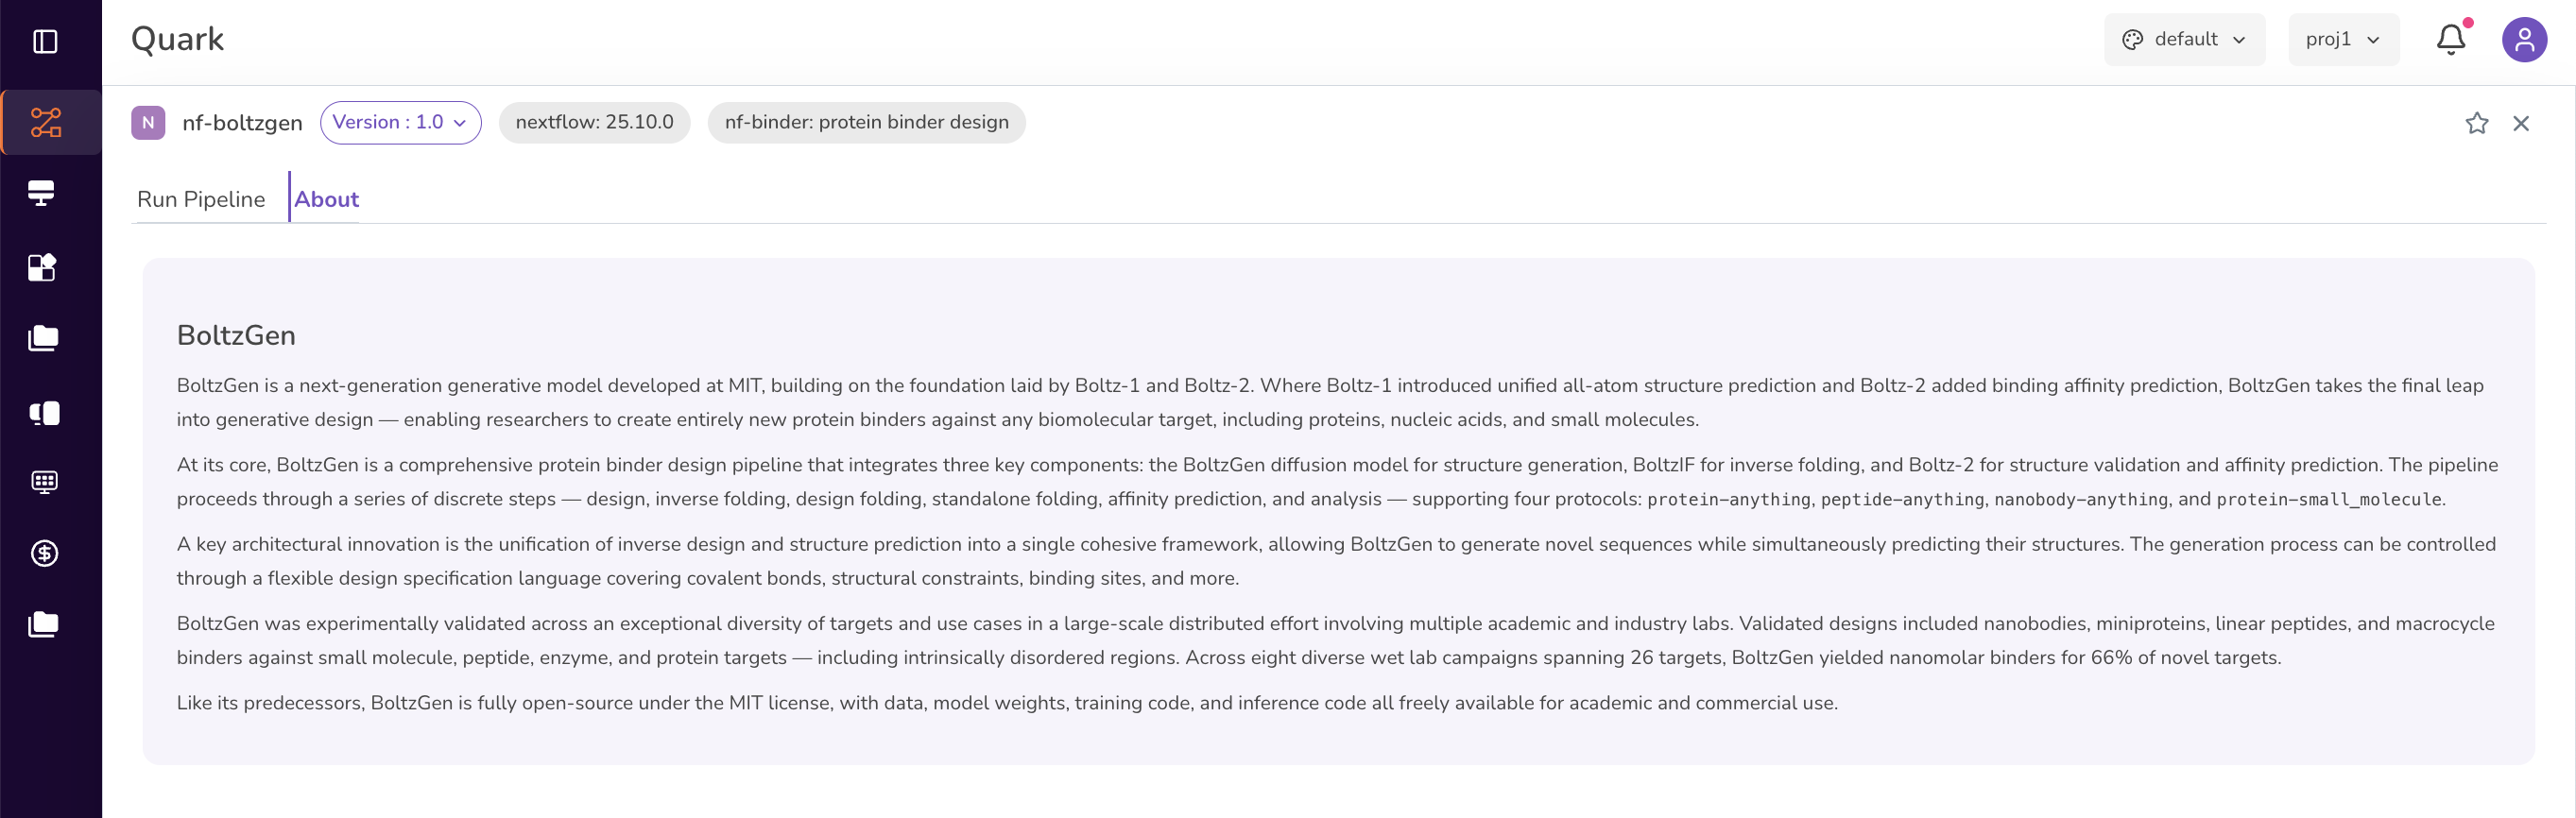
Click on the Run Pipeline tab to configure your run settings.
Step 3: Configure Run Settings
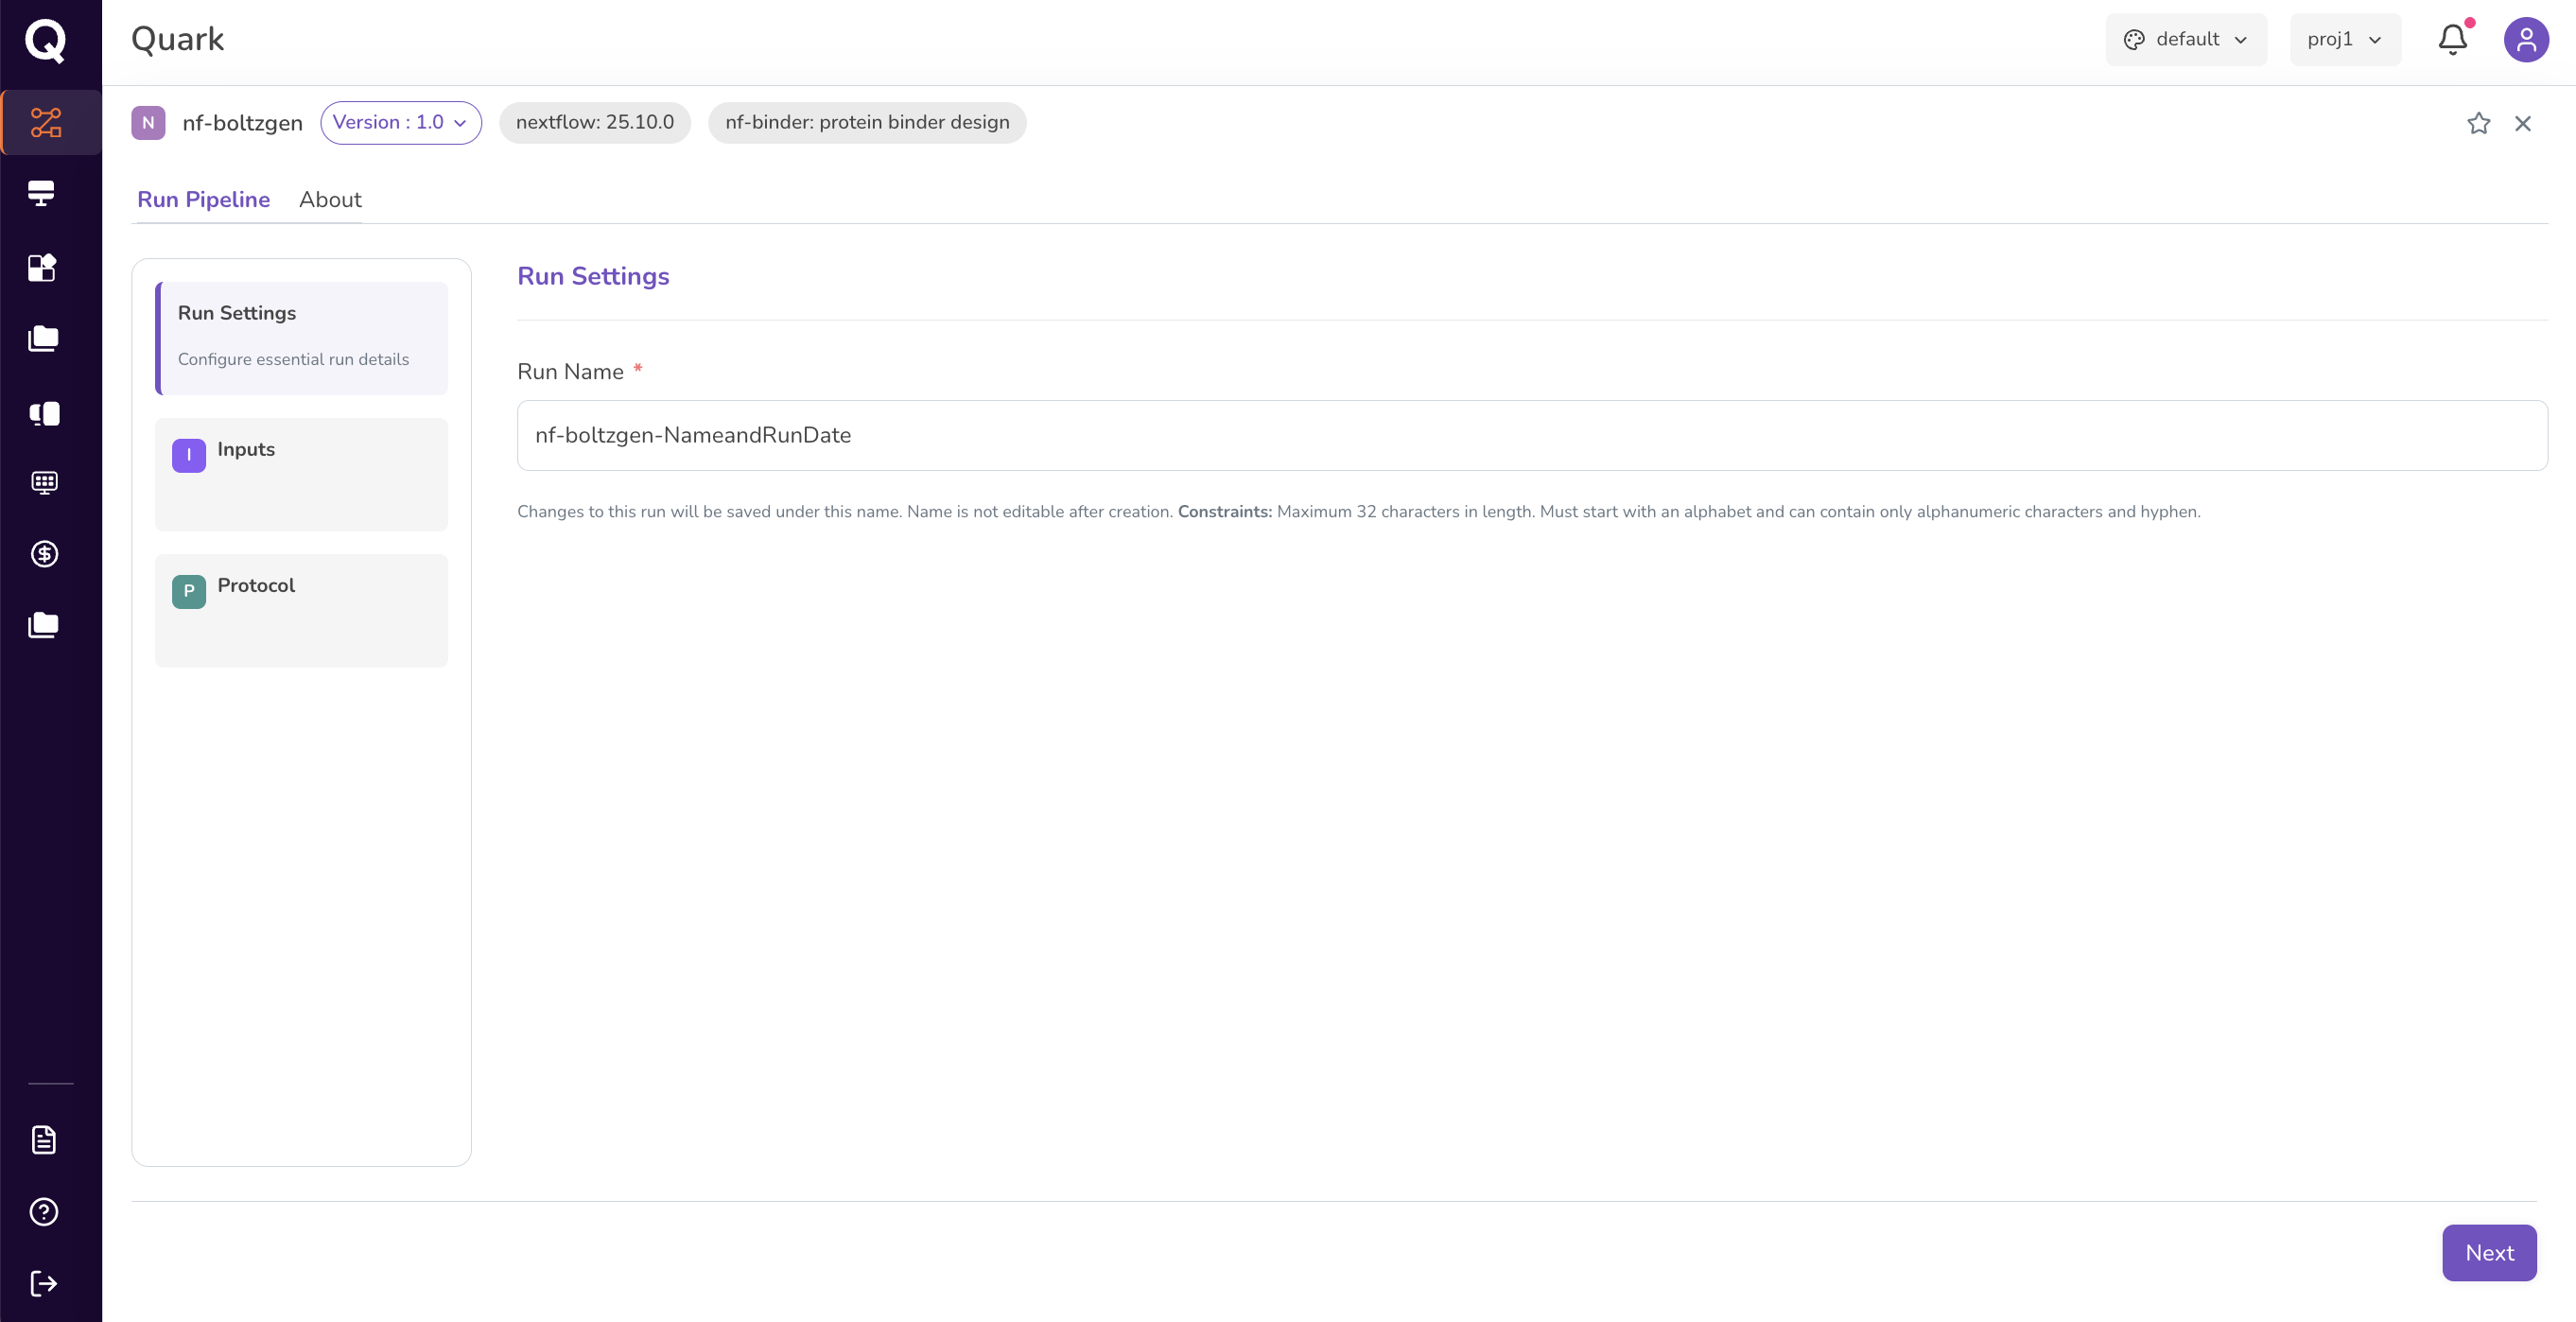
After reviewing your pipeline details, you can proceed to launch a run by clicking the Run Pipeline tab.
- Provide a descriptive Run Name — this is how your run will appear in
the Runs history. Choose something meaningful, such as
boltzgen-peptide-trial-01 - Click Next to proceed to the Inputs page
Tip: A clear, descriptive run name makes it much easier to find and compare runs later in the Runs tab.
Step 4: Provide Pipeline Inputs
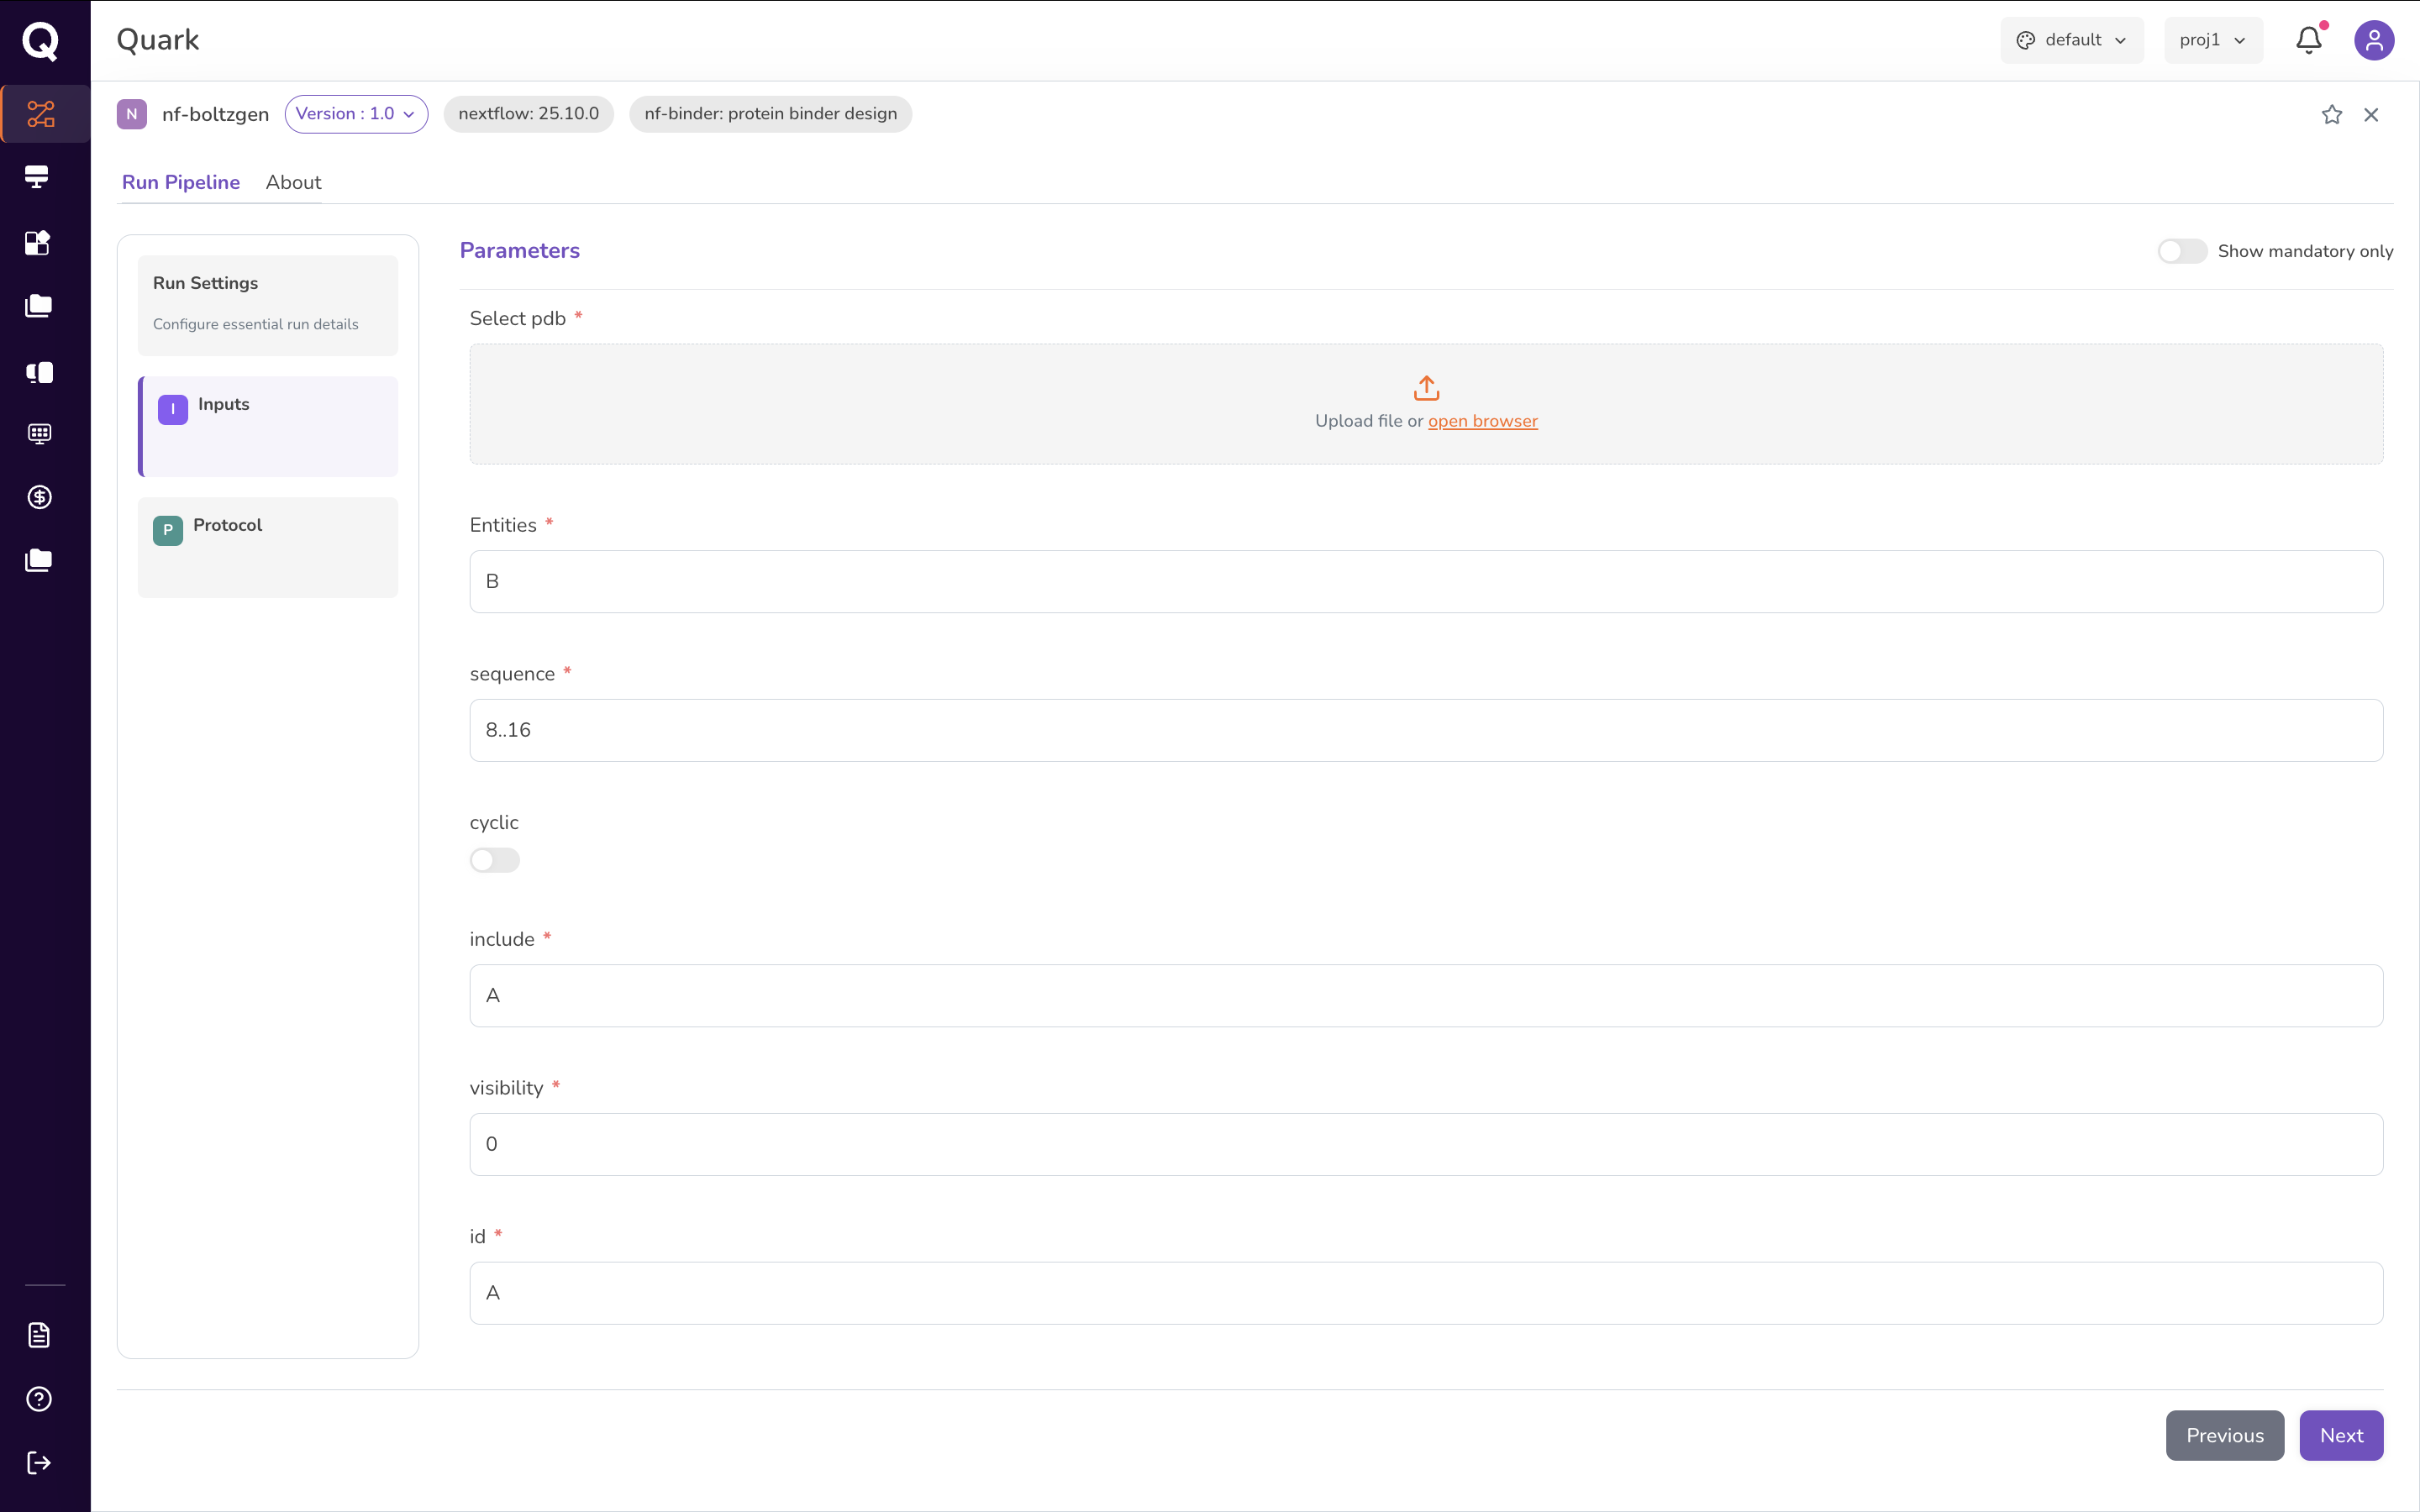
On the Inputs page, configure all required parameters for your run. For the Boltzgen pipeline, this involves two sets of inputs: scientific inputs and run parameters.
Scientific Inputs
| Input | Description |
|---|---|
| PDB file | The protein structure file used to model the peptide binder. Select this from your uploaded files in My Files → Data. |
| Chain and sequence | The chain identifier and the amino acid sequence for the target protein. |
| Cyclic peptide | Indicate whether the peptide to be designed is cyclic. |
| Full chain visibility | Indicate whether visibility across the entire polypeptide chain is required. |
Protocol and Run Parameters
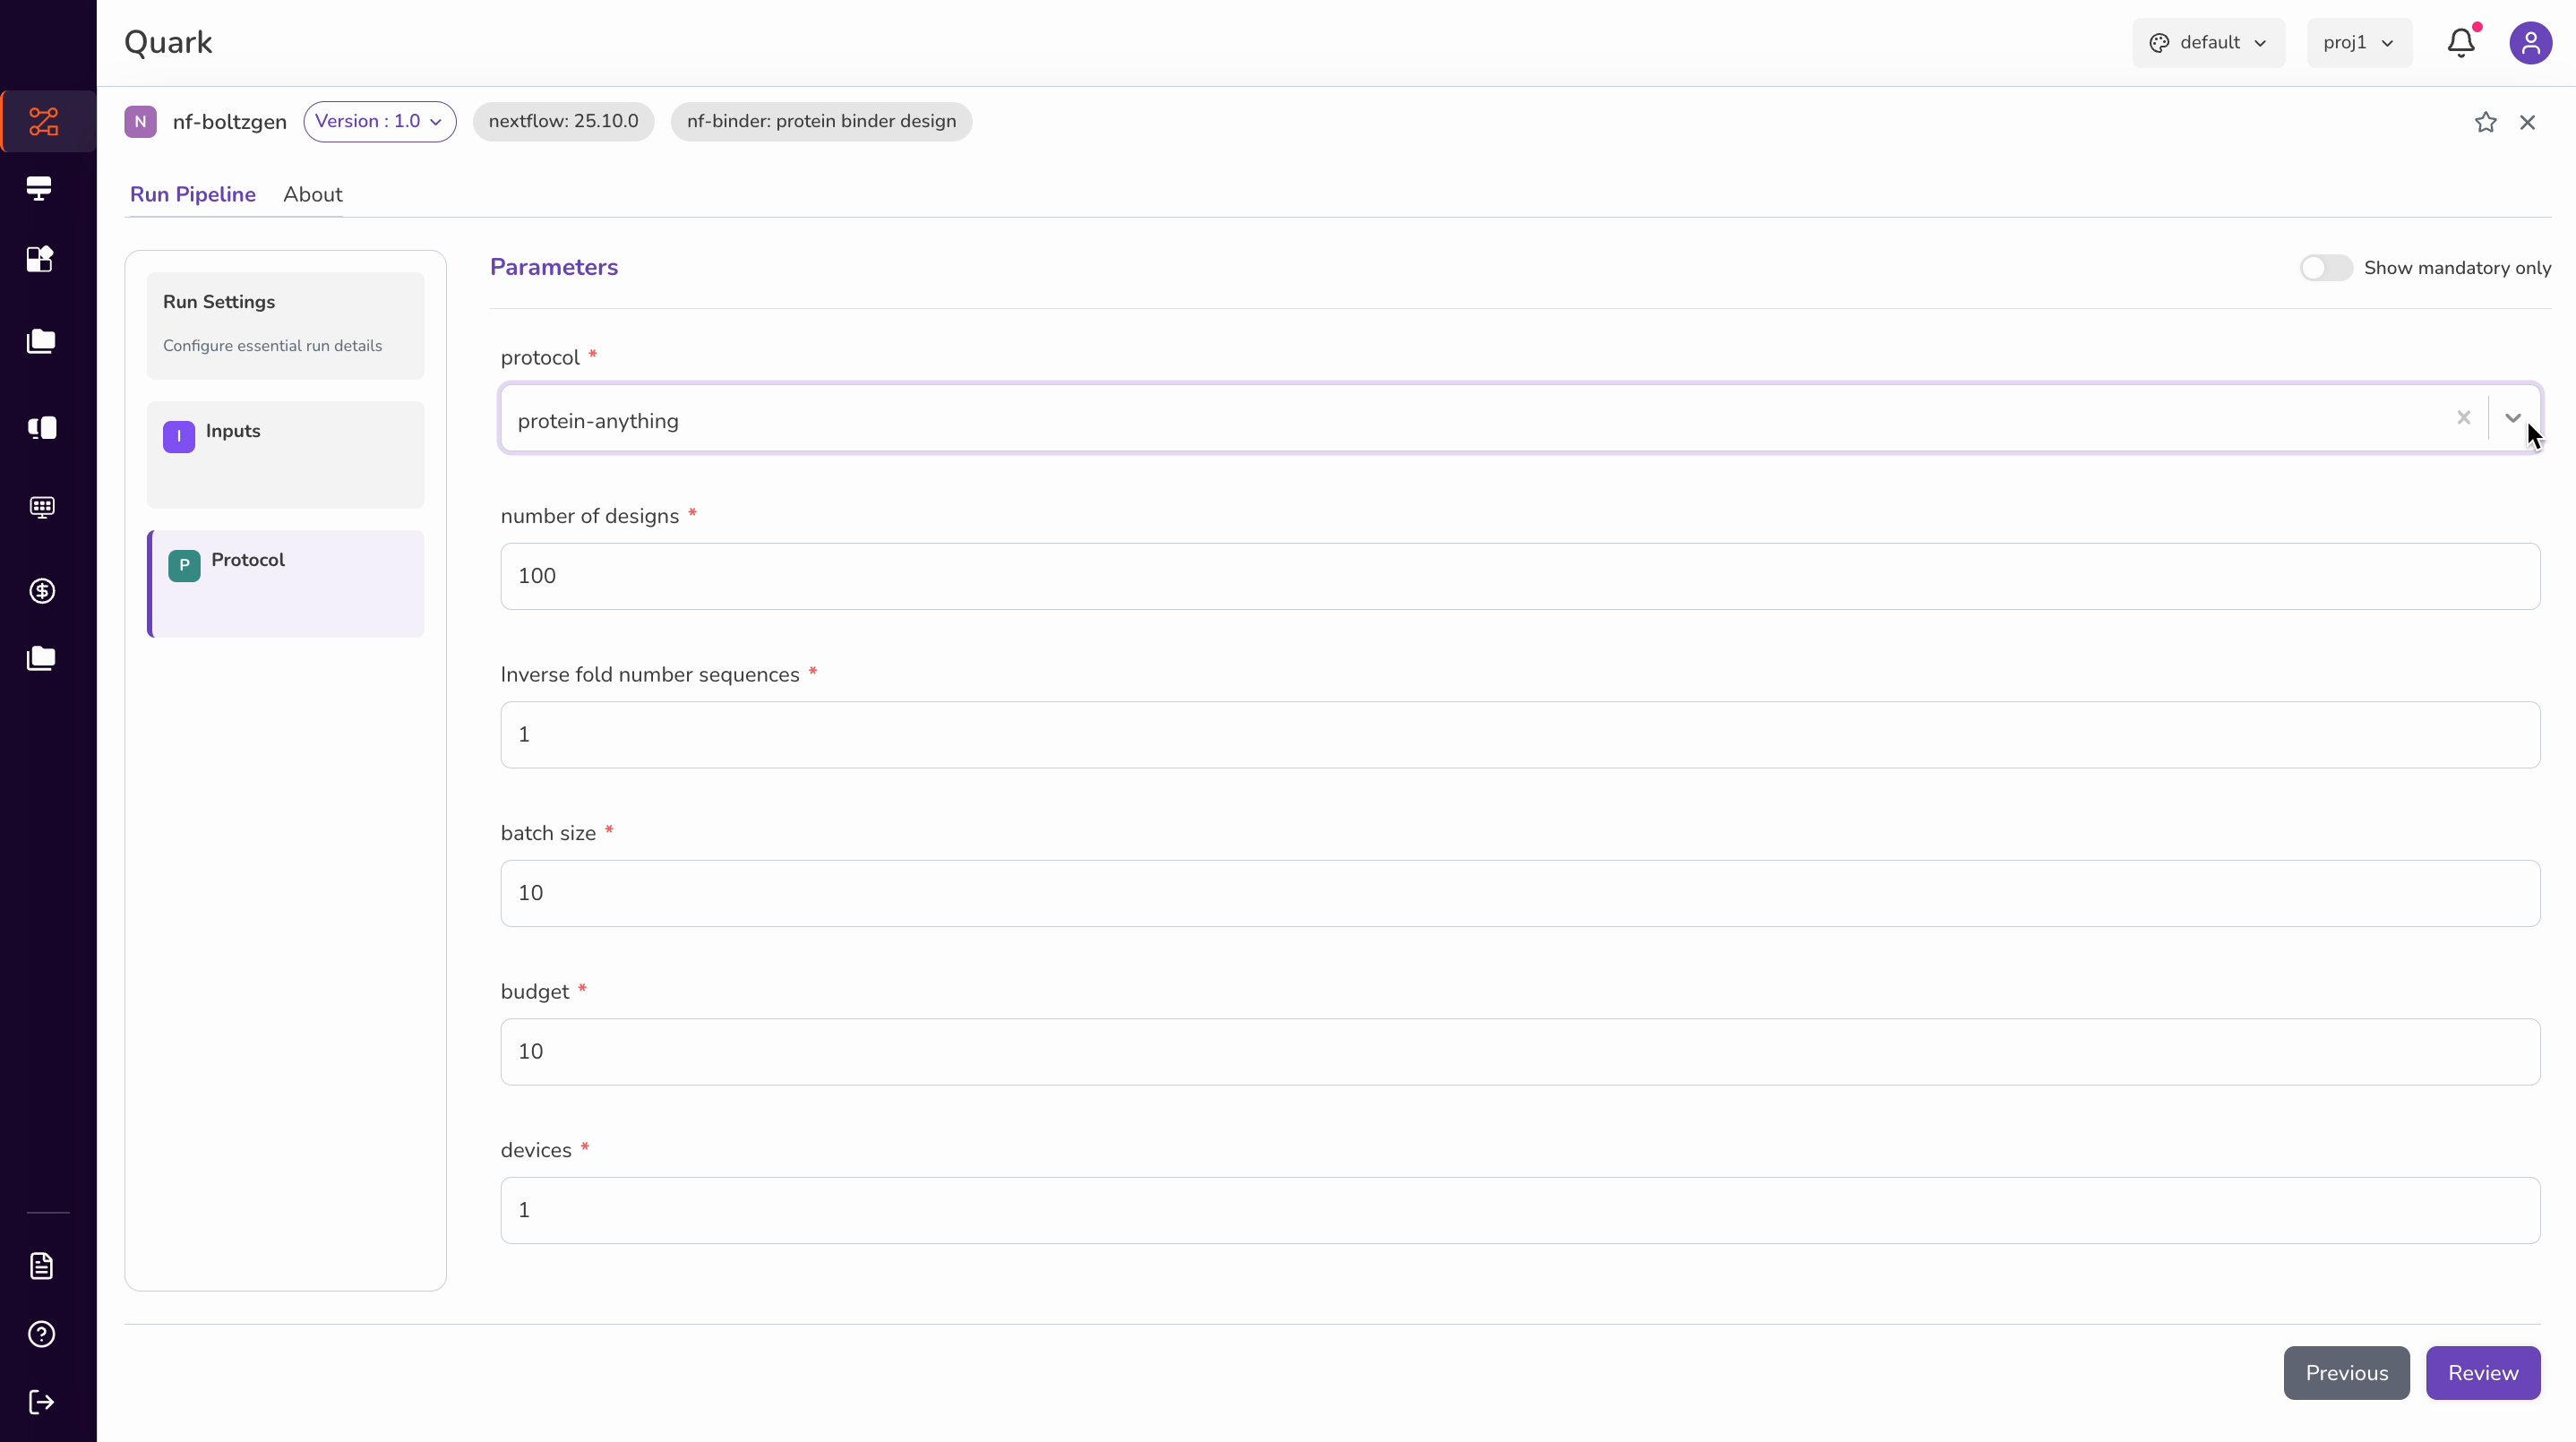
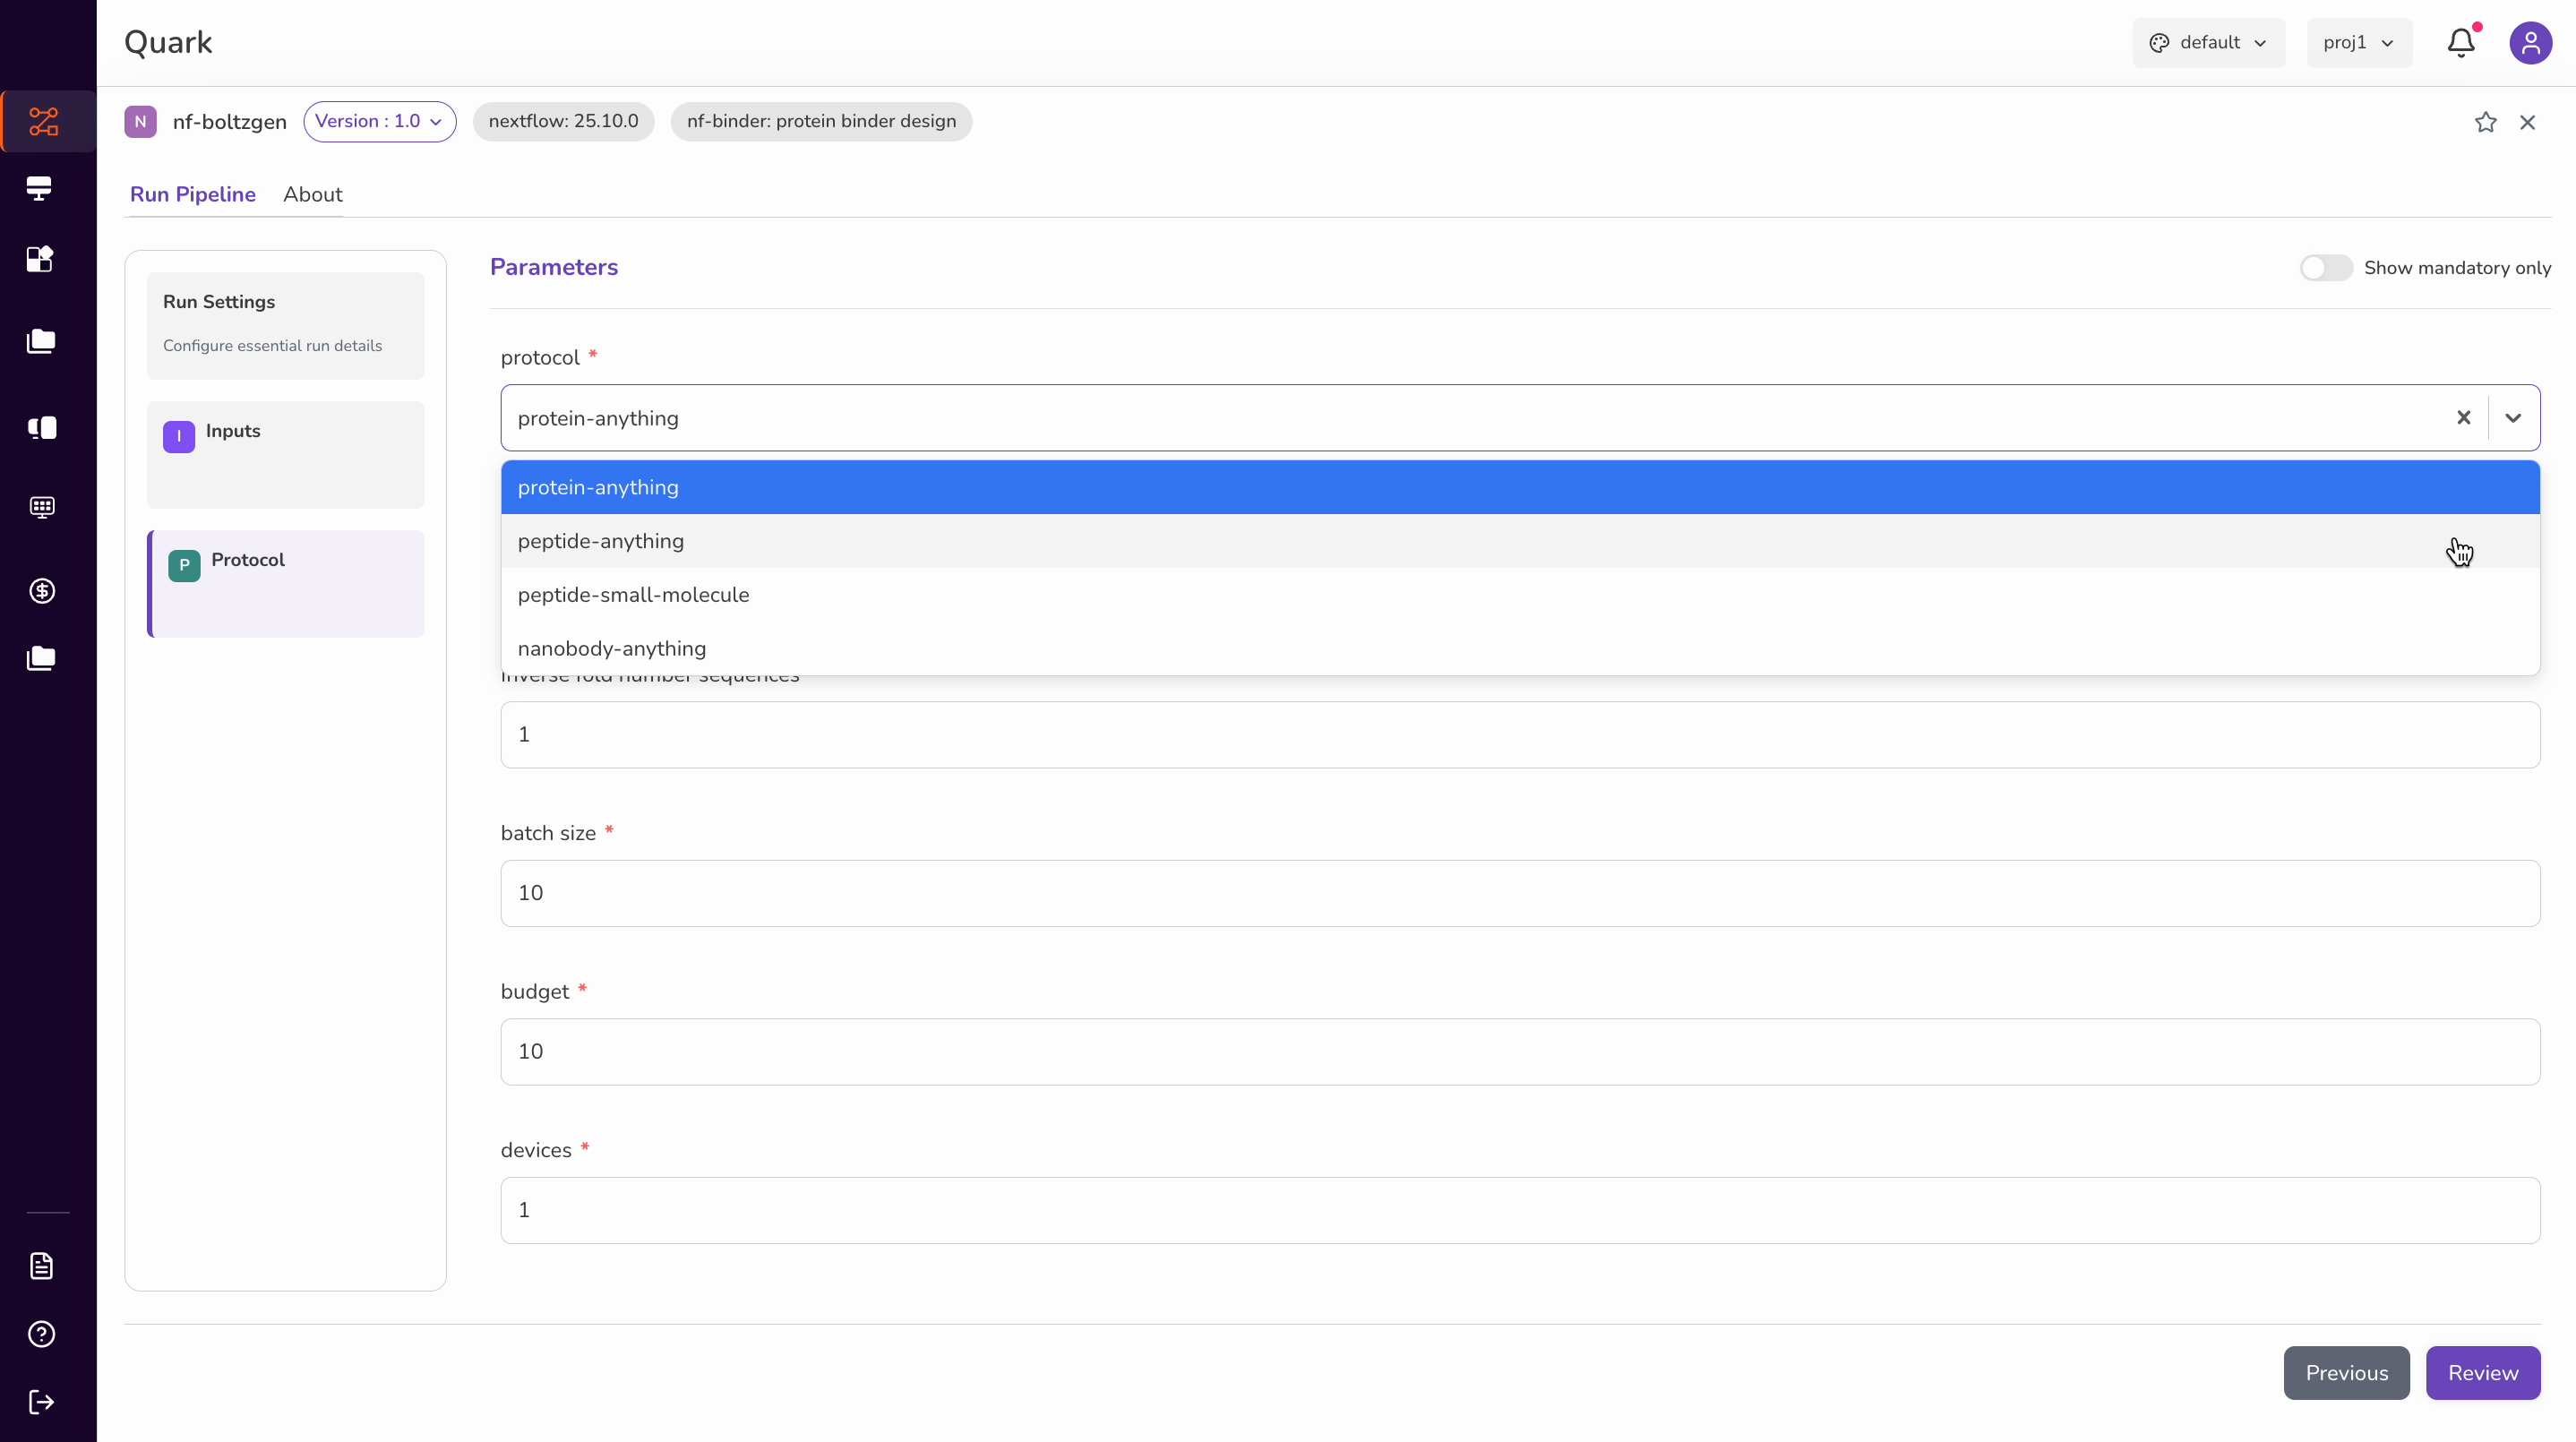
Next, specify the protocol using the dropdown and configure the following parameters:
| Parameter | Description |
|---|---|
| Protocol | Select the design protocol from the available dropdown options. |
| Number of designs | The total number of peptide design iterations to generate. |
| Fold number sequences | The number of sequences to fold per design iteration. |
| Batch sizes | The number of designs to process per batch. Larger batches may reduce total runtime but require more compute resources. |
Step 5: Review Inputs and Submit the Pipeline Run
When you have finished configuring all inputs, click Review to validate your setup before submitting.
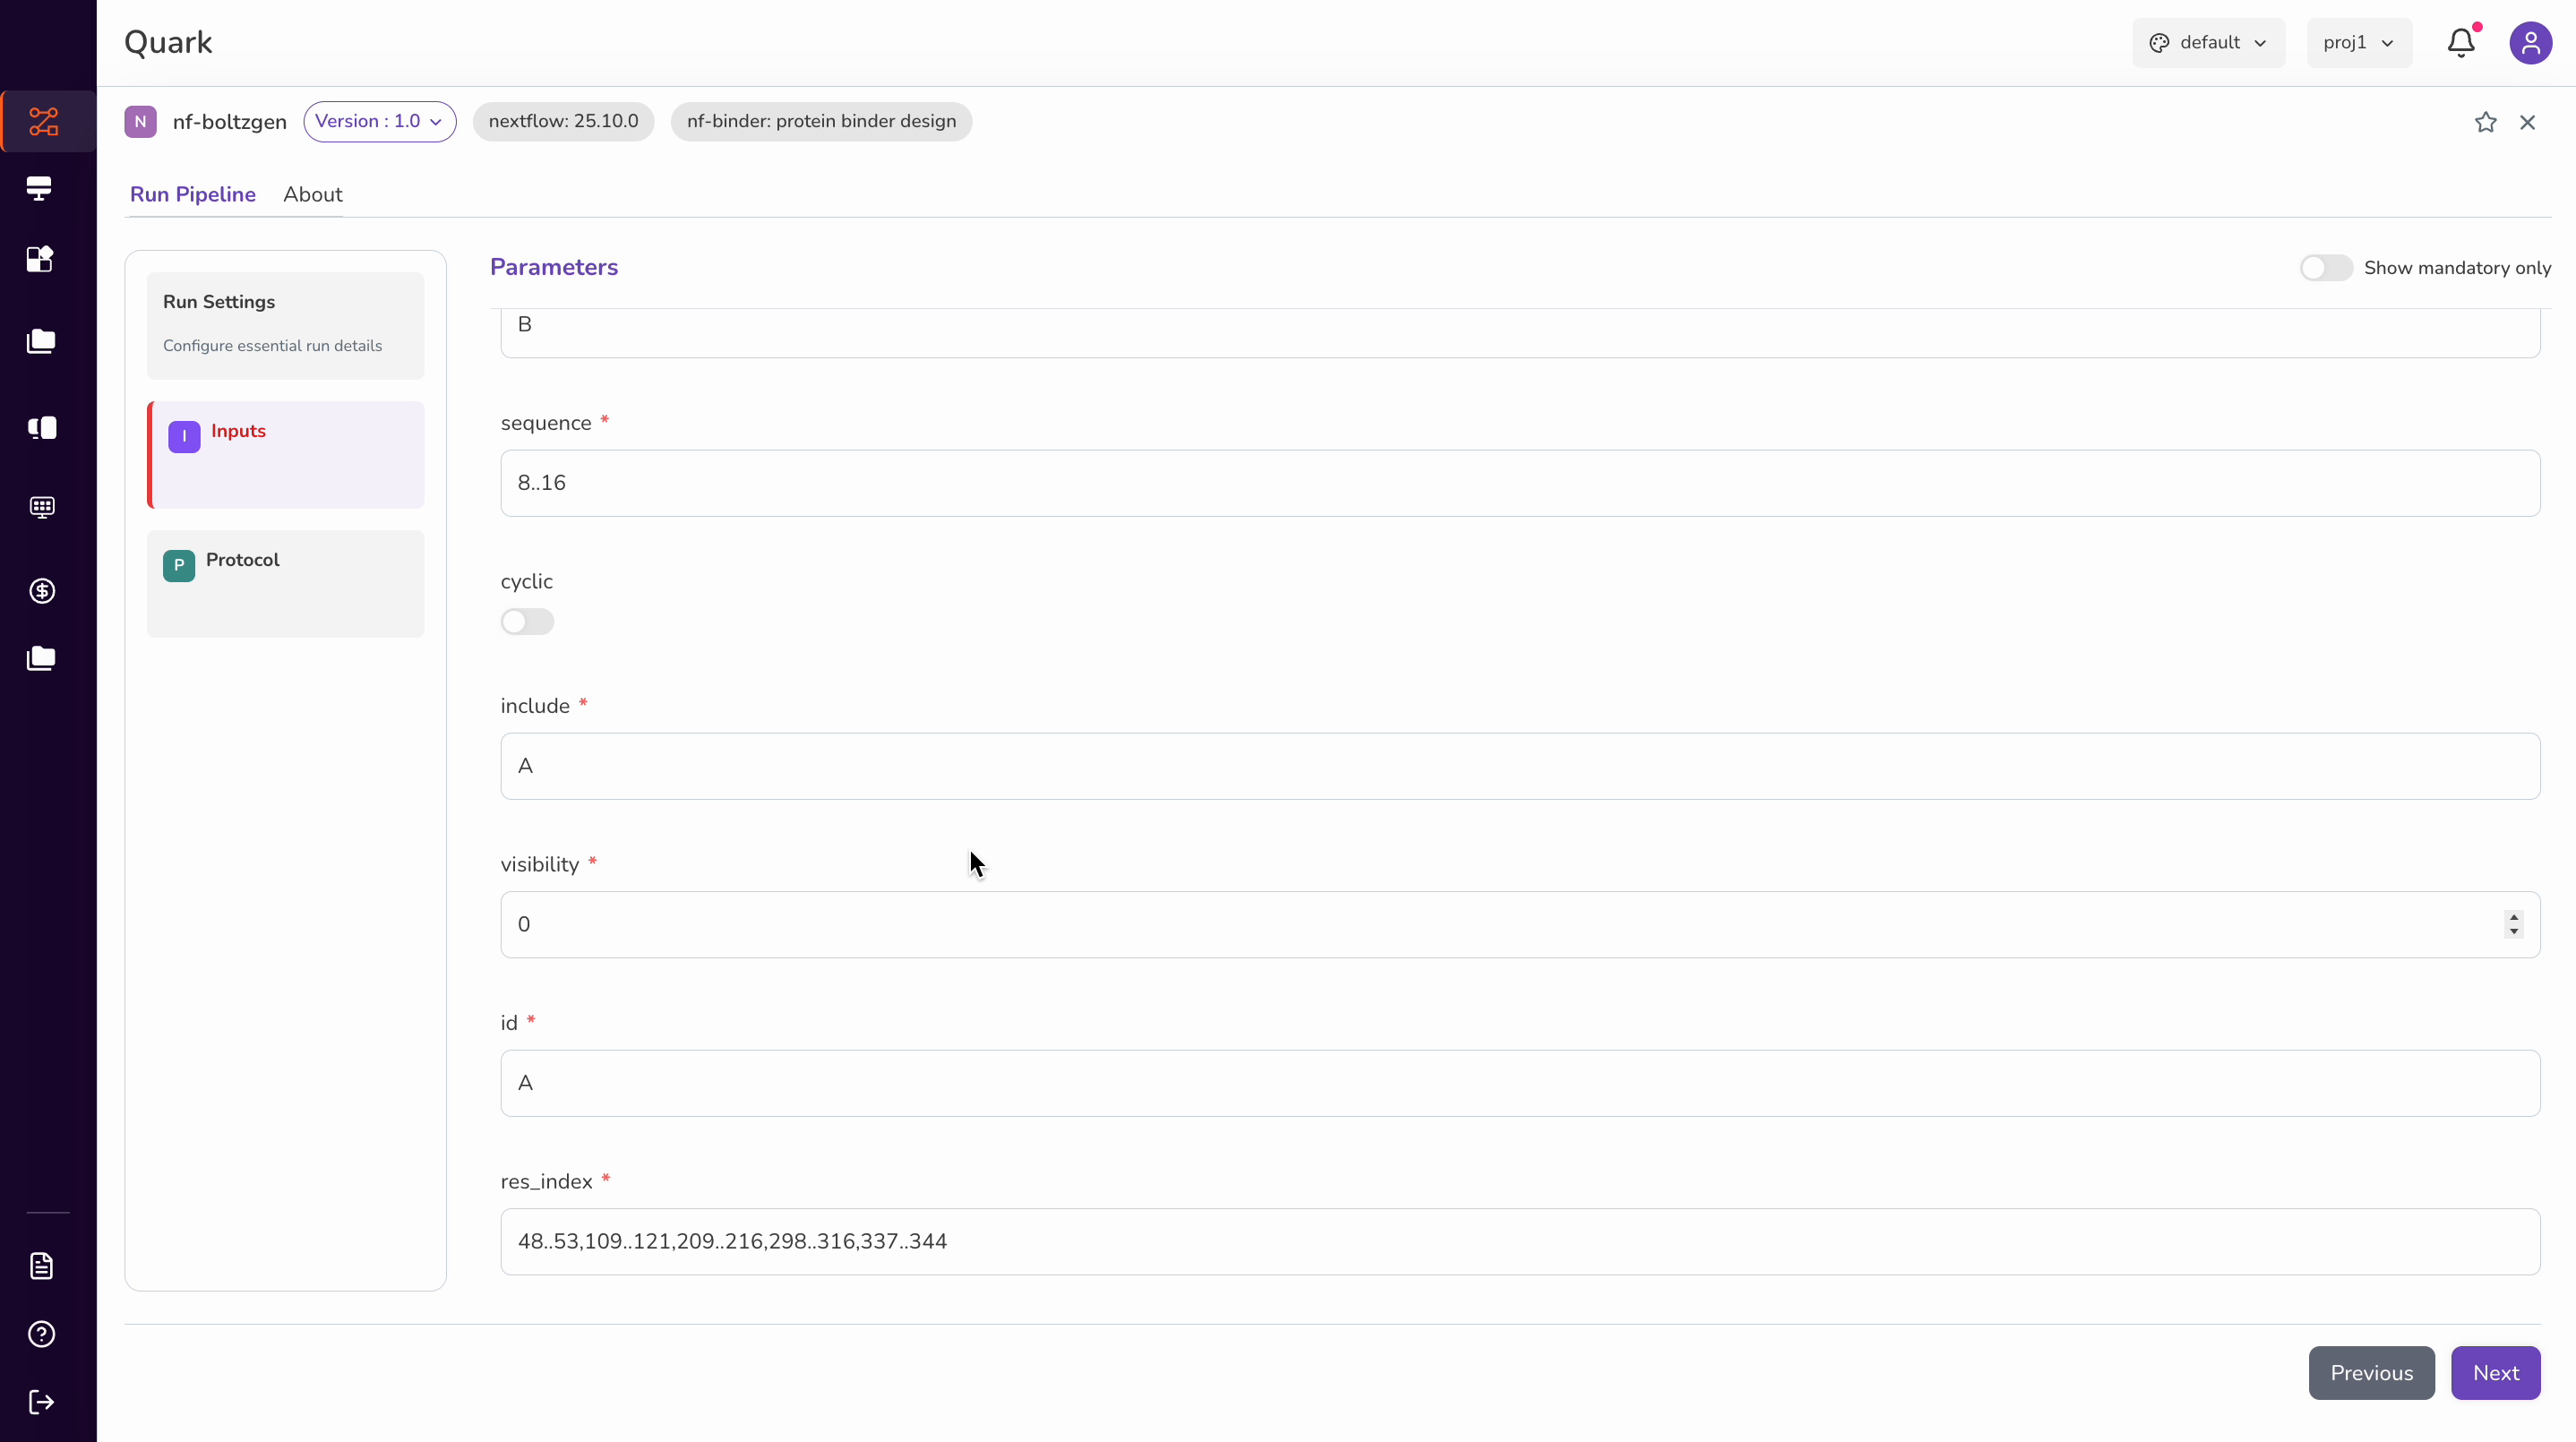
If any required inputs are missing — for example, if you have not yet uploaded the required PDB file — an error message will be displayed. Review all input parameters carefully and correct any issues before proceeding.
Once you have confirmed that all parameters are accurate and complete, click Next to submit your pipeline run.
Tip: After submission, your run will appear in the Runs, tab where you can monitor its progress and access results once it completes.
Tracking Your Run
After submission, your run is queued and begins executing on the platform. To monitor its progress:
- Select Pipelines from the left navigation pane
- Click the Runs tab
- Locate your run by its name, or use the Search bar or Filter options to find it
Each run entry shows its current Status, the pipeline it used, and its Start and Finish times. Once the run completes, results are accessible from My Files → Results.
Summary
| Step | Action |
|---|---|
| 1 | Open Pipelines → Launchpad |
| 2 | Search or filter for your pipeline (e.g. Boltzgen) |
| 3 | Set a descriptive Run Name and click Next |
| 4 | Configure scientific inputs and run parameters |
| 5 | Review, resolve any errors, and submit |
| Post-run | Track status in Runs; access outputs in My Files → Results |
Next Steps
You can access the Results of your Pipeline Run in two ways:
- Retrieving Pipeline Results - retrieve the results of a successful pipeline run from Pipelines -> Runs
- Managing Files — Access your result files from My Files