Workstation Templates
Overview
The Workstation Templates section is where the Infrastructure Administrator defines the reusable environment configurations that researchers select when launching workstations. Each template encodes the operating system, machine image, storage, networking, and permitted instance types for a class of workstation. Once created, a template appears as a selectable option for DS Administrators provisioning workstations and for researchers launching their own environments.
Templates are scoped to one or more projects at creation time, controlling which teams can see and use them.
Navigation: Select Workstation Templates from the left-hand navigation pane.
The Workstation Templates Page
The Workstation Templates page displays all templates that have been created on the platform. Each template is shown as a card. When no templates have been created yet, the page displays an empty state.

Once templates exist, each card shows the template's key details and provides an Edit option to update its configuration.
Creating a Workstation Template
To create a new template:
- Click + Add New in the top-right corner of the Workstation Templates page.
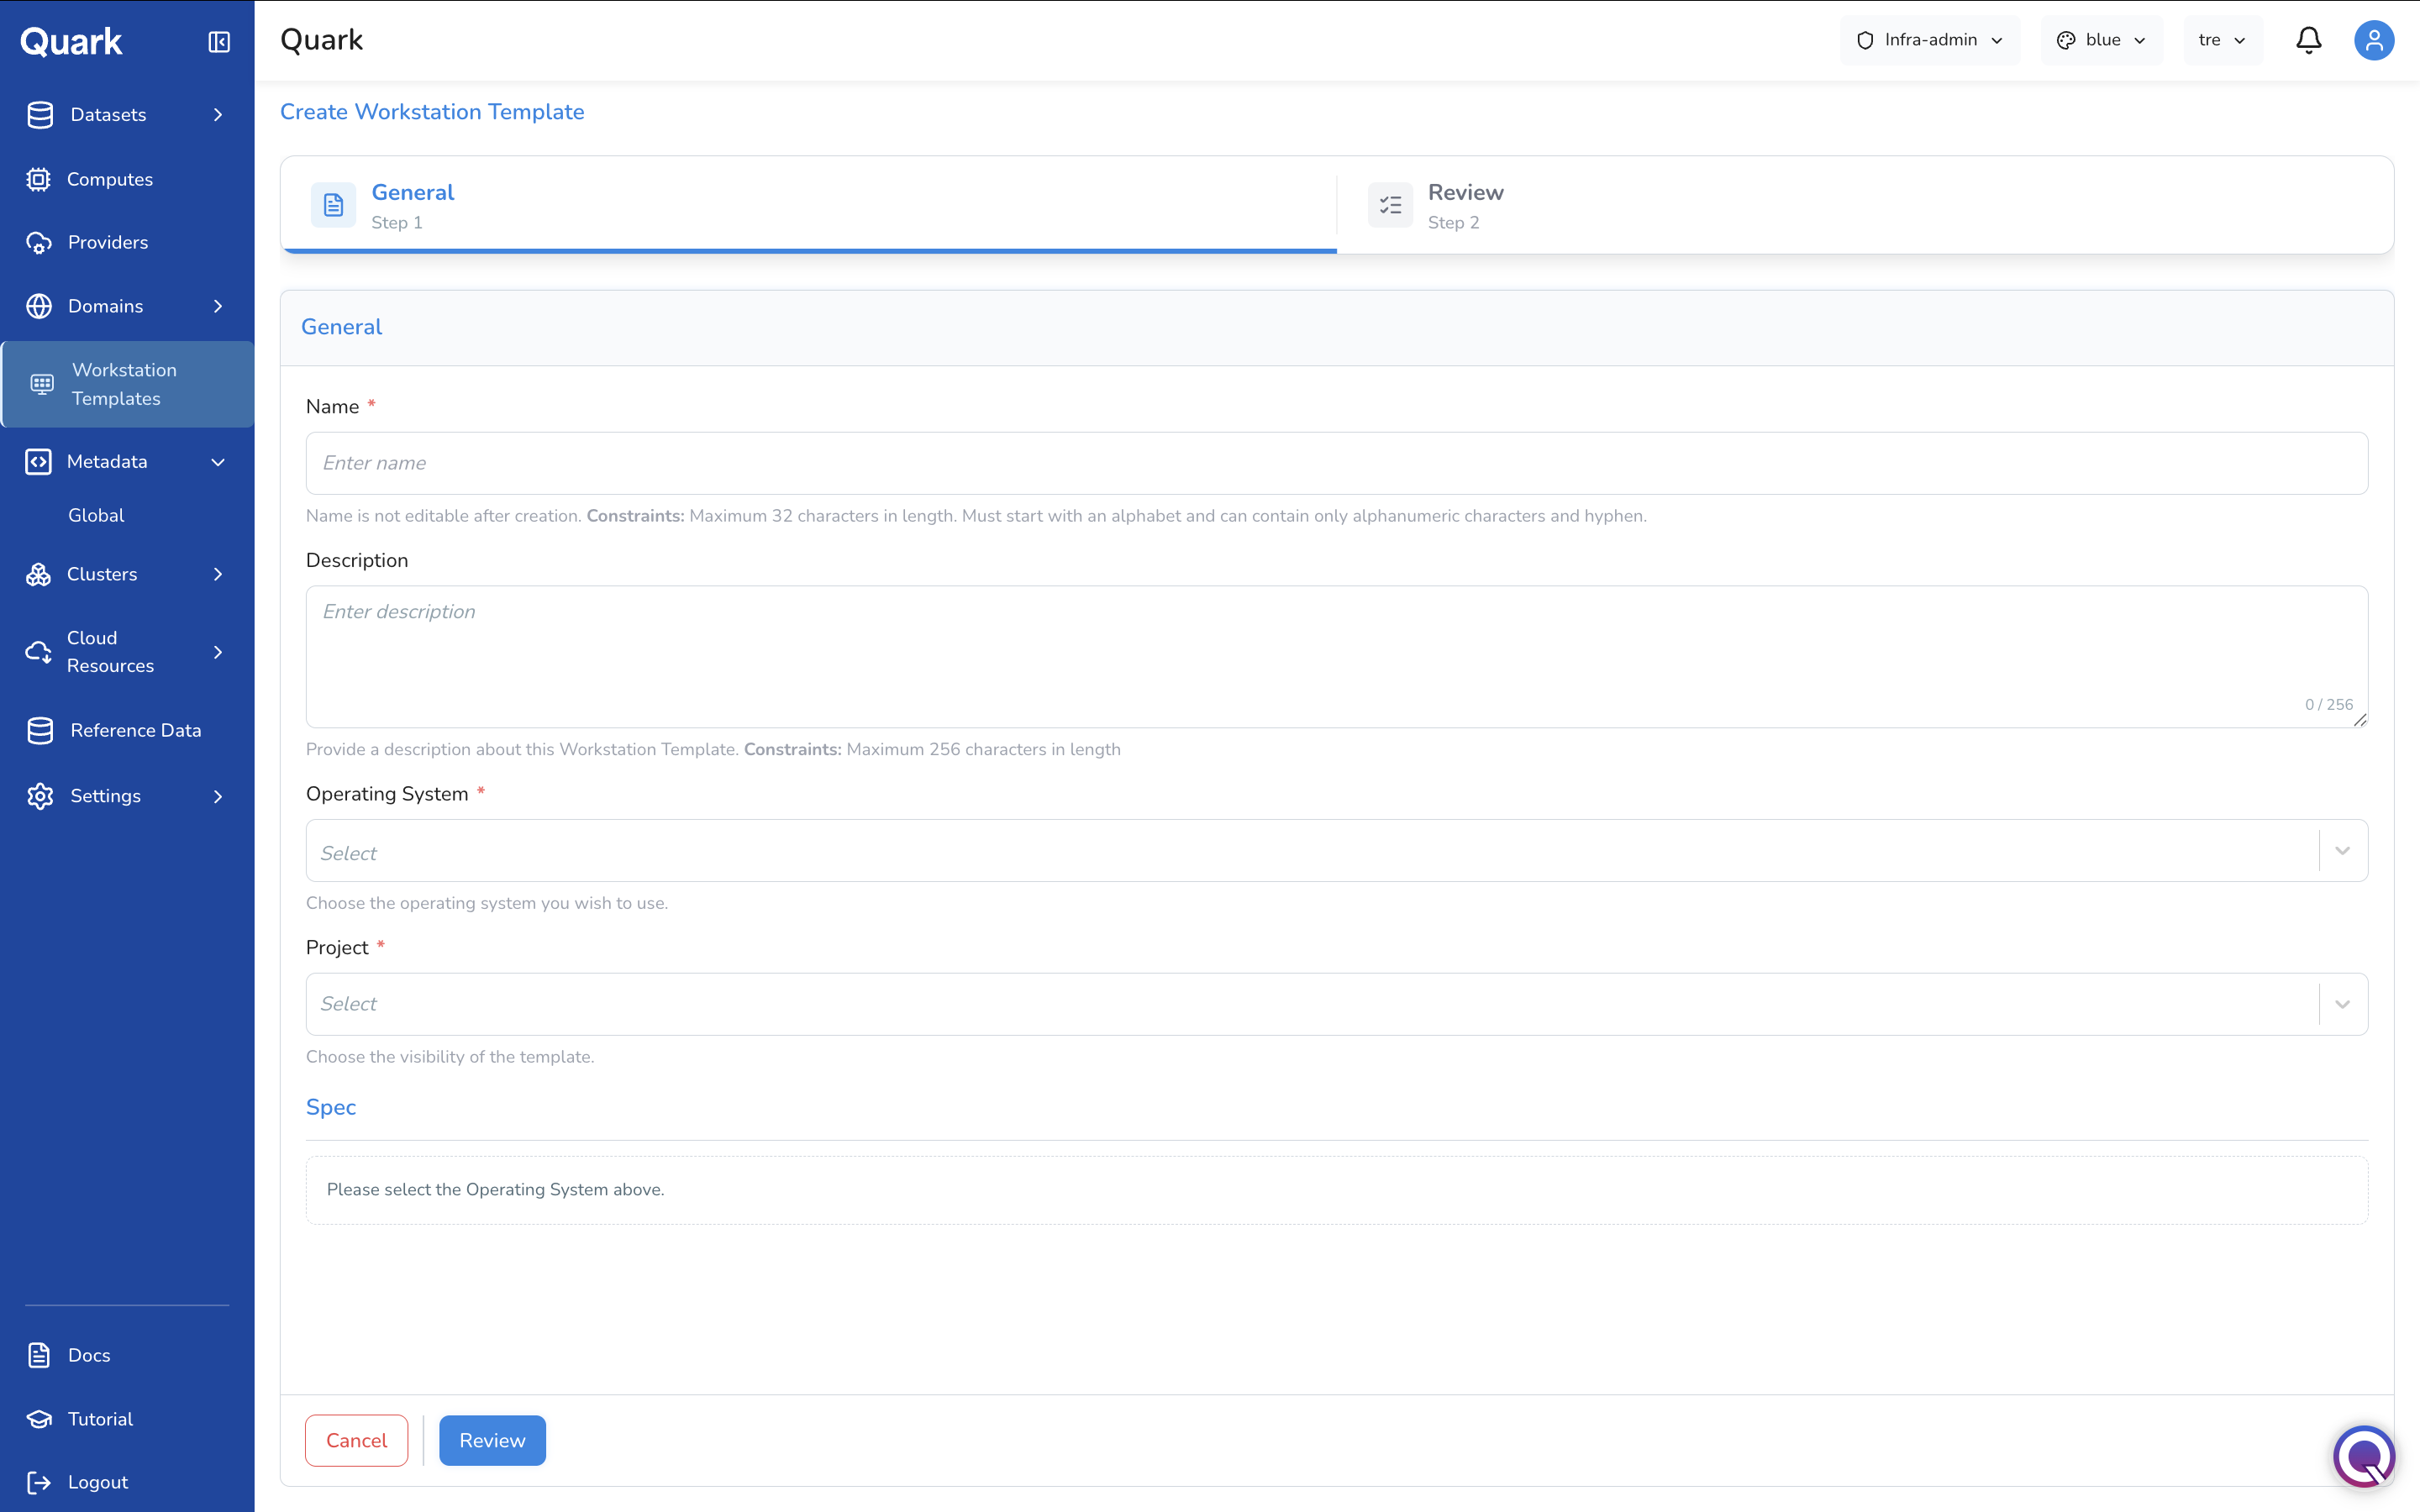
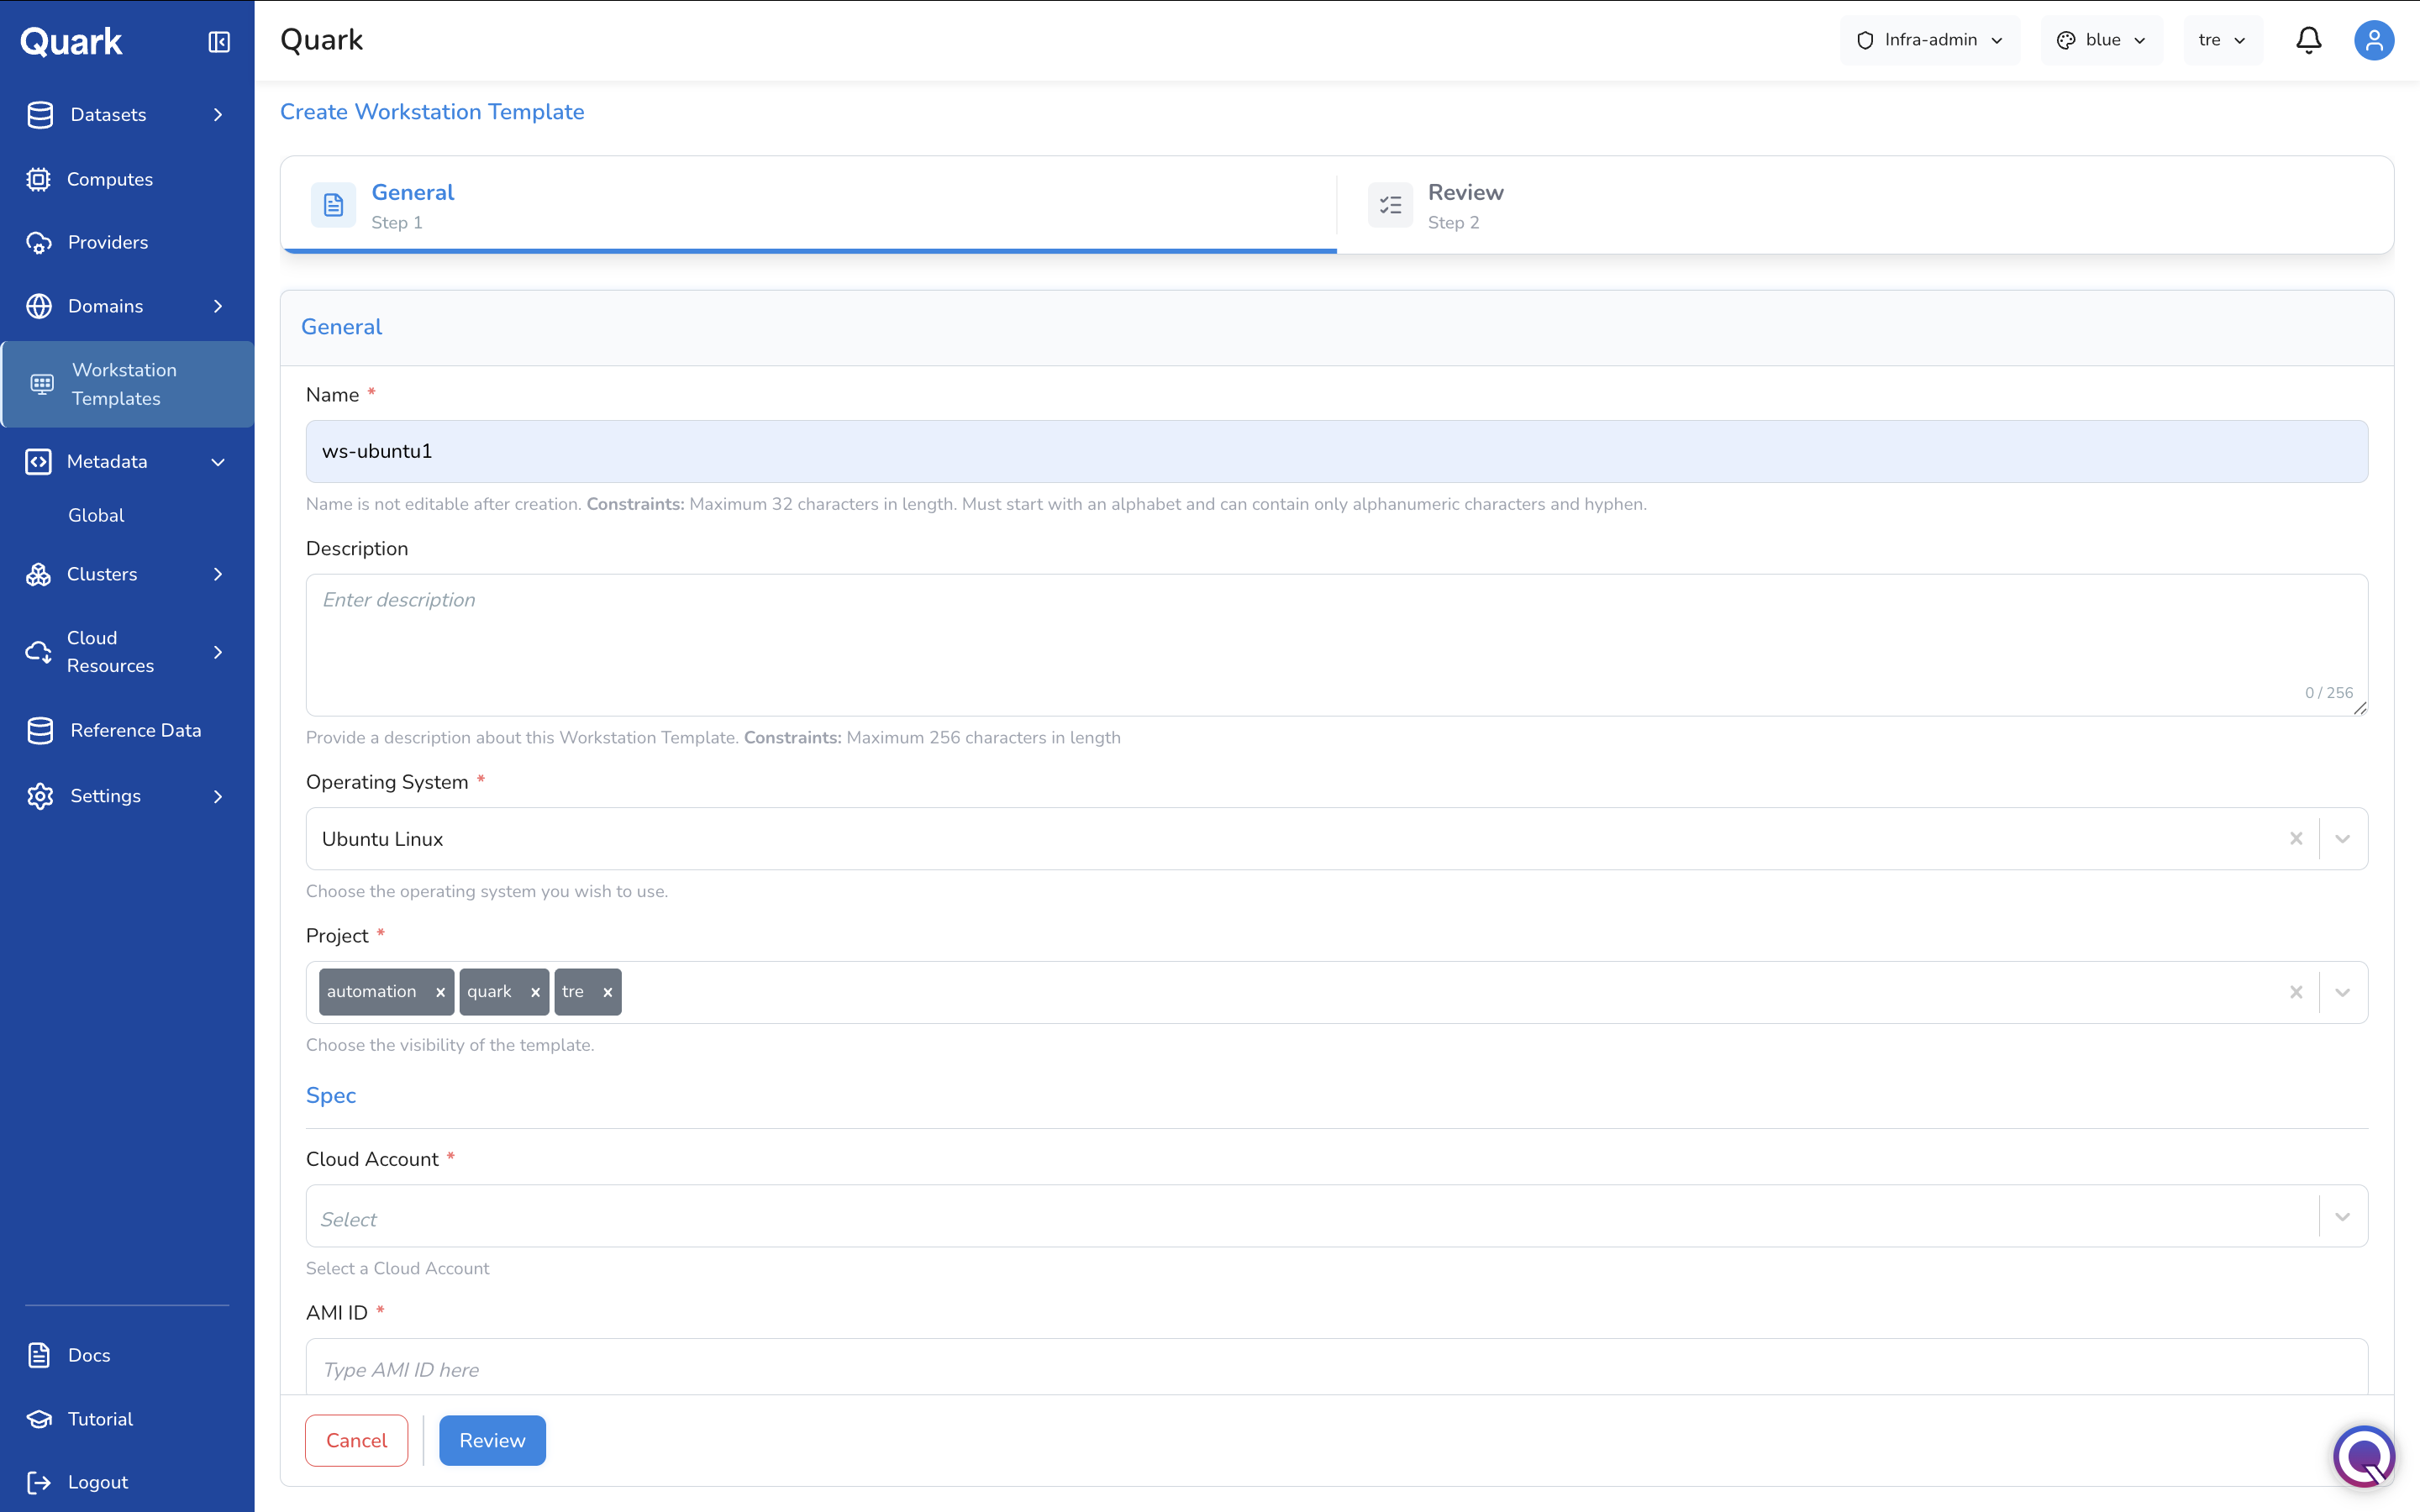
This opens the Create Workstation Template wizard, which has two steps: General (Step 1) and Review (Step 2). All configuration — both identifying information and infrastructure spec — is completed on a single scrolling page in Step 1.
Step 1: General and Spec
General
| Field | Description |
|---|---|
| Name (mandatory) | A unique name for this template. Maximum 32 characters. Must start with a letter and contain only alphanumeric characters and hyphens (e.g., ubuntu-genomics, gpu-deep-learning). |
| Description | A brief summary of what this template is designed for — the intended use case, pre-installed tools, or any relevant constraints. Maximum 256 characters. |
| Operating System (mandatory) | The operating system for workstations launched from this template (e.g., Ubuntu Linux). This selection must be made before the Spec fields below appear. |
| Project (mandatory) | The project or projects that can access this template. Select one or more projects to control which teams see this template when launching workstations. |
Important: The template Name cannot be changed after creation. Choose a name that clearly identifies the OS, intended workload, and any distinguishing characteristics — for example,
ws-ubuntu-gpuorws-ubuntu-standard.
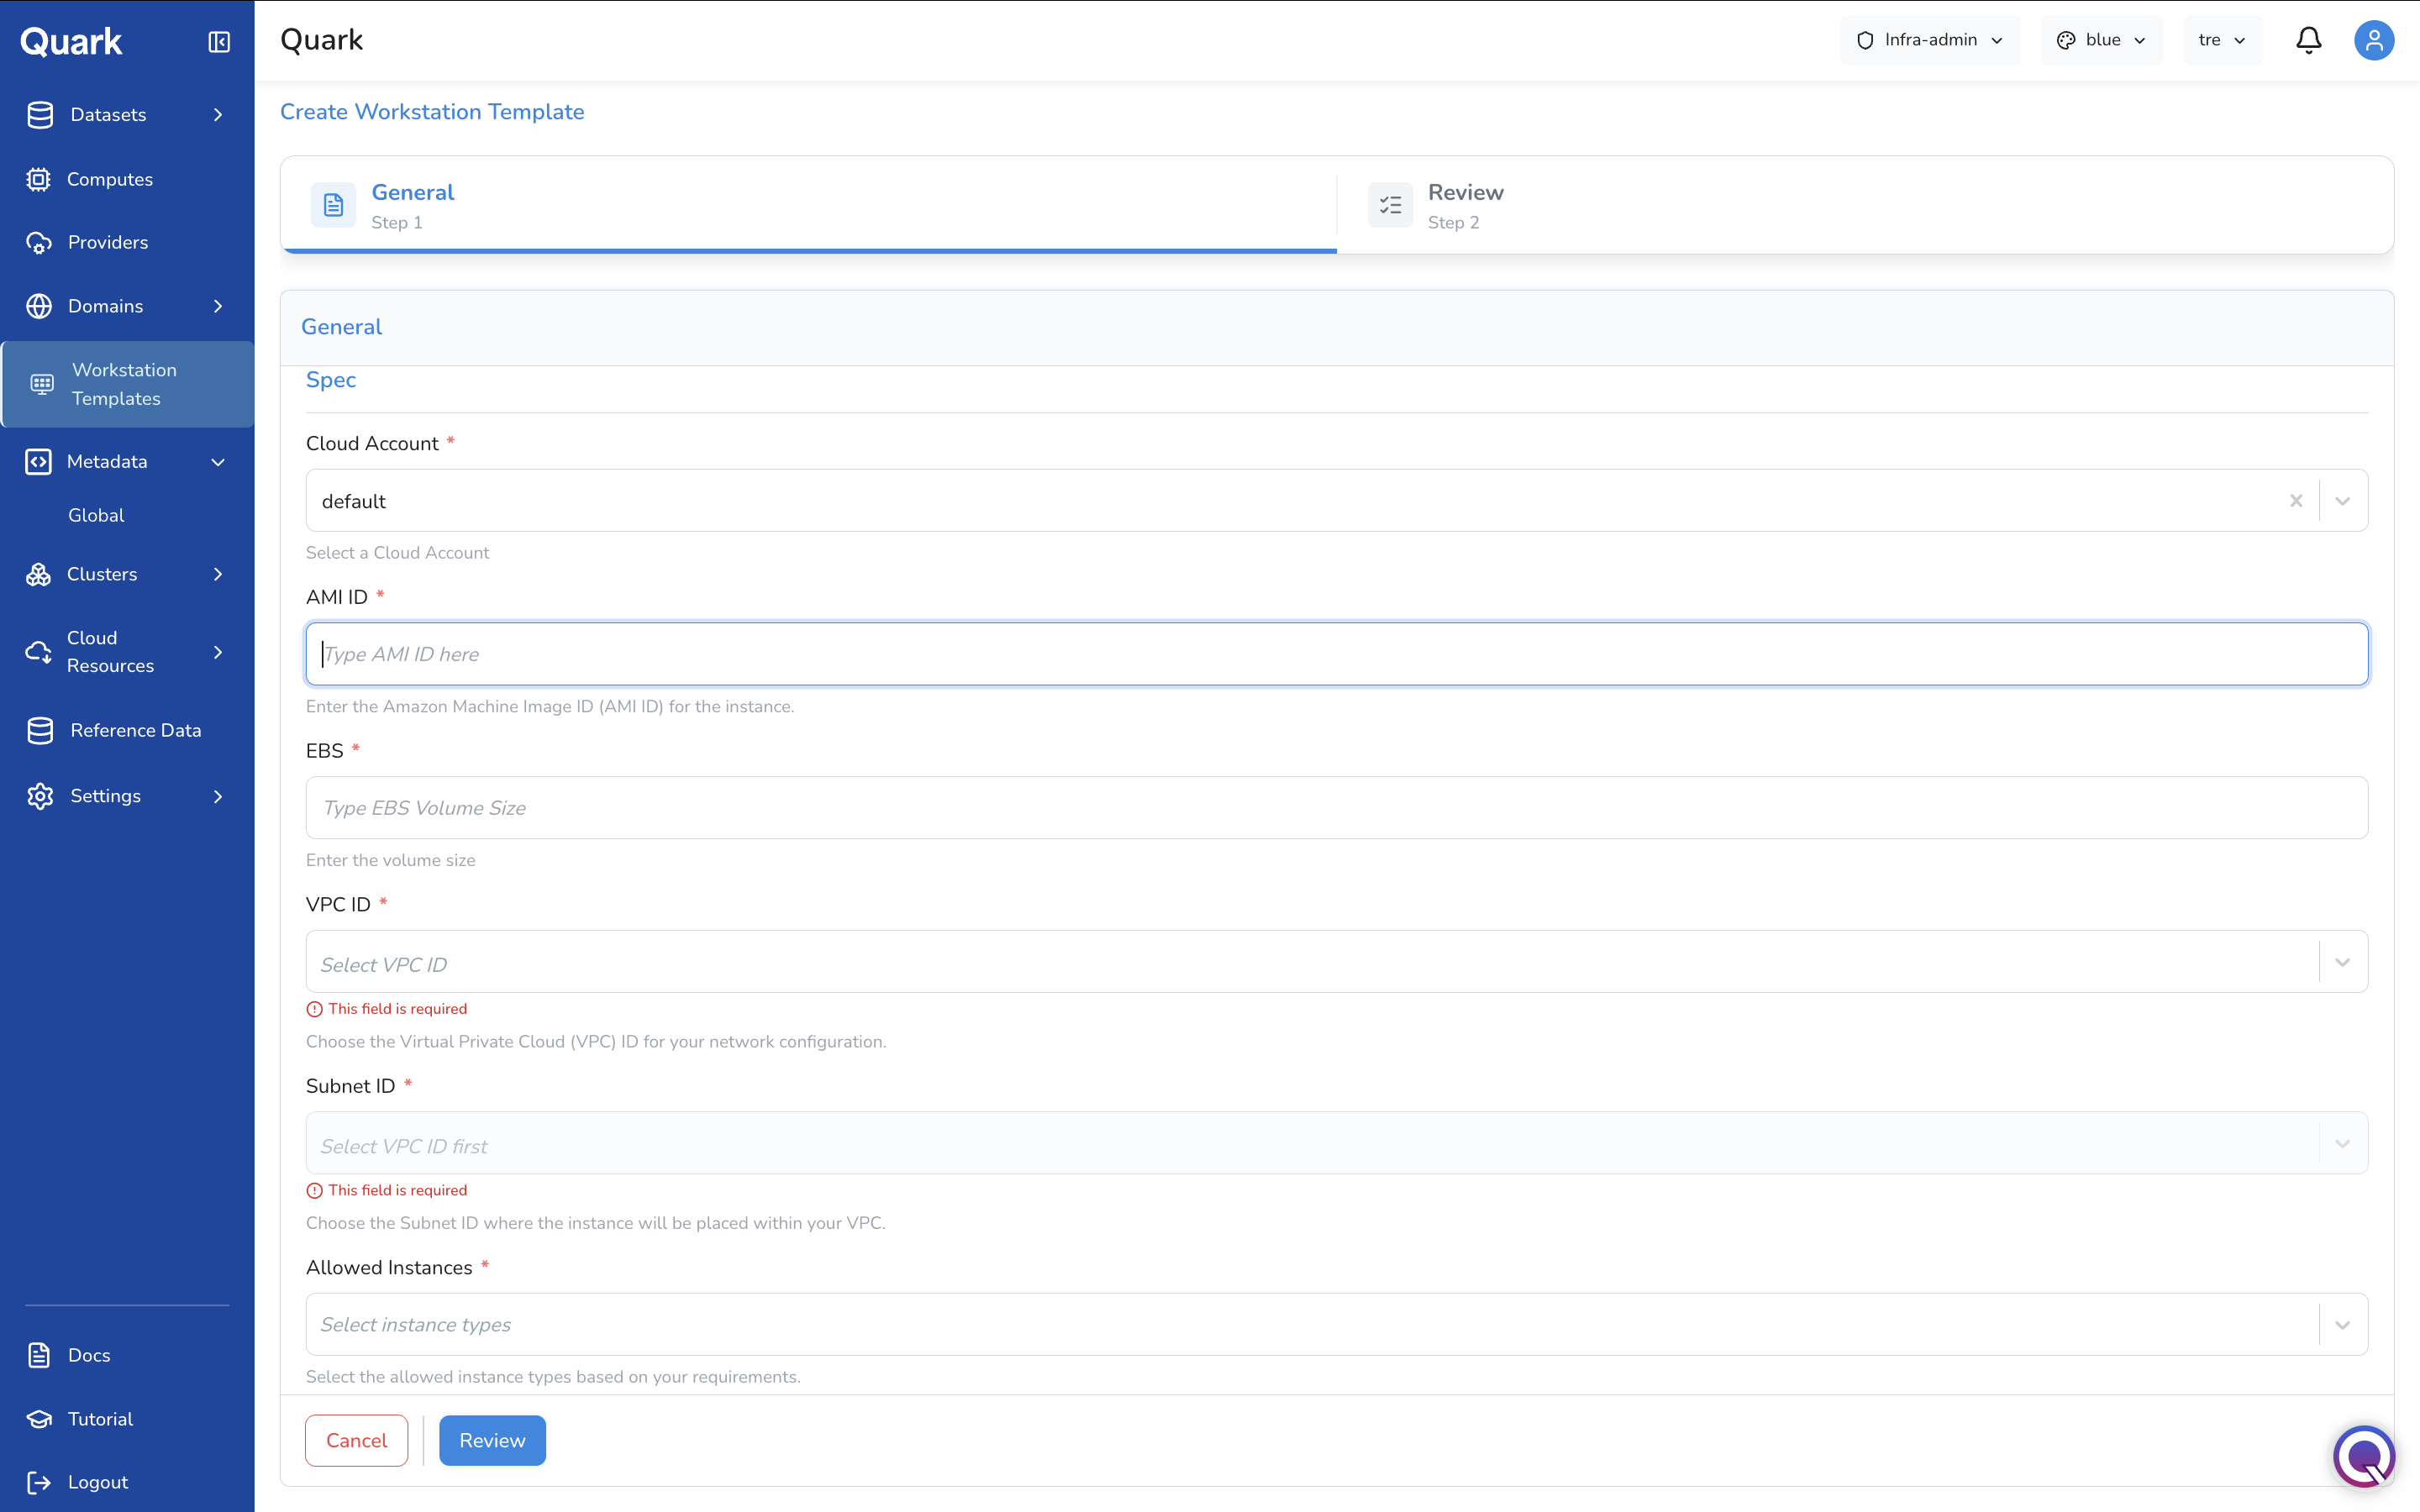
Spec
The Spec section appears directly below the General fields once an Operating System has been selected. It defines the underlying AWS infrastructure the workstation will run on.
| Field | Description |
|---|---|
| Cloud Account (mandatory) | The connected cloud provider account this template will use to launch workstation instances. Select from the accounts registered in Providers. |
| AMI ID (mandatory) | The Amazon Machine Image ID for the base OS image workstations will launch from (e.g., ami-0abcdef1234567890). This must be a valid AMI available in the regions covered by the selected cloud account. |
| EBS (mandatory) | The root EBS volume size (in GB) to attach to each workstation instance launched from this template. |
| VPC ID (mandatory) | The Virtual Private Cloud to place workstation instances in. Select from the VPCs available in the selected cloud account. |
| Subnet ID (mandatory) | The subnet within the selected VPC where workstation instances will be placed. The dropdown is populated once a VPC ID is selected. |
| Field | Description |
|---|---|
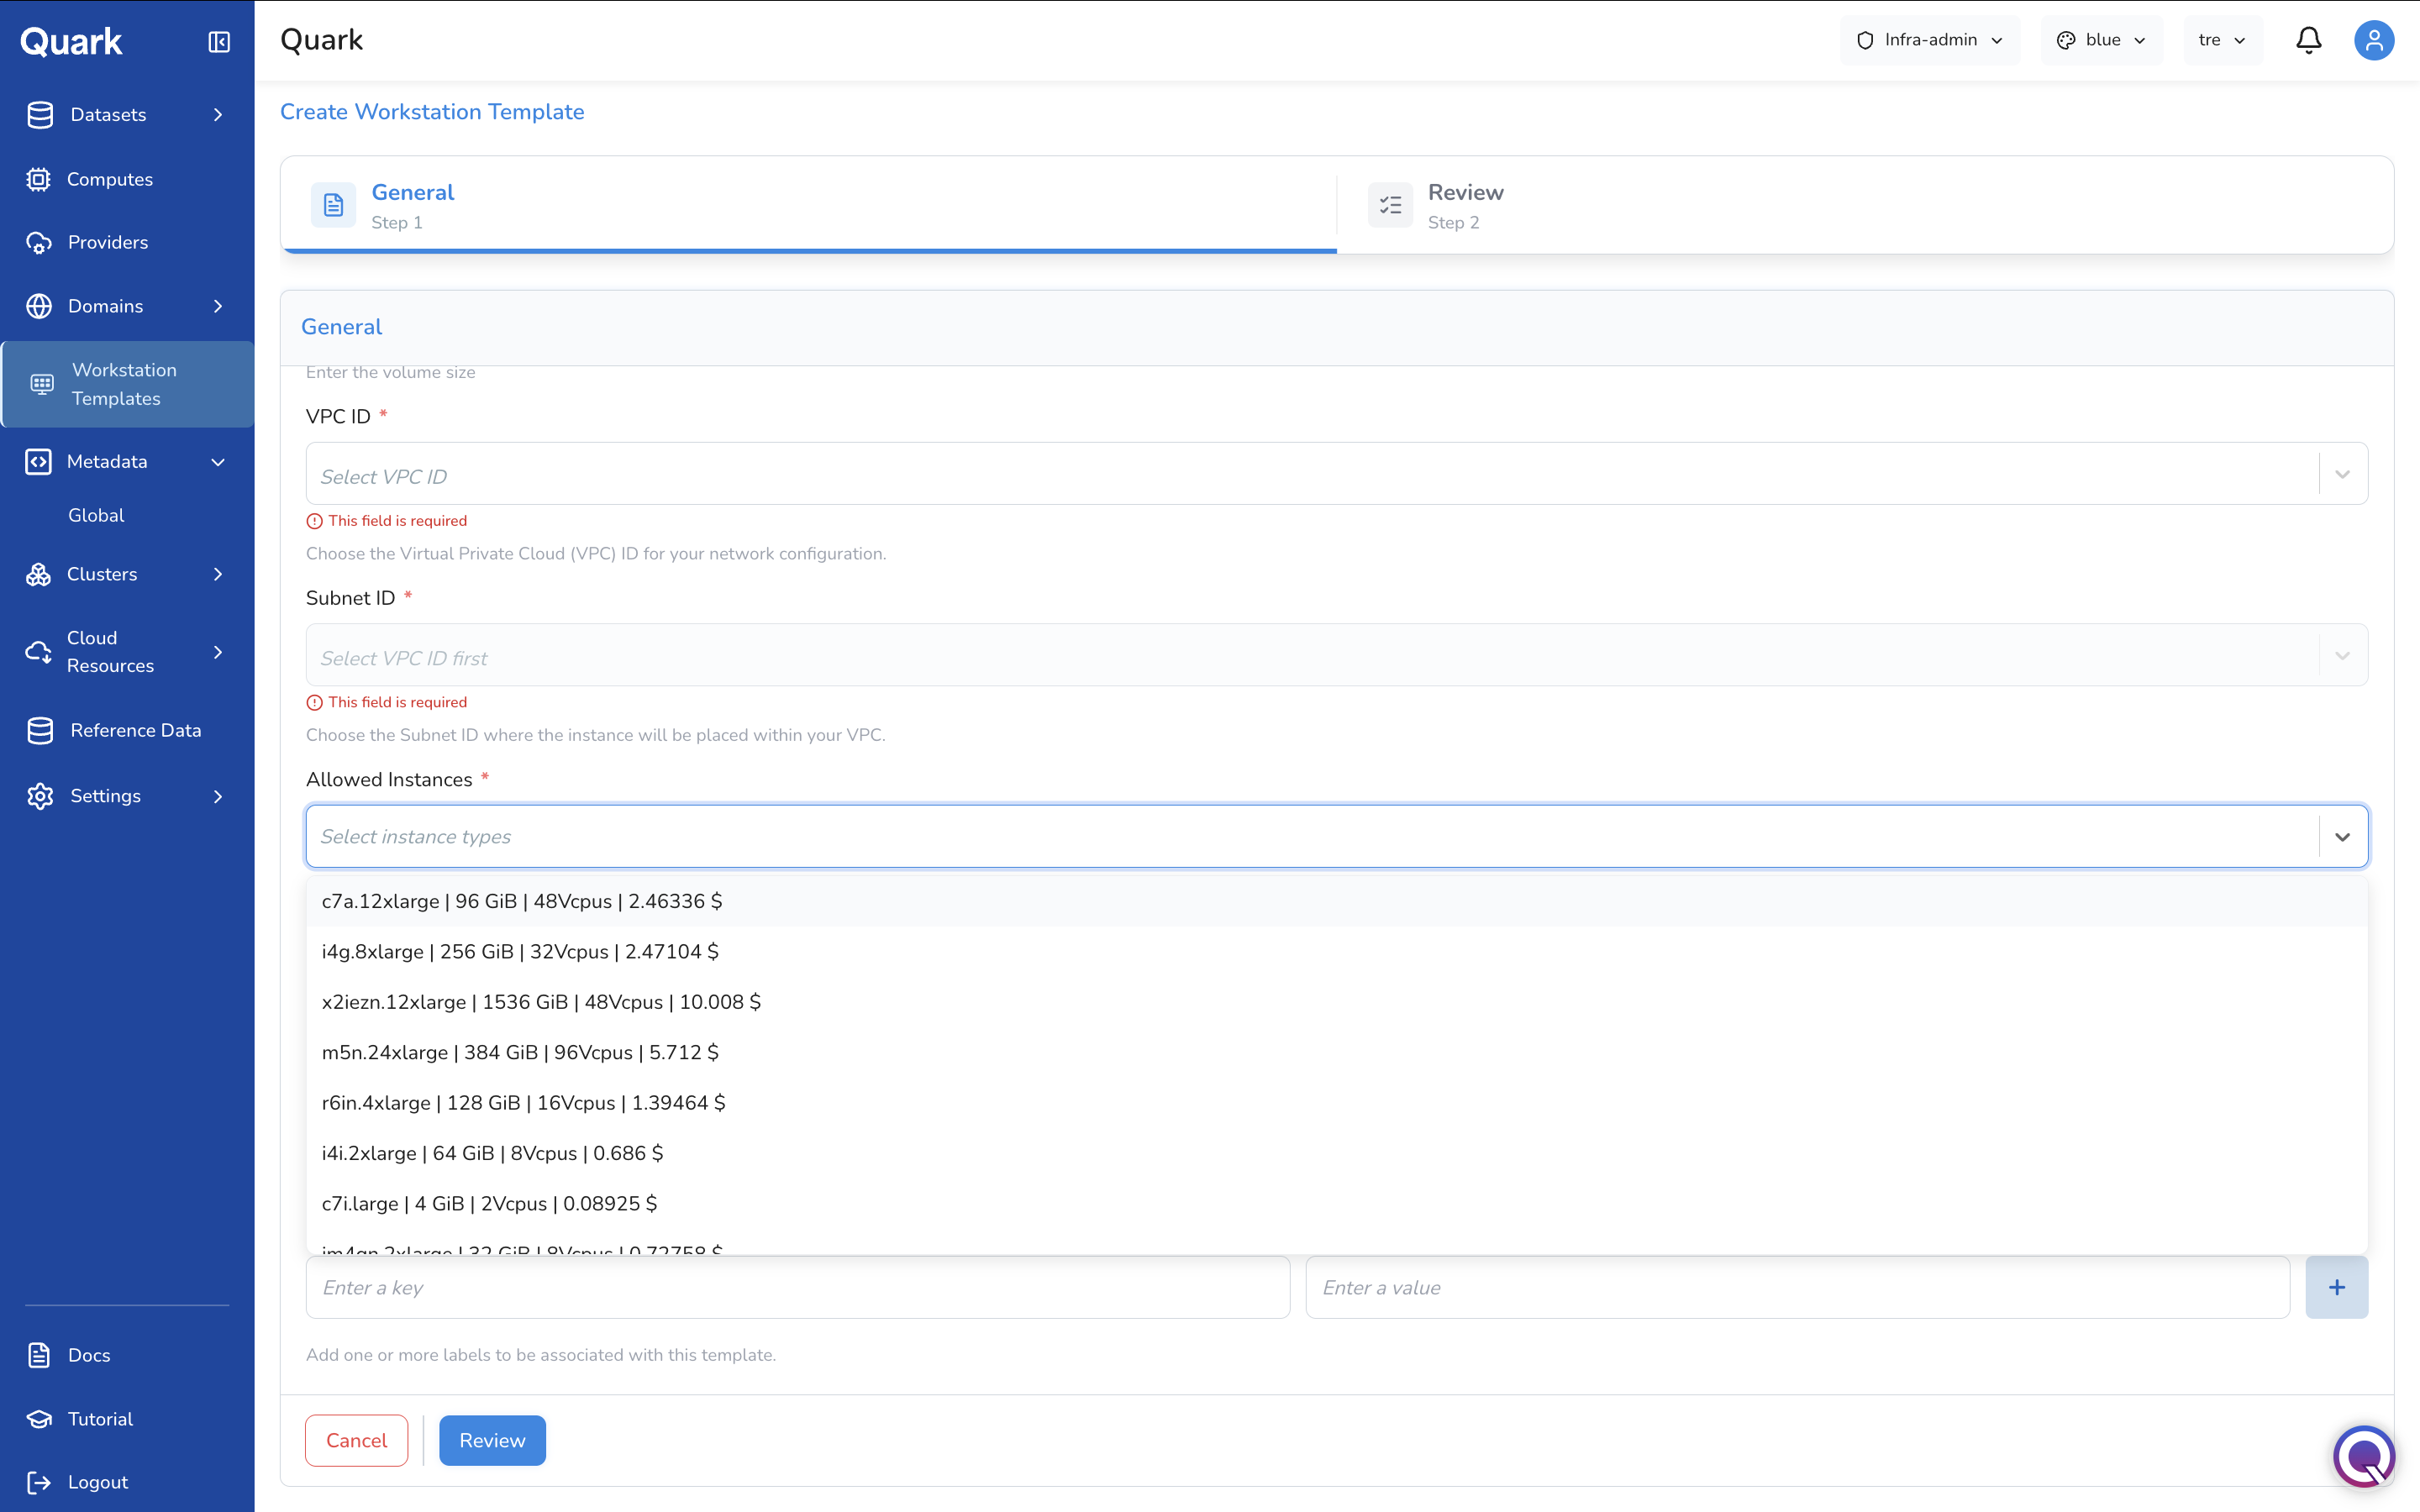
| Allowed Instances (mandatory) | The EC2 instance types researchers can choose from when launching a workstation with this template. Each option in the dropdown shows the instance type, available memory, vCPU count, and hourly cost (e.g., c7i.large \| 4 GiB \| 2Vcpus \| 0.08925 $). Select multiple types to give researchers flexibility. |
| Field | Description |
|---|---|
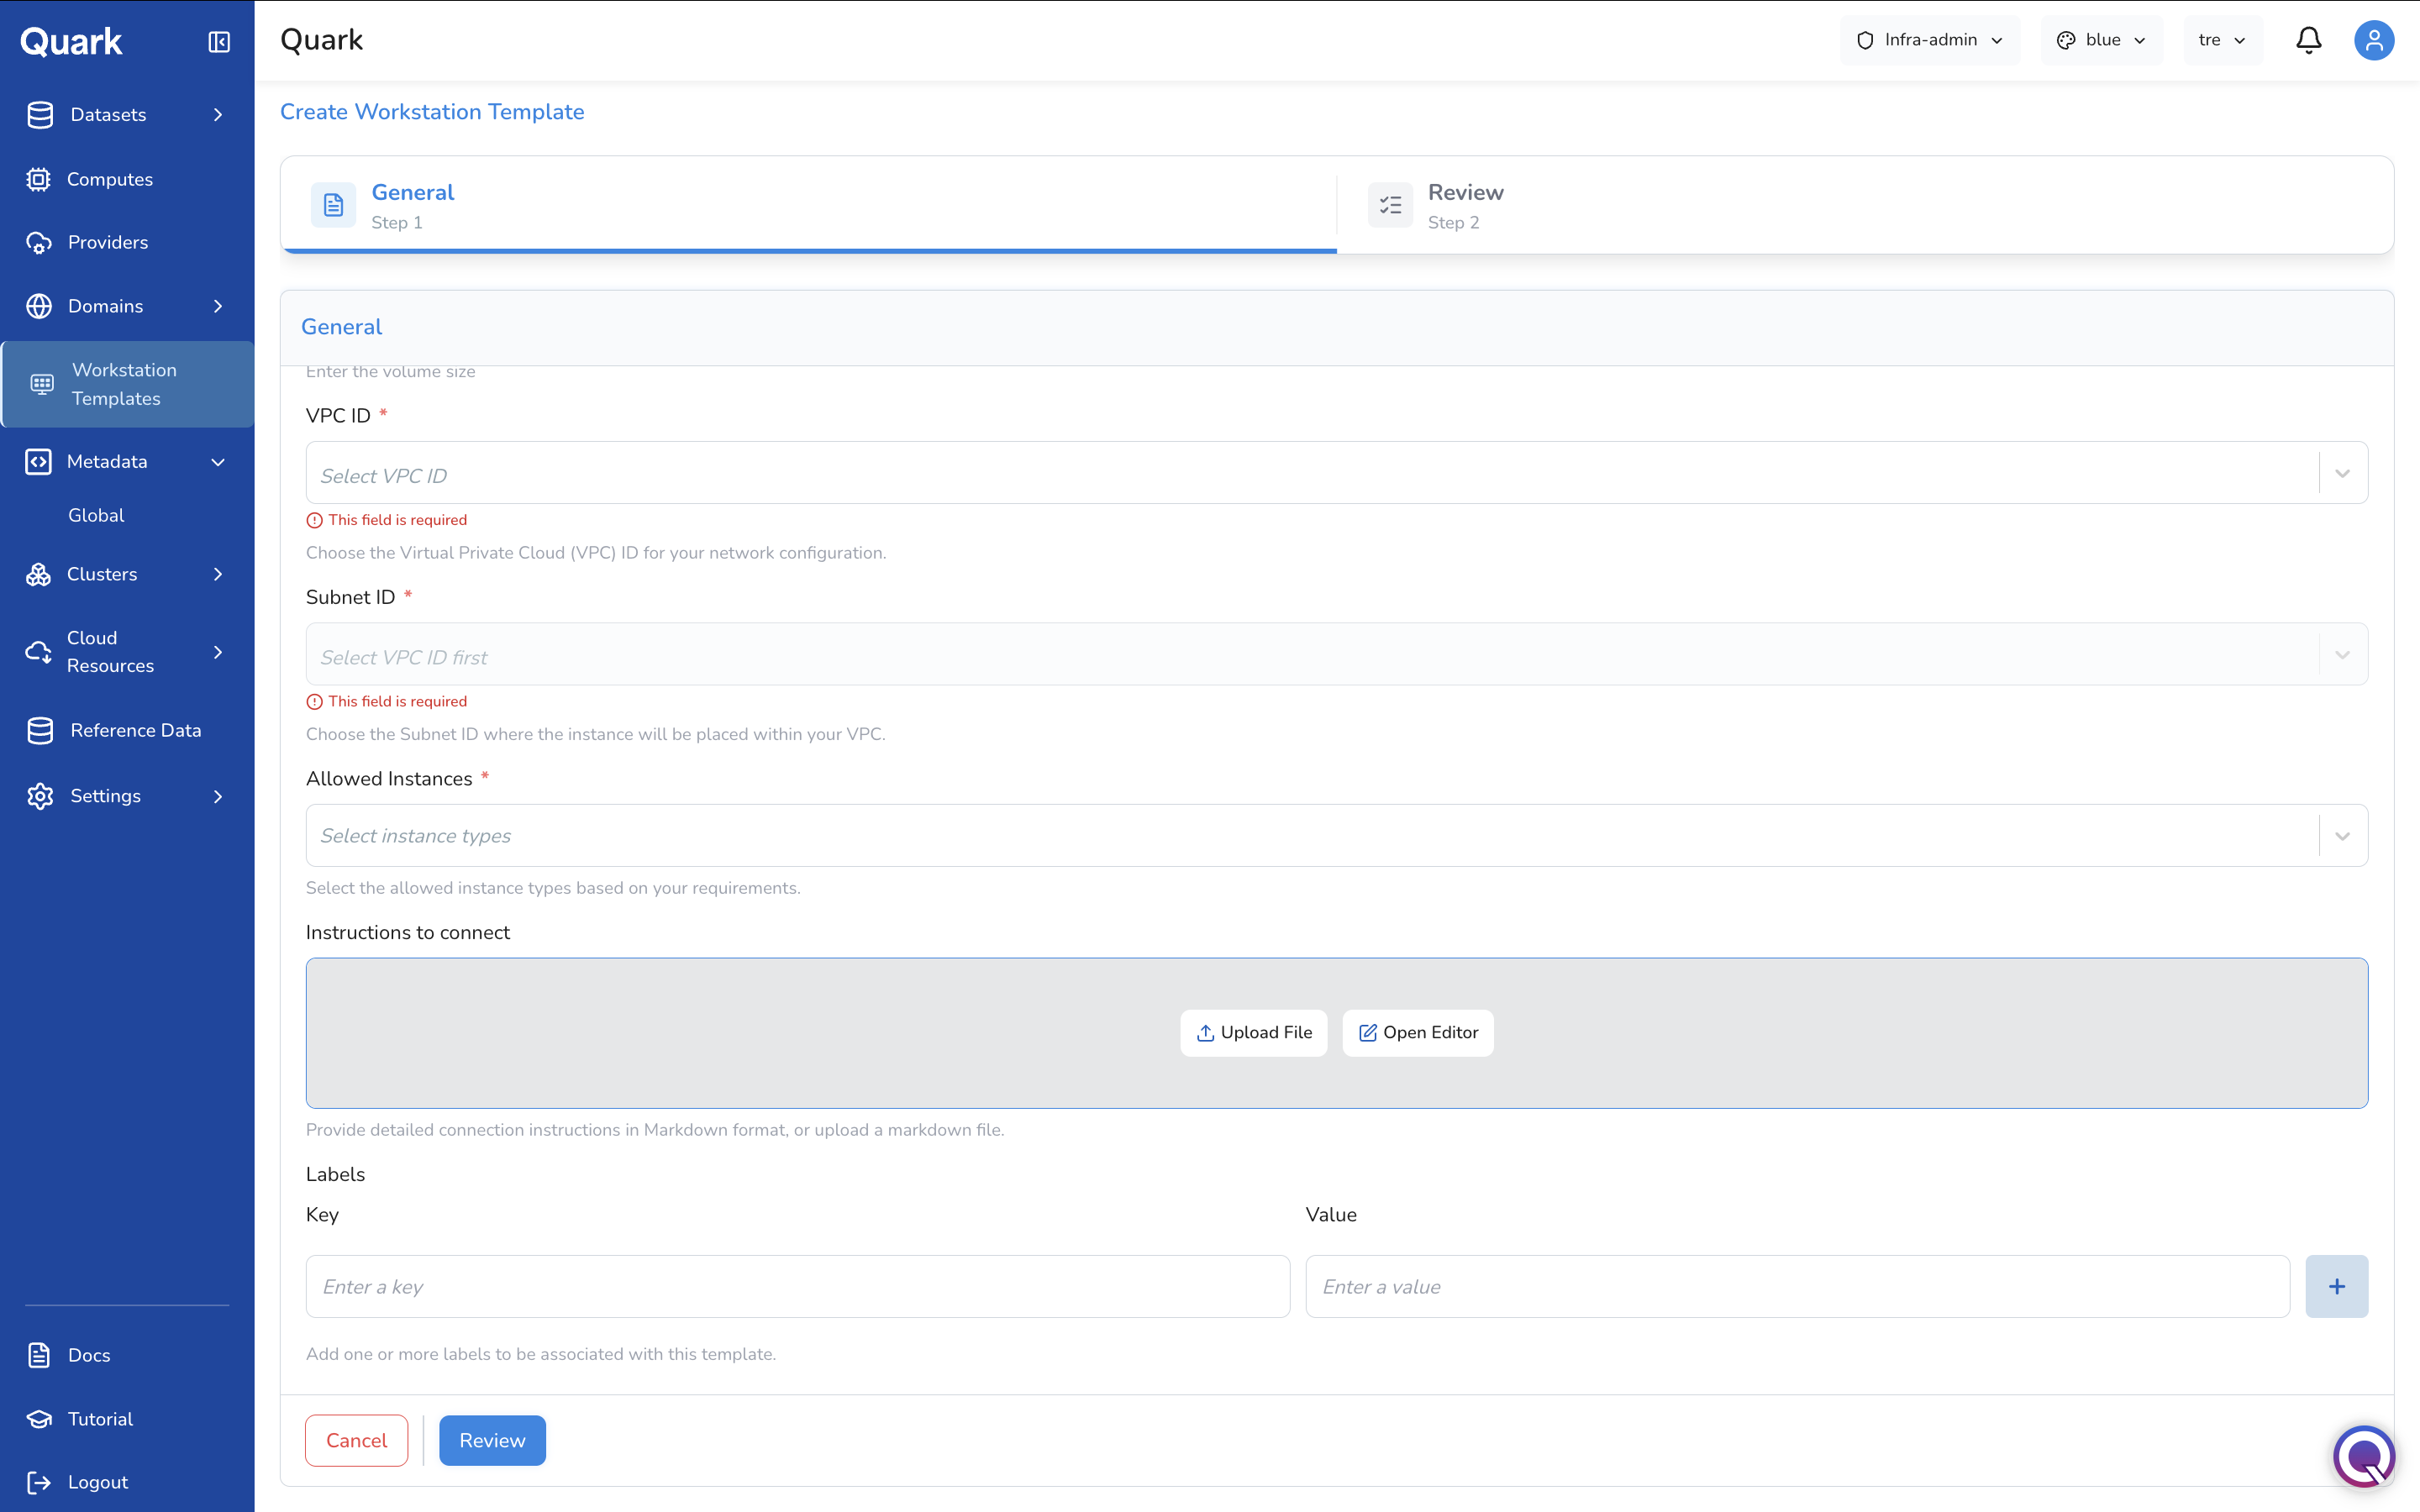
| Instructions to Connect | Optional Markdown-formatted instructions displayed to researchers when they launch a workstation from this template — for example, SSH connection steps, port forwarding instructions, or tool-specific setup guidance. Write directly in the editor or click Upload File to upload a .md file, or Open Editor for a full-screen Markdown editor. |
| Labels | Optional key-value pairs to associate with this template for organisational or filtering purposes. Click + to add each label. |
Step 2: Review
Once all fields are complete, click Review to proceed to the summary screen. Confirm that the OS, cloud account, AMI, networking, and allowed instance types are correct, then click Create to publish the template.
Once created, the template appears as a card on the Workstation Templates landing page and becomes immediately available to researchers and DS Administrators in the projects it has been scoped to.
Managing Templates
Each template card on the landing page has an Edit option. Clicking Edit returns to the full configuration form, pre-populated with the current values. All fields except the Name can be updated.
Note: Changes to a template do not affect workstations that have already been launched from it. They apply only to workstations launched after the template is updated.
What's Next
- Computes — Workstation templates define the machine image and networking; compute configurations define the instance capacity and scheduling. Confirm the right compute profiles exist for the projects using this template.
- Providers — The cloud account selected in the template Spec must be registered as a Provider. If the expected account does not appear in the dropdown, verify it is configured in Providers.
- Clusters — Workstation instances are scheduled on clusters. Ensure the cluster serving the relevant project is healthy before researchers begin launching workstations.