Cloud Resources
Overview
The Cloud Resources section is where the Infrastructure Administrator connects and provisions the managed cloud services and storage backends that platform workloads depend on. This includes cloud-native services such as build environments, databases, and message queues (Cloud Services), and object and file storage buckets (Storages).
Resources registered here become available to pipelines, workstations, and other platform workloads as configured infrastructure — referenced by name without requiring researchers to manage credentials or connection details directly.
Navigation: Select Cloud Resources from the left-hand navigation pane. The section expands to show Cloud Services and Storages as sub-items.
Cloud Services Tab
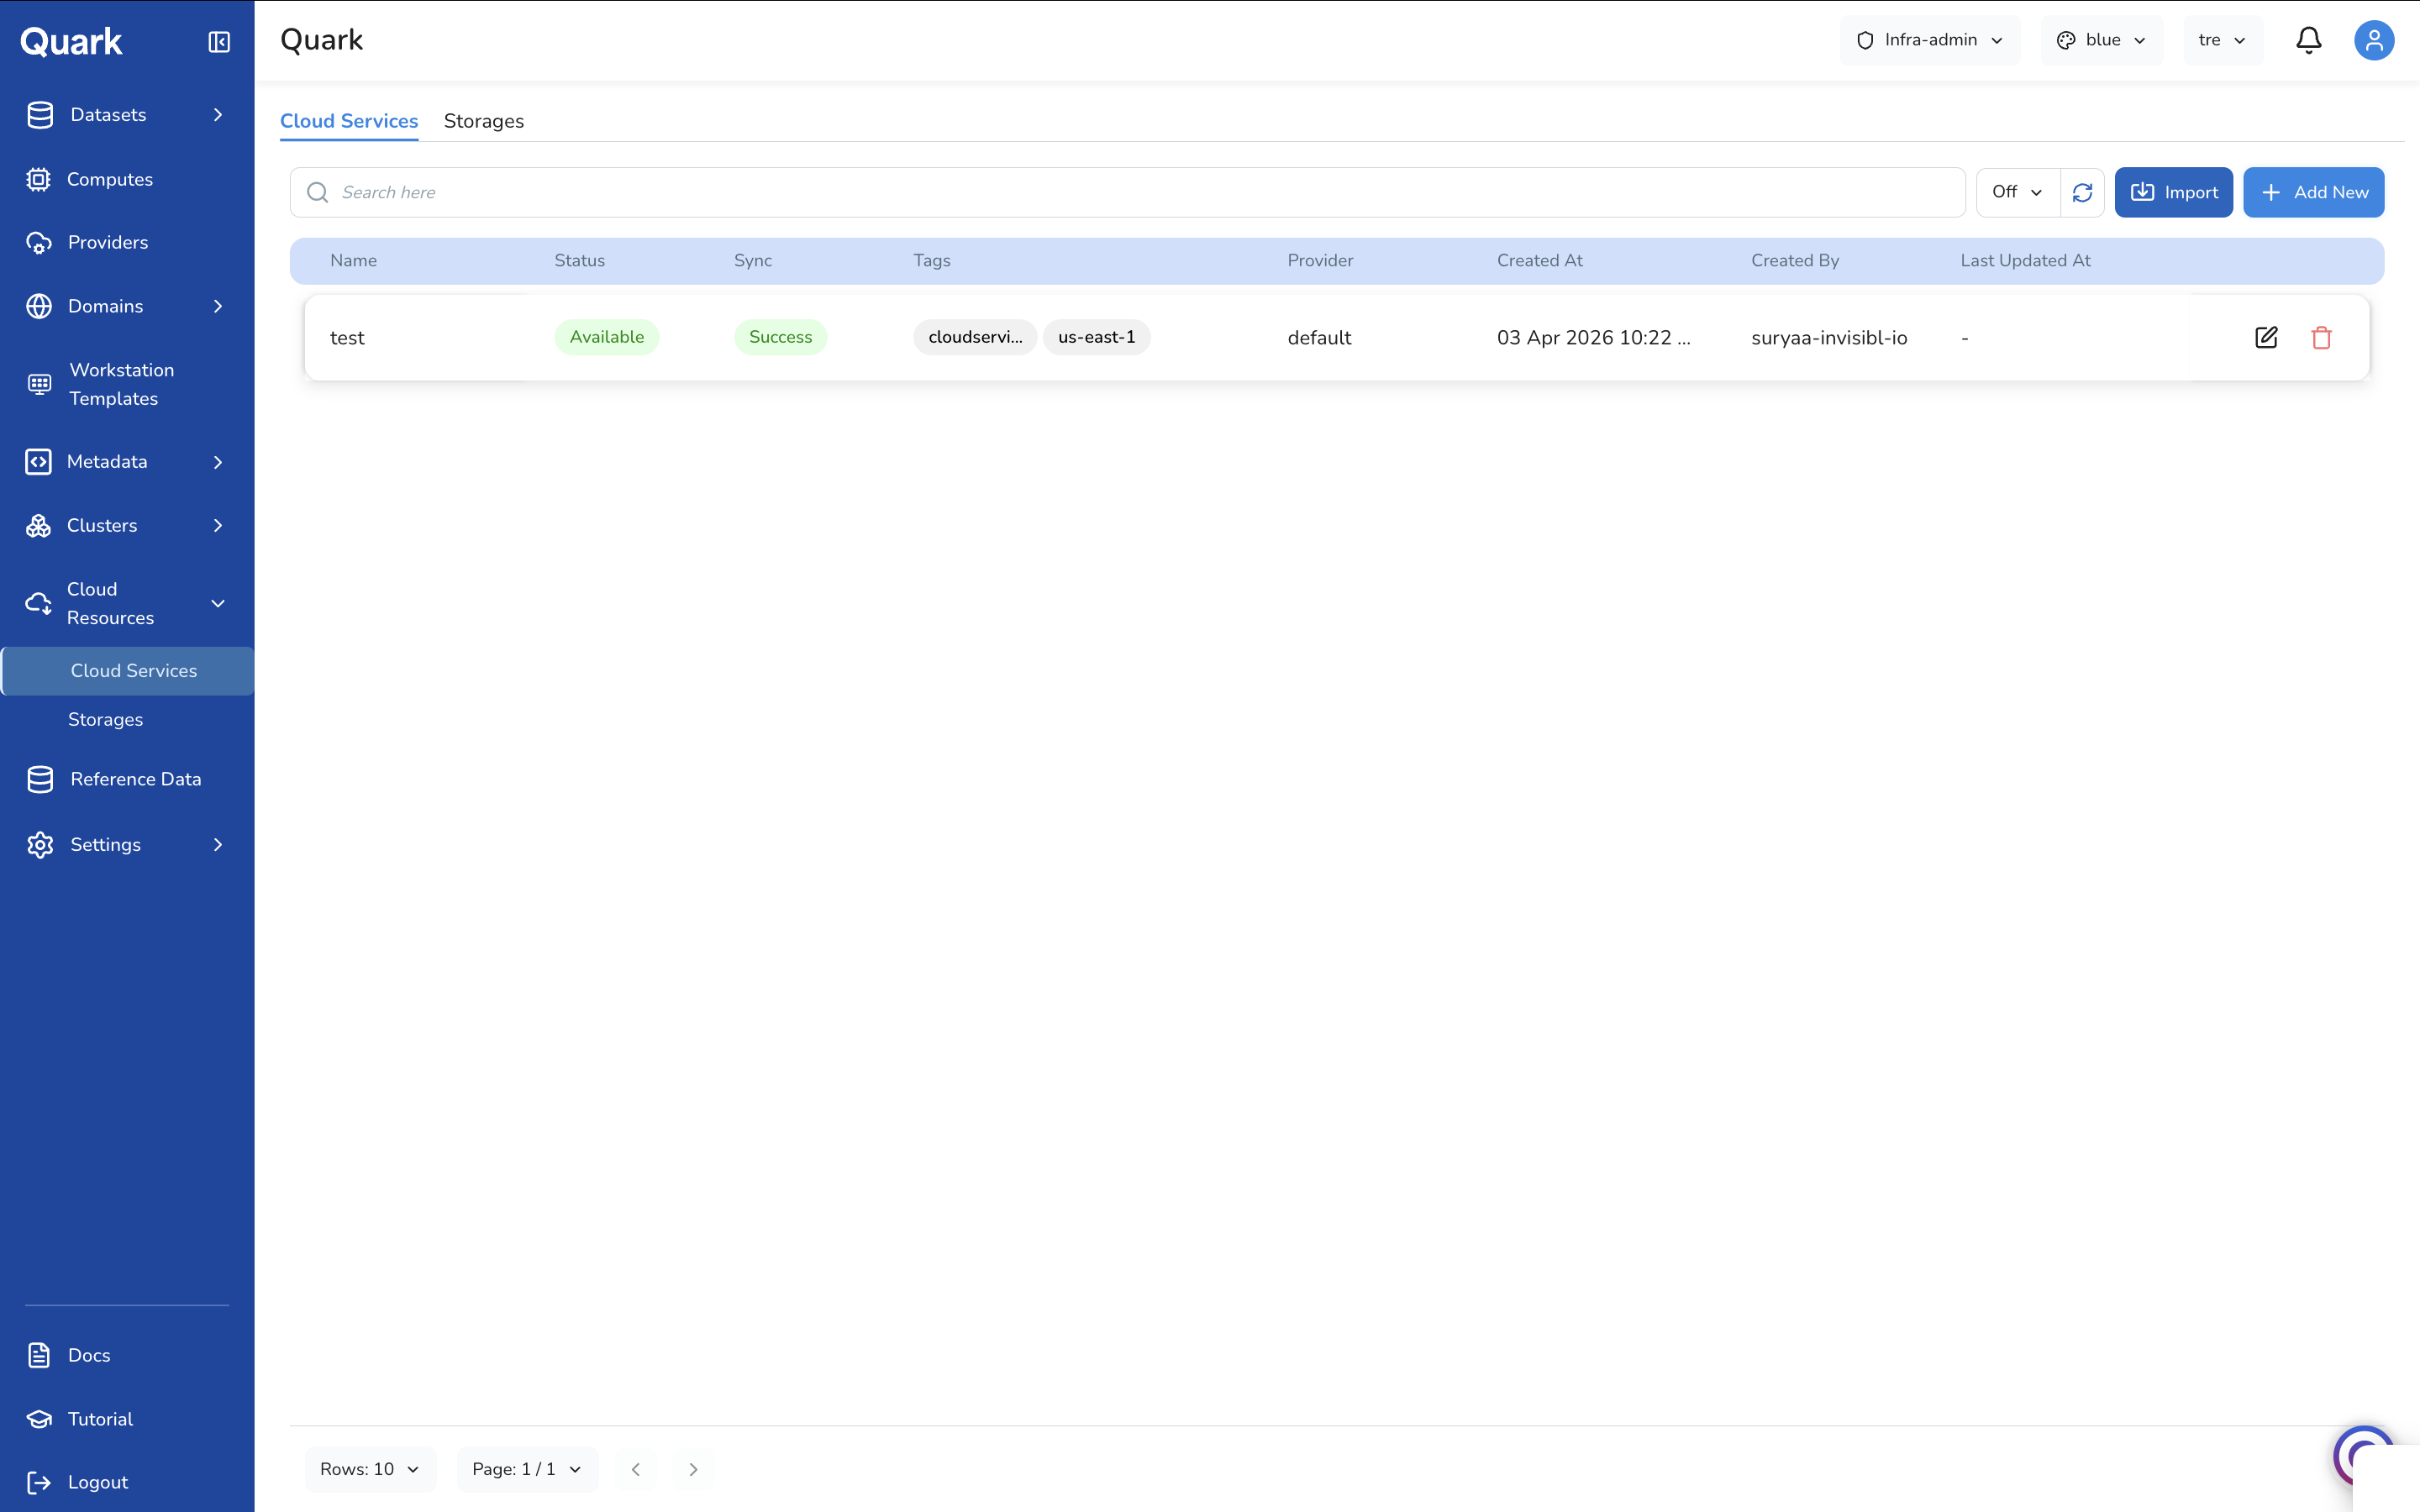
The Cloud Services Page
The Cloud Services tab lists all managed cloud services connected to the platform. Each row shows:
| Column | Description |
|---|---|
| Name | The unique name assigned to this cloud service at registration time. |
| Status | Whether the service is currently Available or in an error state. |
| Sync | The result of the last synchronisation with the cloud provider — Success or a failure state. |
| Tags | Labels showing the service type and region (e.g., cloudservi..., us-east-1). |
| Provider | The connected cloud account this service is running in. |
| Created At | The date and time this service was registered. |
| Created By | The user who registered the service. |
| Last Updated At | The date and time the service was most recently modified. |
Each row has two actions: Edit (pencil icon) to update the service configuration, and Delete (red trash icon) to remove it.
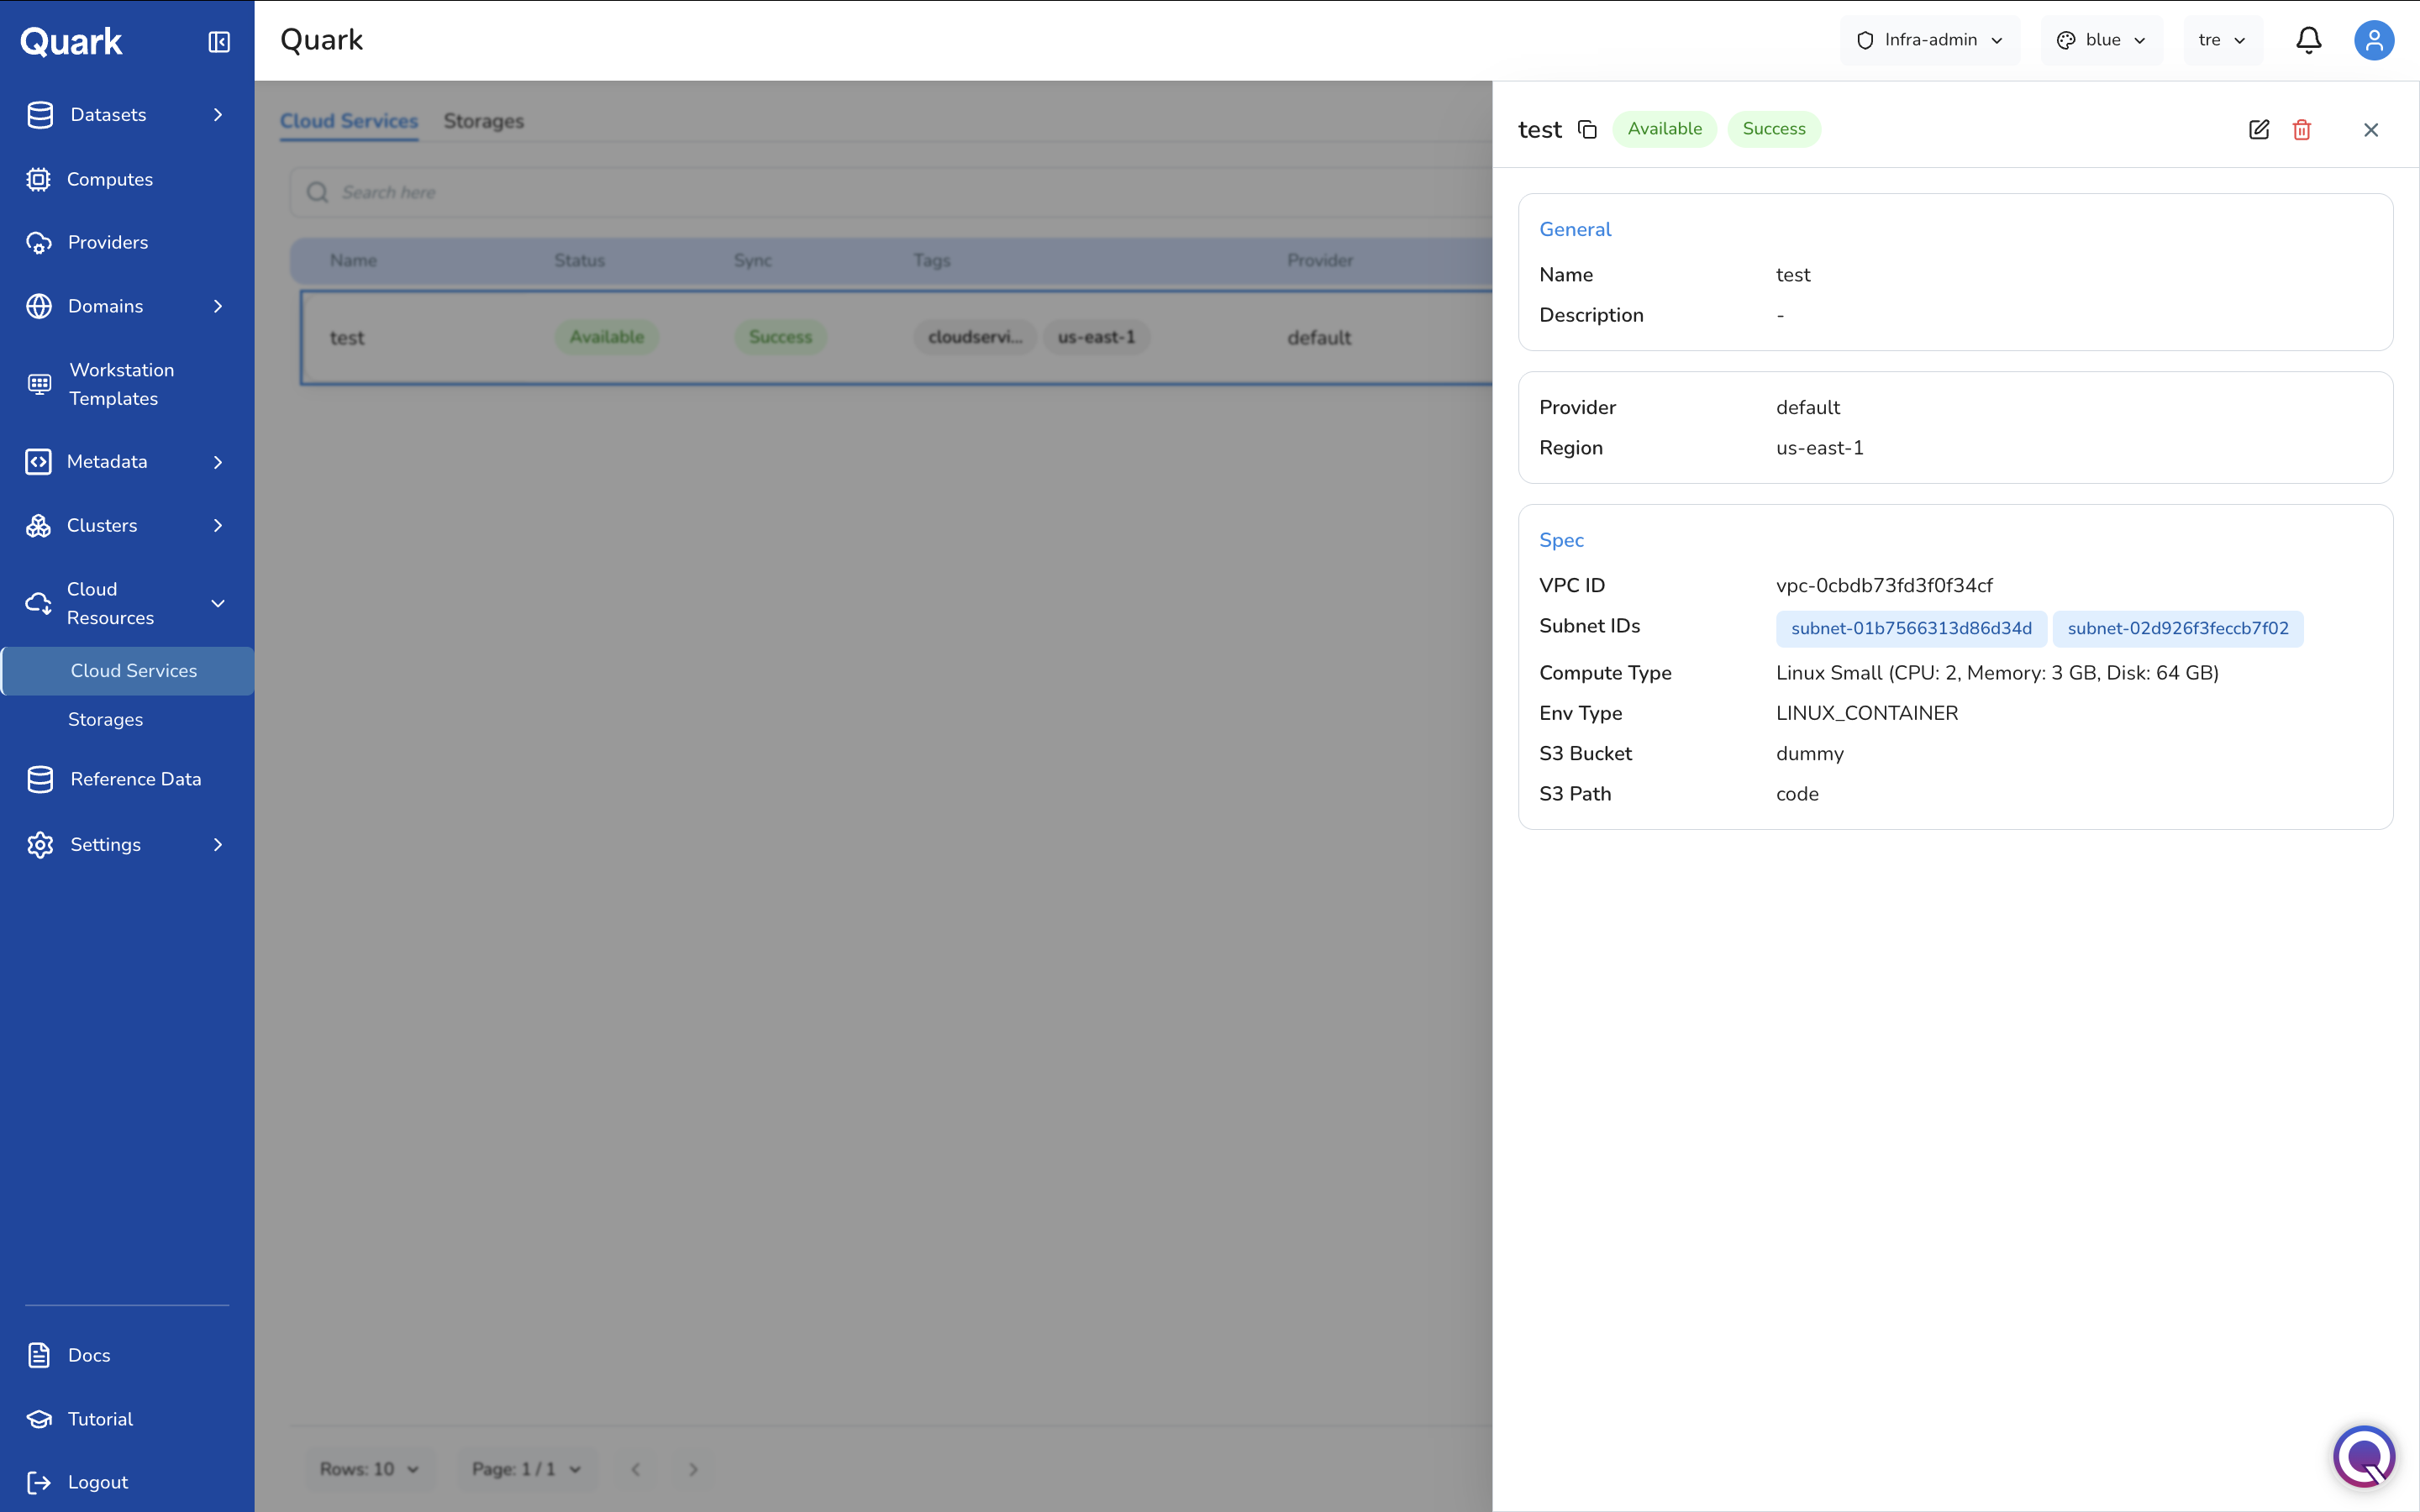
Viewing a Cloud Service
Click any row in the Cloud Services list to open a detail pane on the right side of the screen. The pane shows the service's full configuration, organised into sections:
- General — Name and description.
- Provider and Region — The cloud account and region where the service is running.
- Spec — Service-specific infrastructure details such as VPC ID, Subnet IDs, Compute Type, Environment Type, and any storage references configured at creation time.
The pane header displays the service name alongside its Status and Sync badges, and provides edit and delete actions.
Import vs Add New
The Cloud Services toolbar offers two ways to register a service:
- Import — Connects an existing managed cloud service that is already running in your cloud account. The platform registers and references it without provisioning anything new. Use this when the service infrastructure exists independently and you need to make it accessible to platform workloads.
- Add New — Provisions a brand new managed cloud service through the platform in the selected cloud account. Use this when you need the platform to create and manage the service lifecycle.
Both flows use a Select Cloud Service modal to choose the service type, followed by the same three-step wizard — General → Spec → Review — with Spec fields that vary by service type.
Importing a Cloud Service
- Click Import in the toolbar.
-
The Select Cloud Service modal appears, showing the cloud service types available to import.
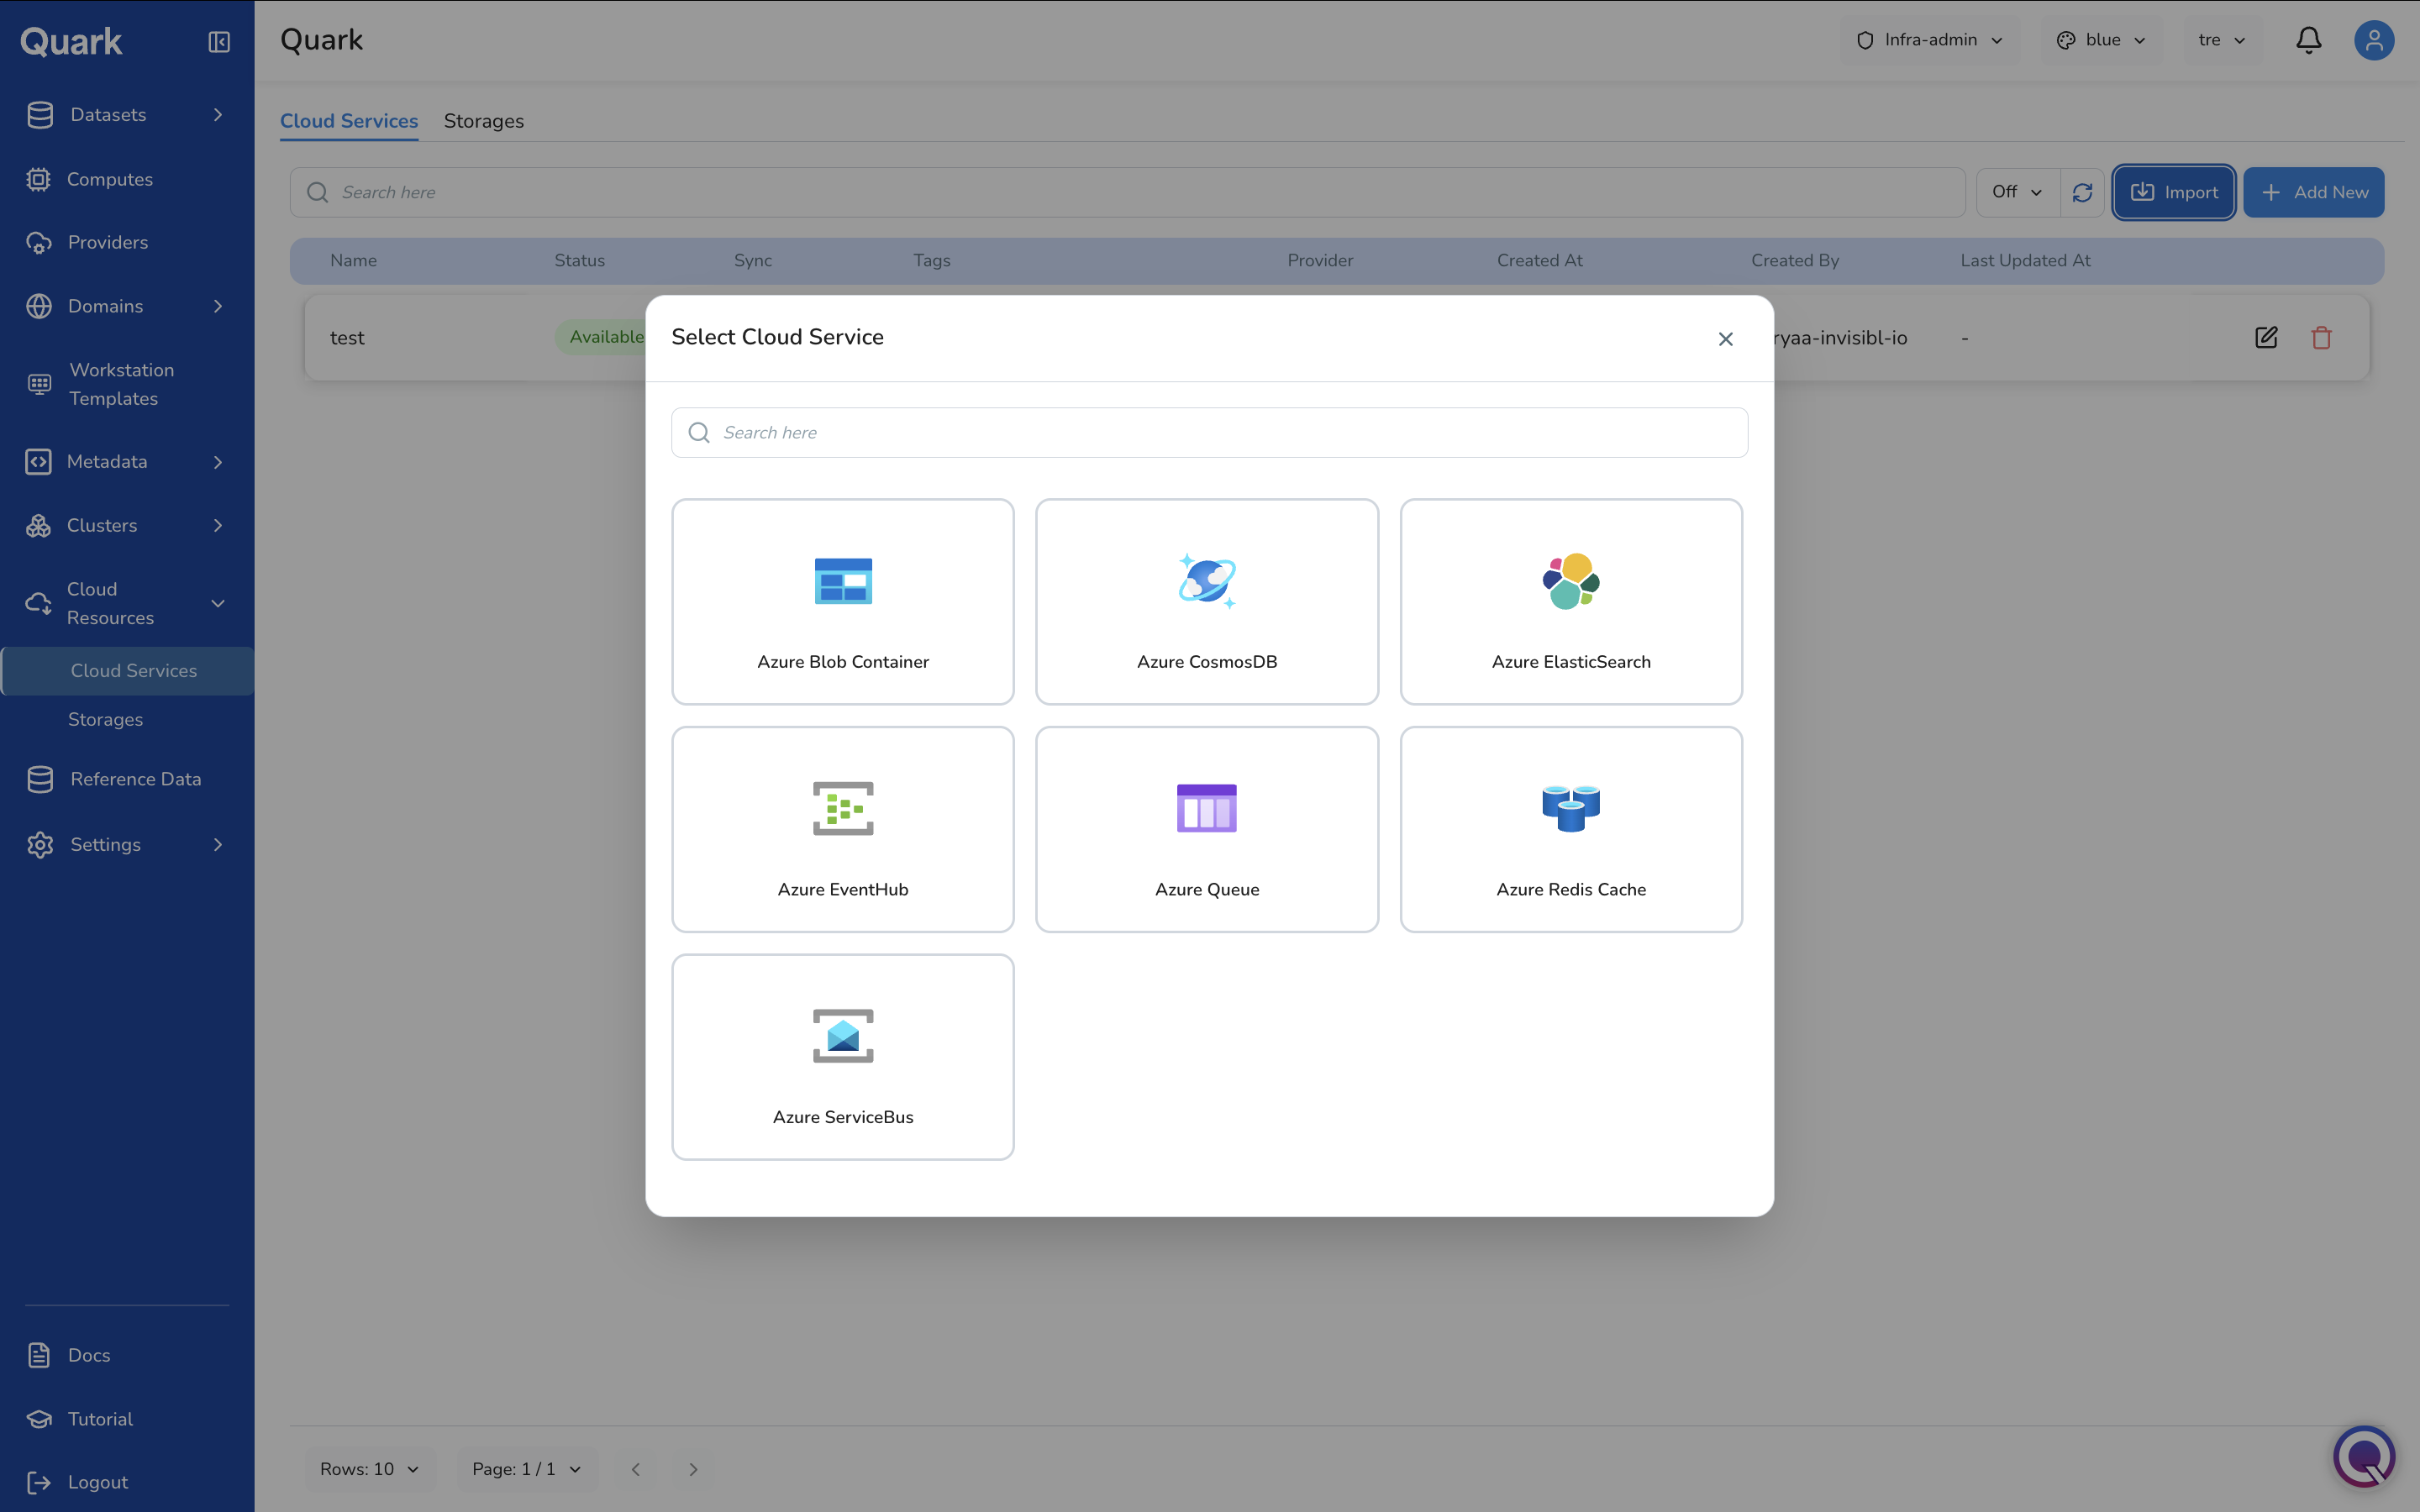
-
Select the appropriate service type. The wizard opens for that type.
The example below walks through importing an Azure CosmosDB service.
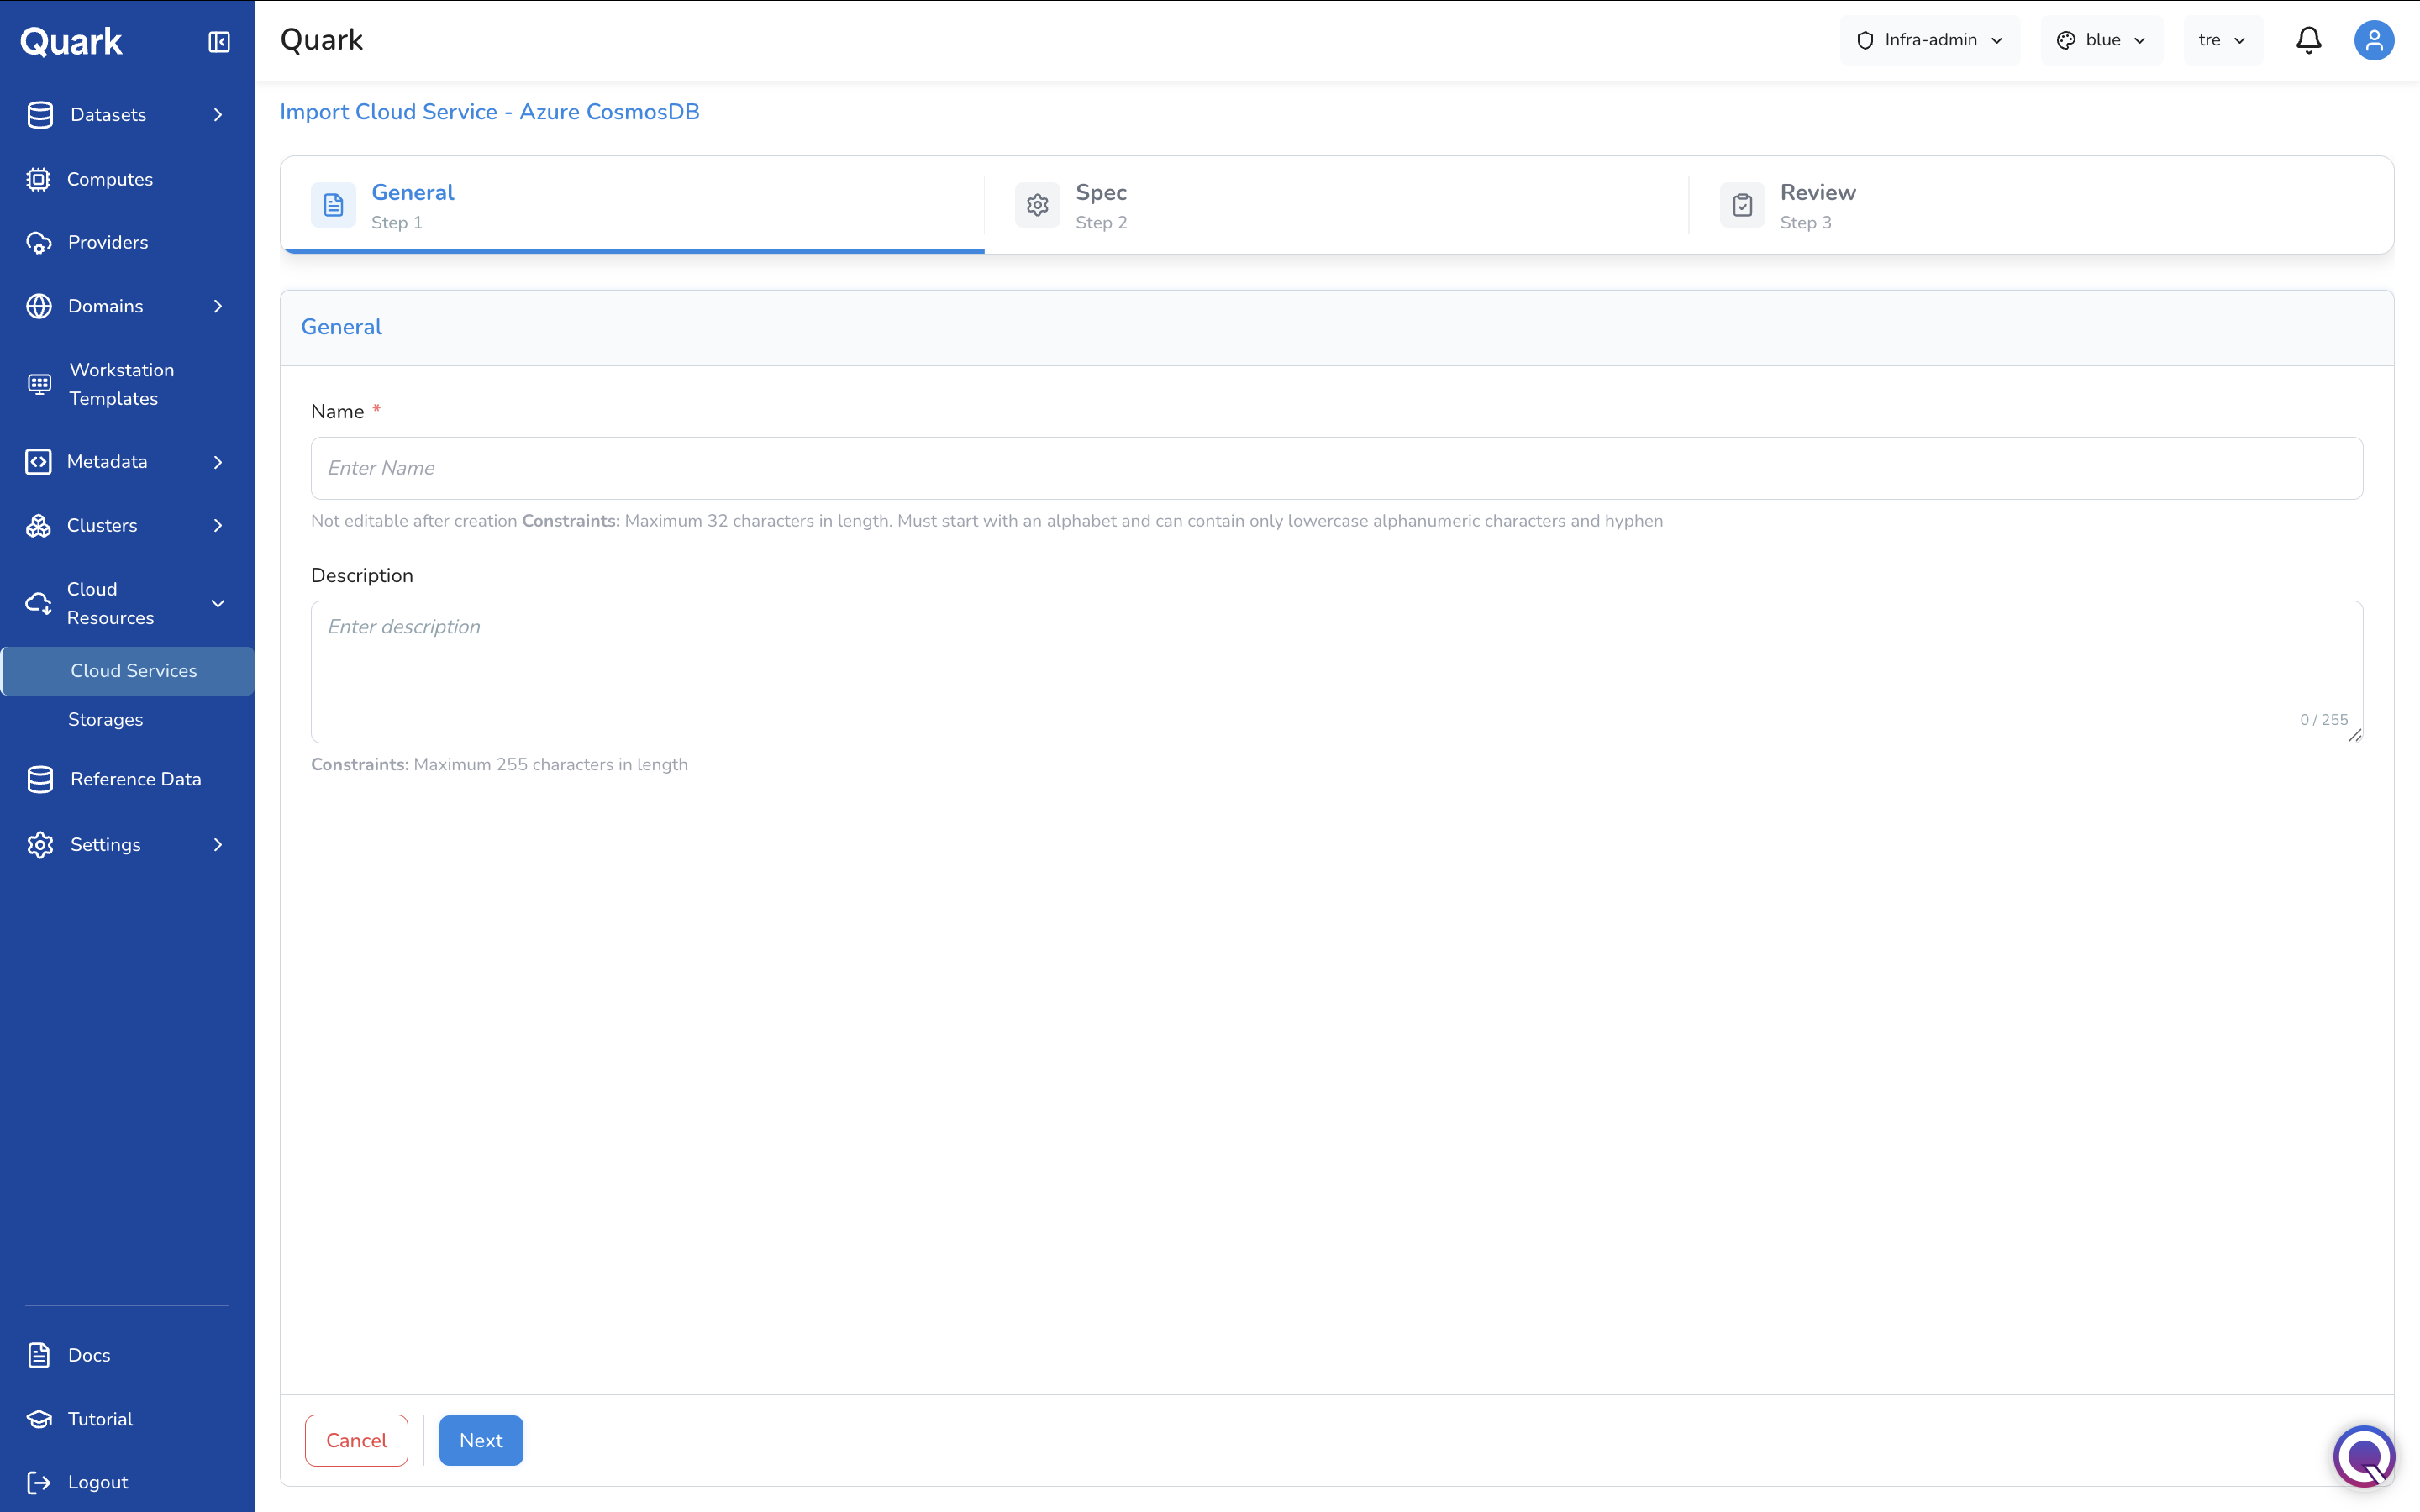
Step 1: General
| Field | Description |
|---|---|
| Name (mandatory) | A unique name for this cloud service on the platform. Maximum 32 characters. Must start with a letter and contain only lowercase alphanumeric characters and hyphens. Not editable after creation. |
| Description | An optional description of this service's purpose. Maximum 255 characters. |
Step 2: Spec
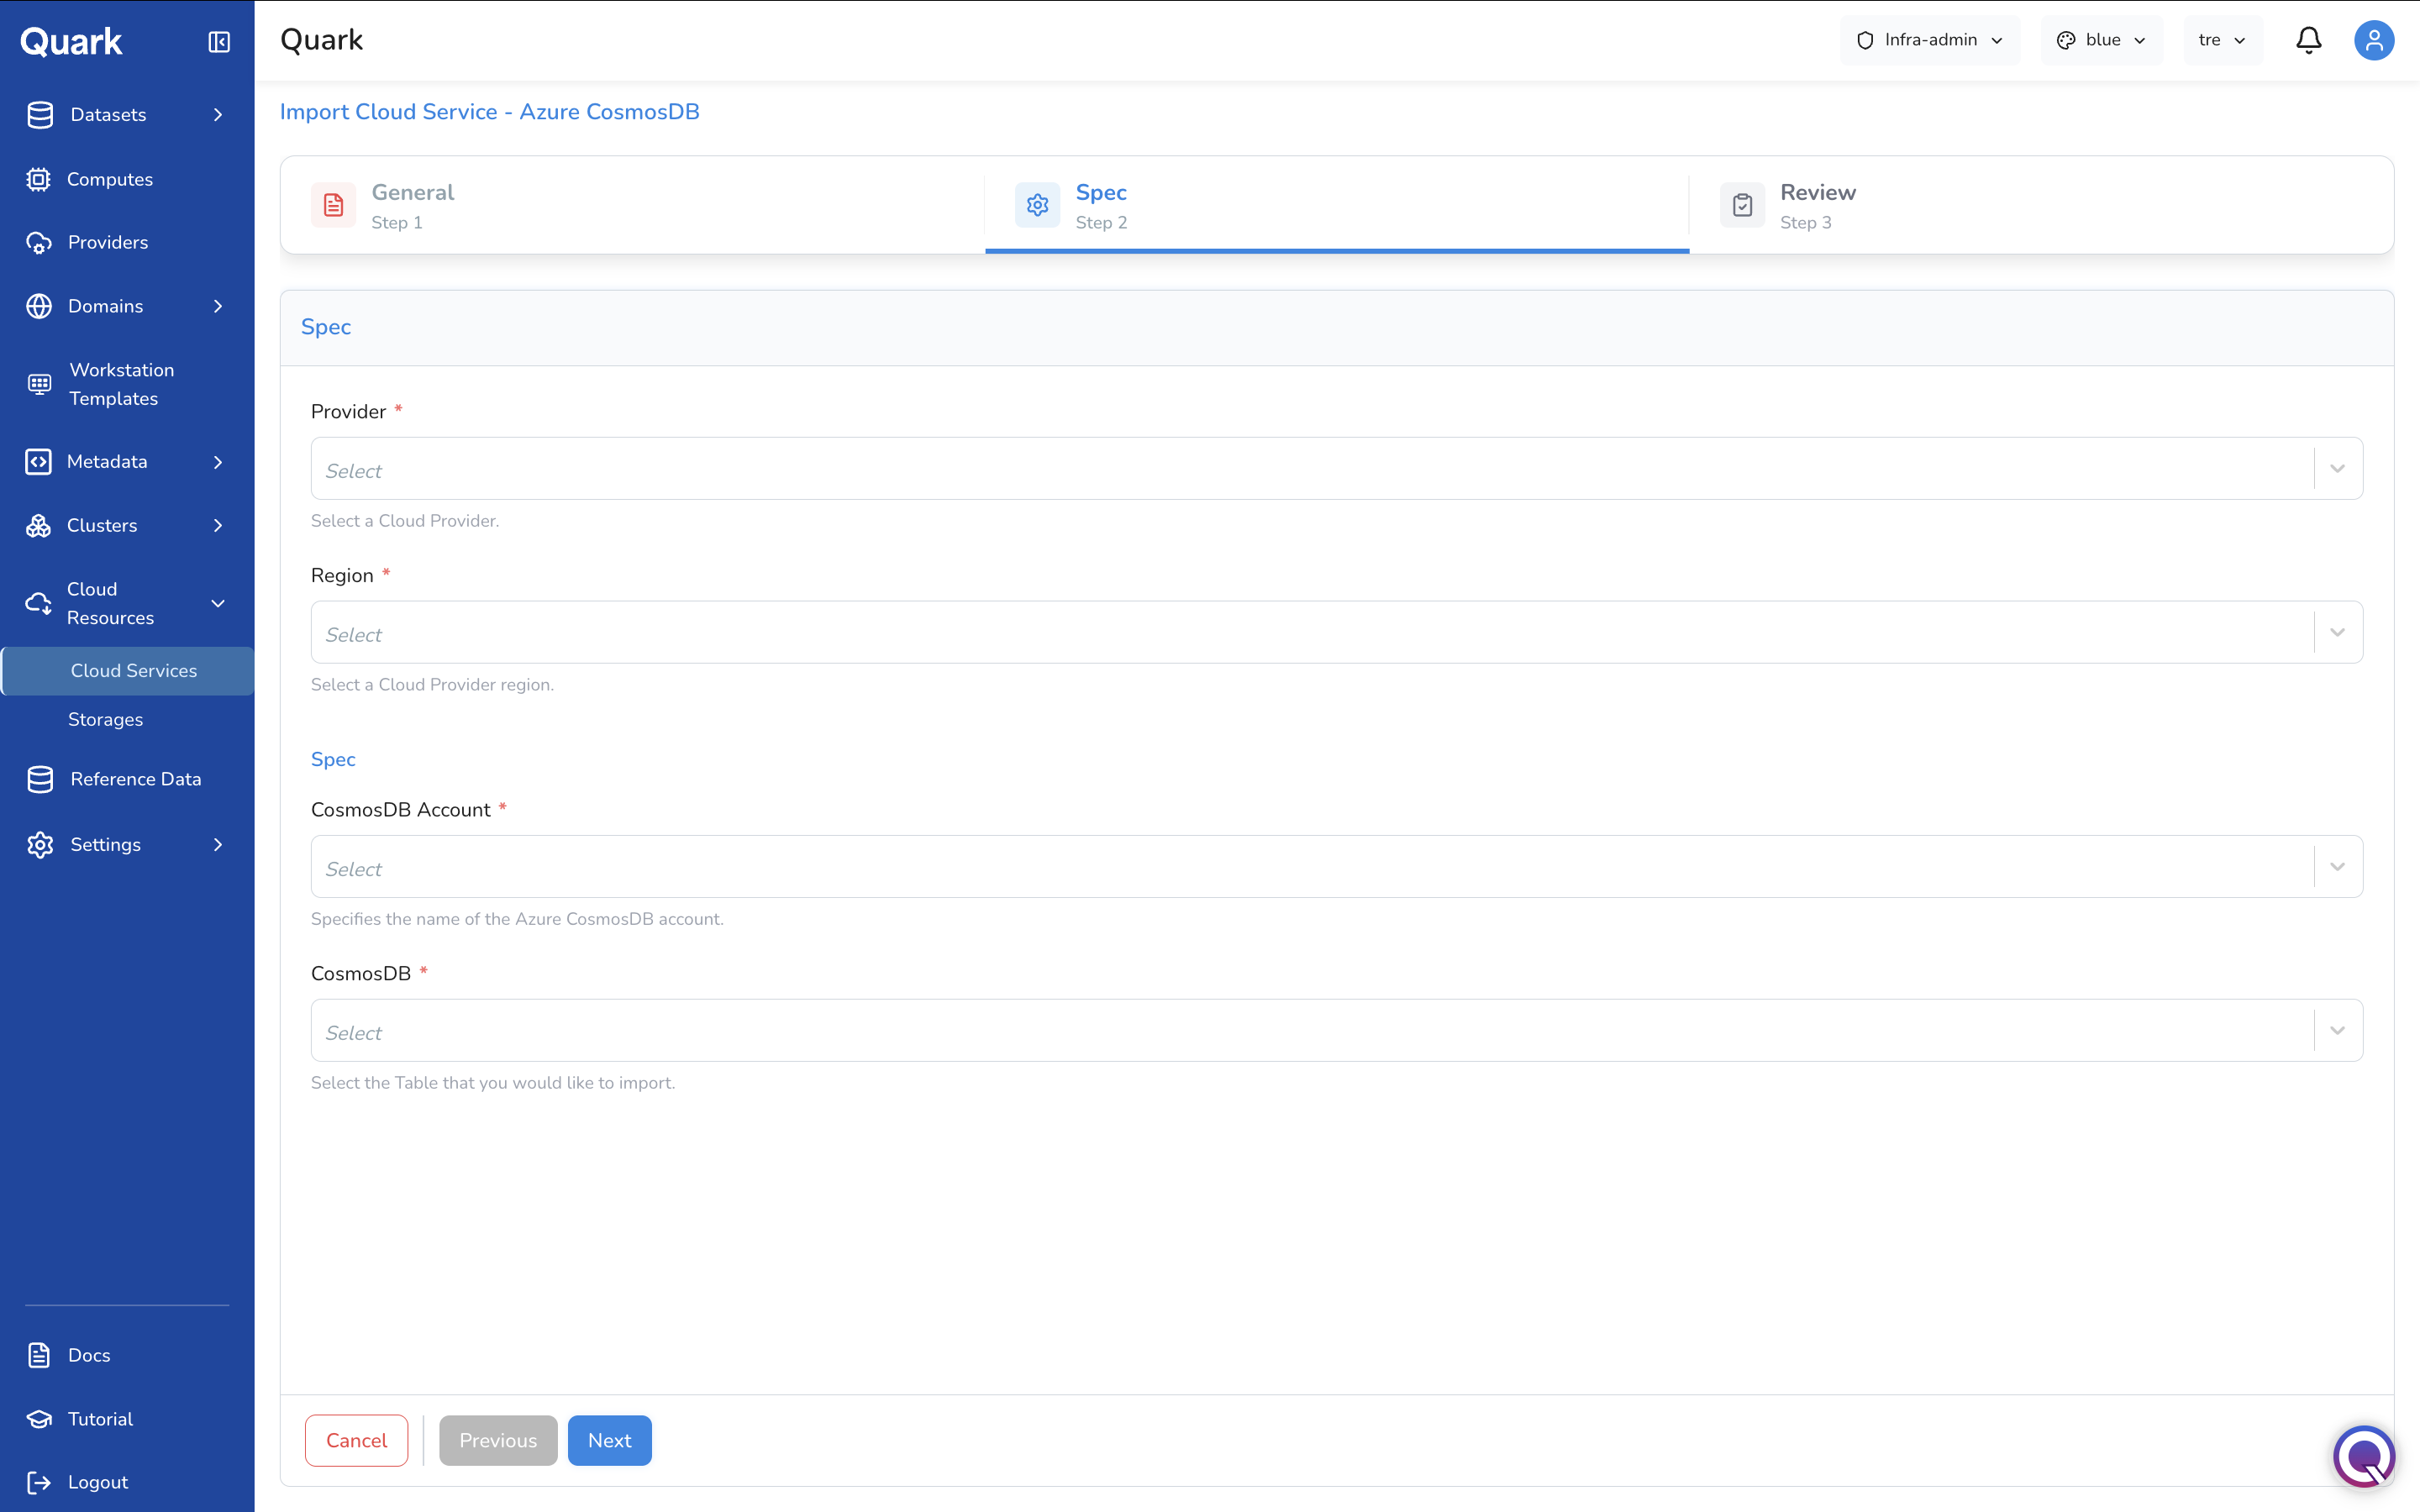
| Field | Description |
|---|---|
| Provider (mandatory) | The connected Azure cloud account where this CosmosDB instance is running. Select from the providers registered in Providers. |
| Region (mandatory) | The cloud region where the CosmosDB account is deployed. Only regions enabled for the selected provider are listed. |
| CosmosDB Account (mandatory) | The name of the existing Azure CosmosDB account to import. |
| CosmosDB (mandatory) | The specific table within the selected CosmosDB account to import. |
Step 3: Review
Review all configuration details, then click Create to register the imported service.
Creating a New Cloud Service
- Click + Add New in the toolbar.
-
The Select Cloud Service modal appears with the full catalogue of available service types. Use the Provider and Category filter dropdowns to narrow the list.
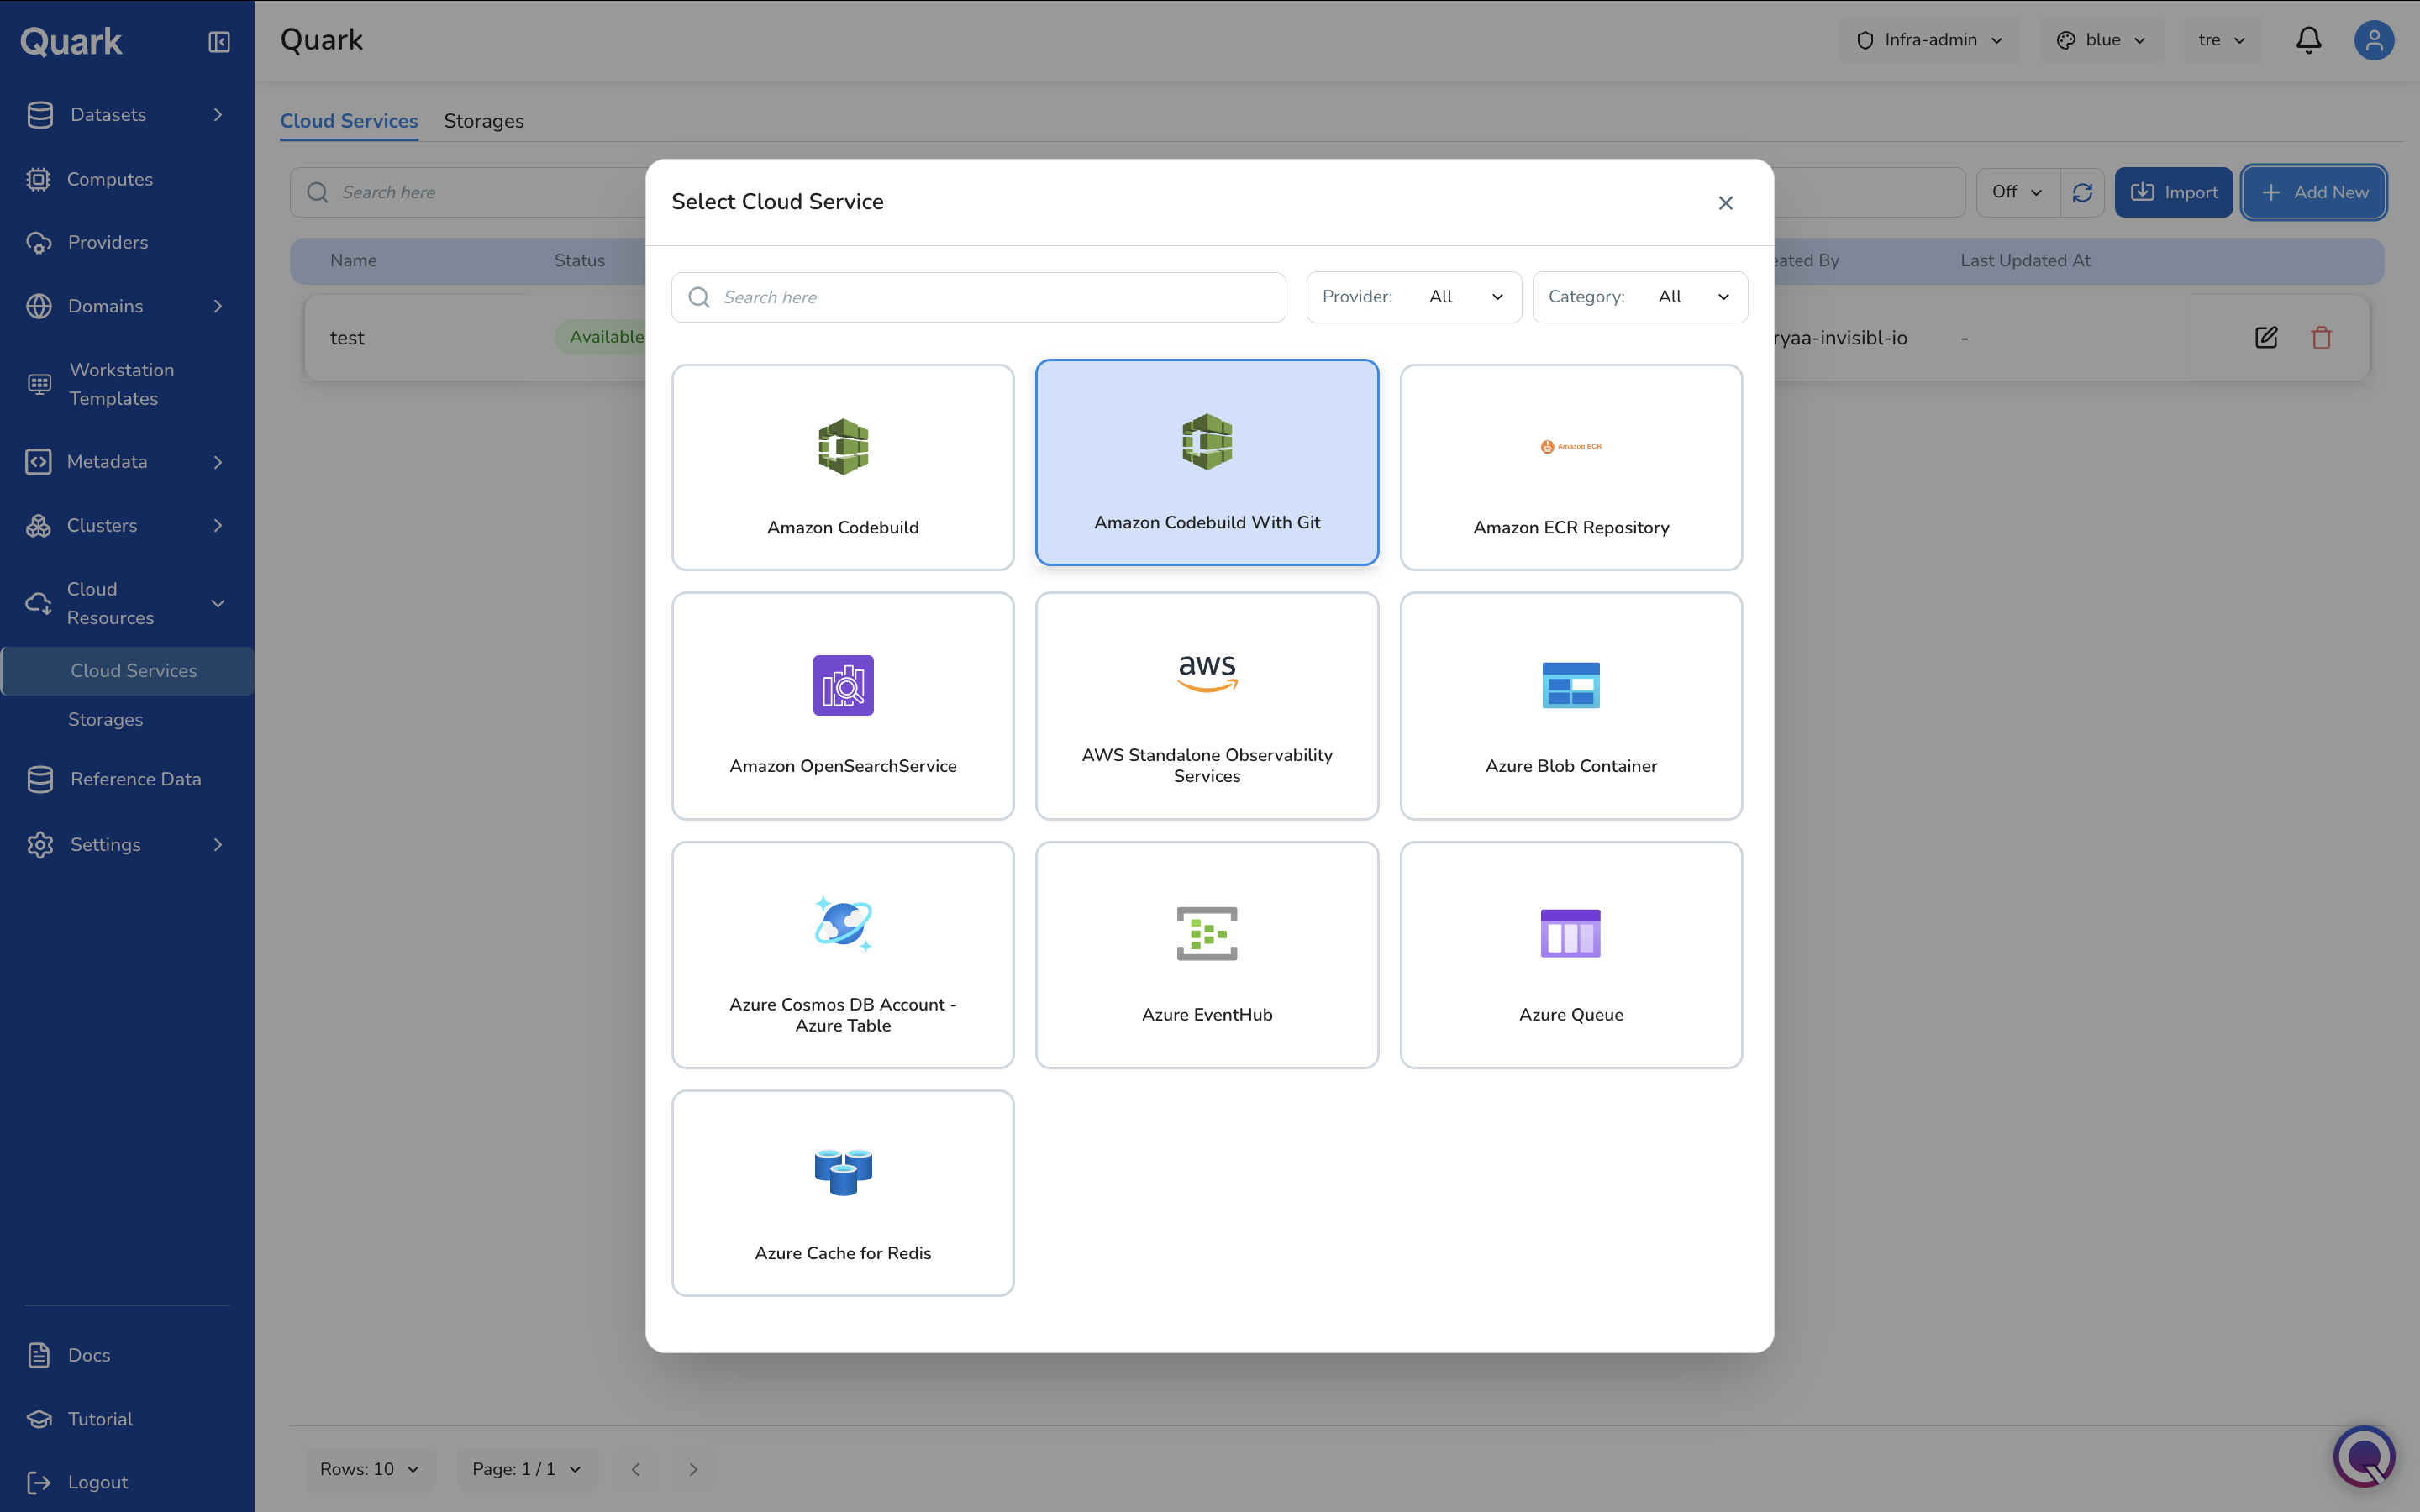
-
Select the desired service type. The wizard opens for that type.
The example below walks through creating an Amazon Codebuild With Git service.
Step 1: General

| Field | Description |
|---|---|
| Name (mandatory) | A unique name for this cloud service. Same constraints as above. |
| Description | An optional description. Maximum 255 characters. |
Step 2: Spec
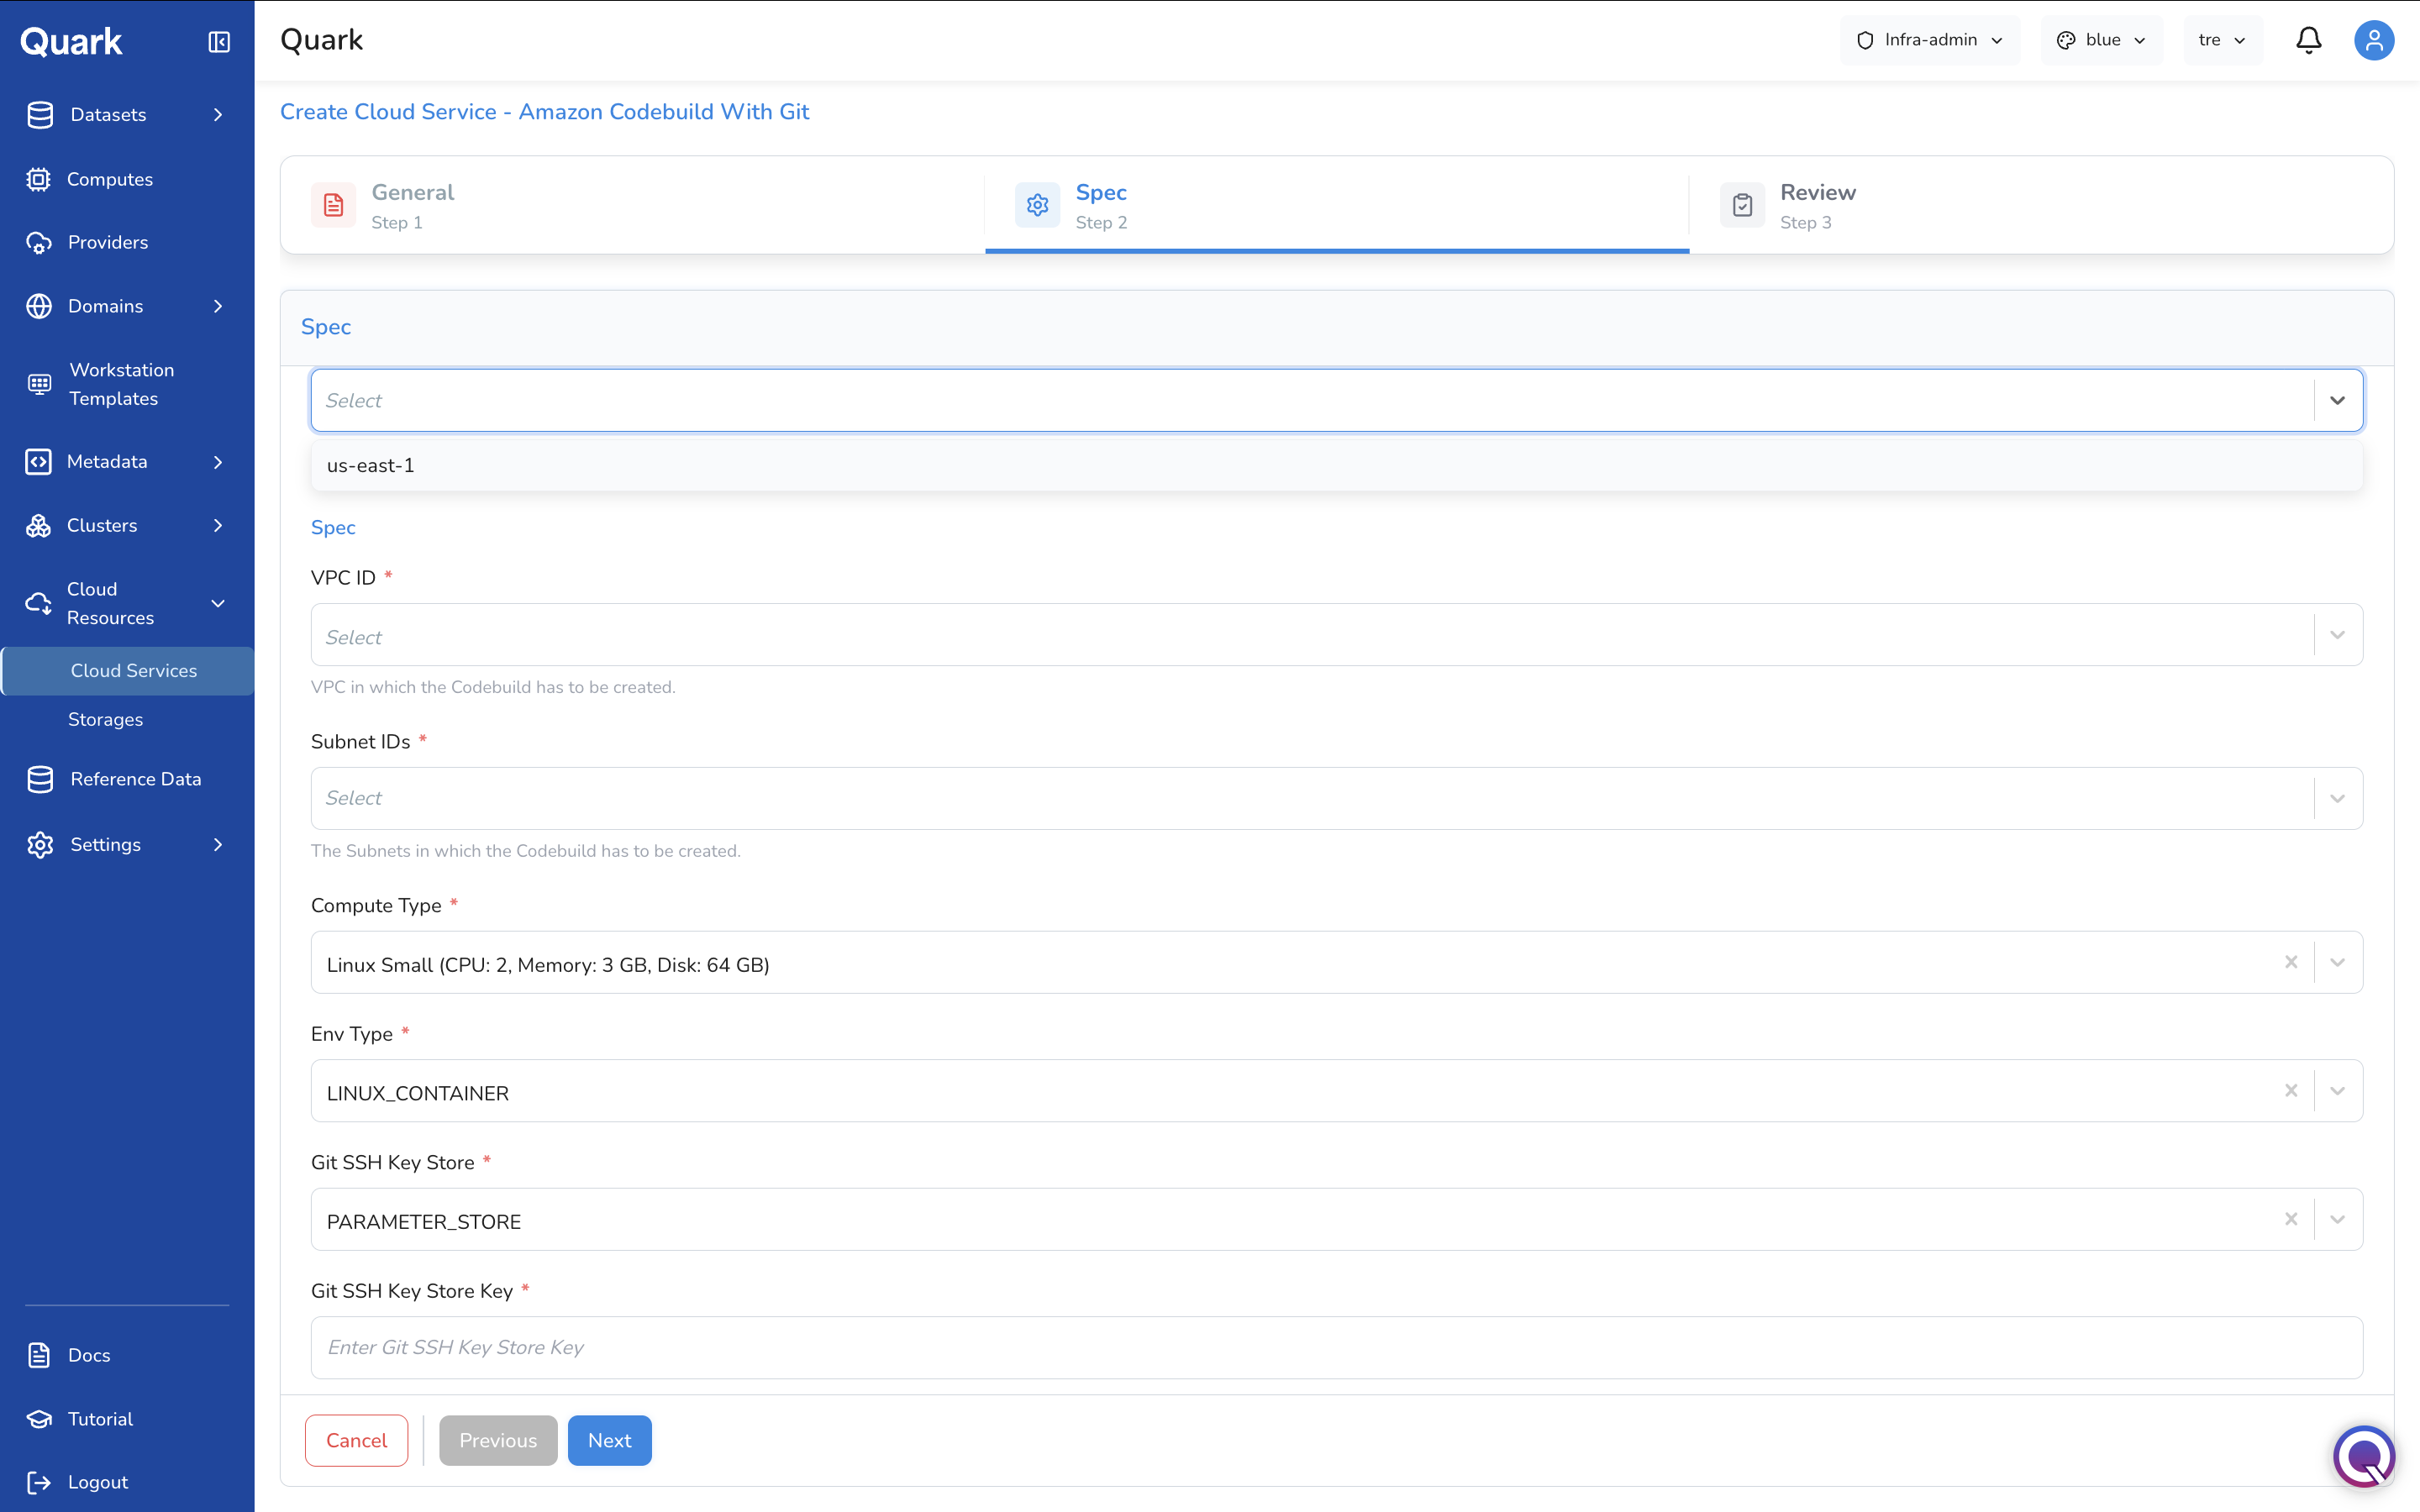
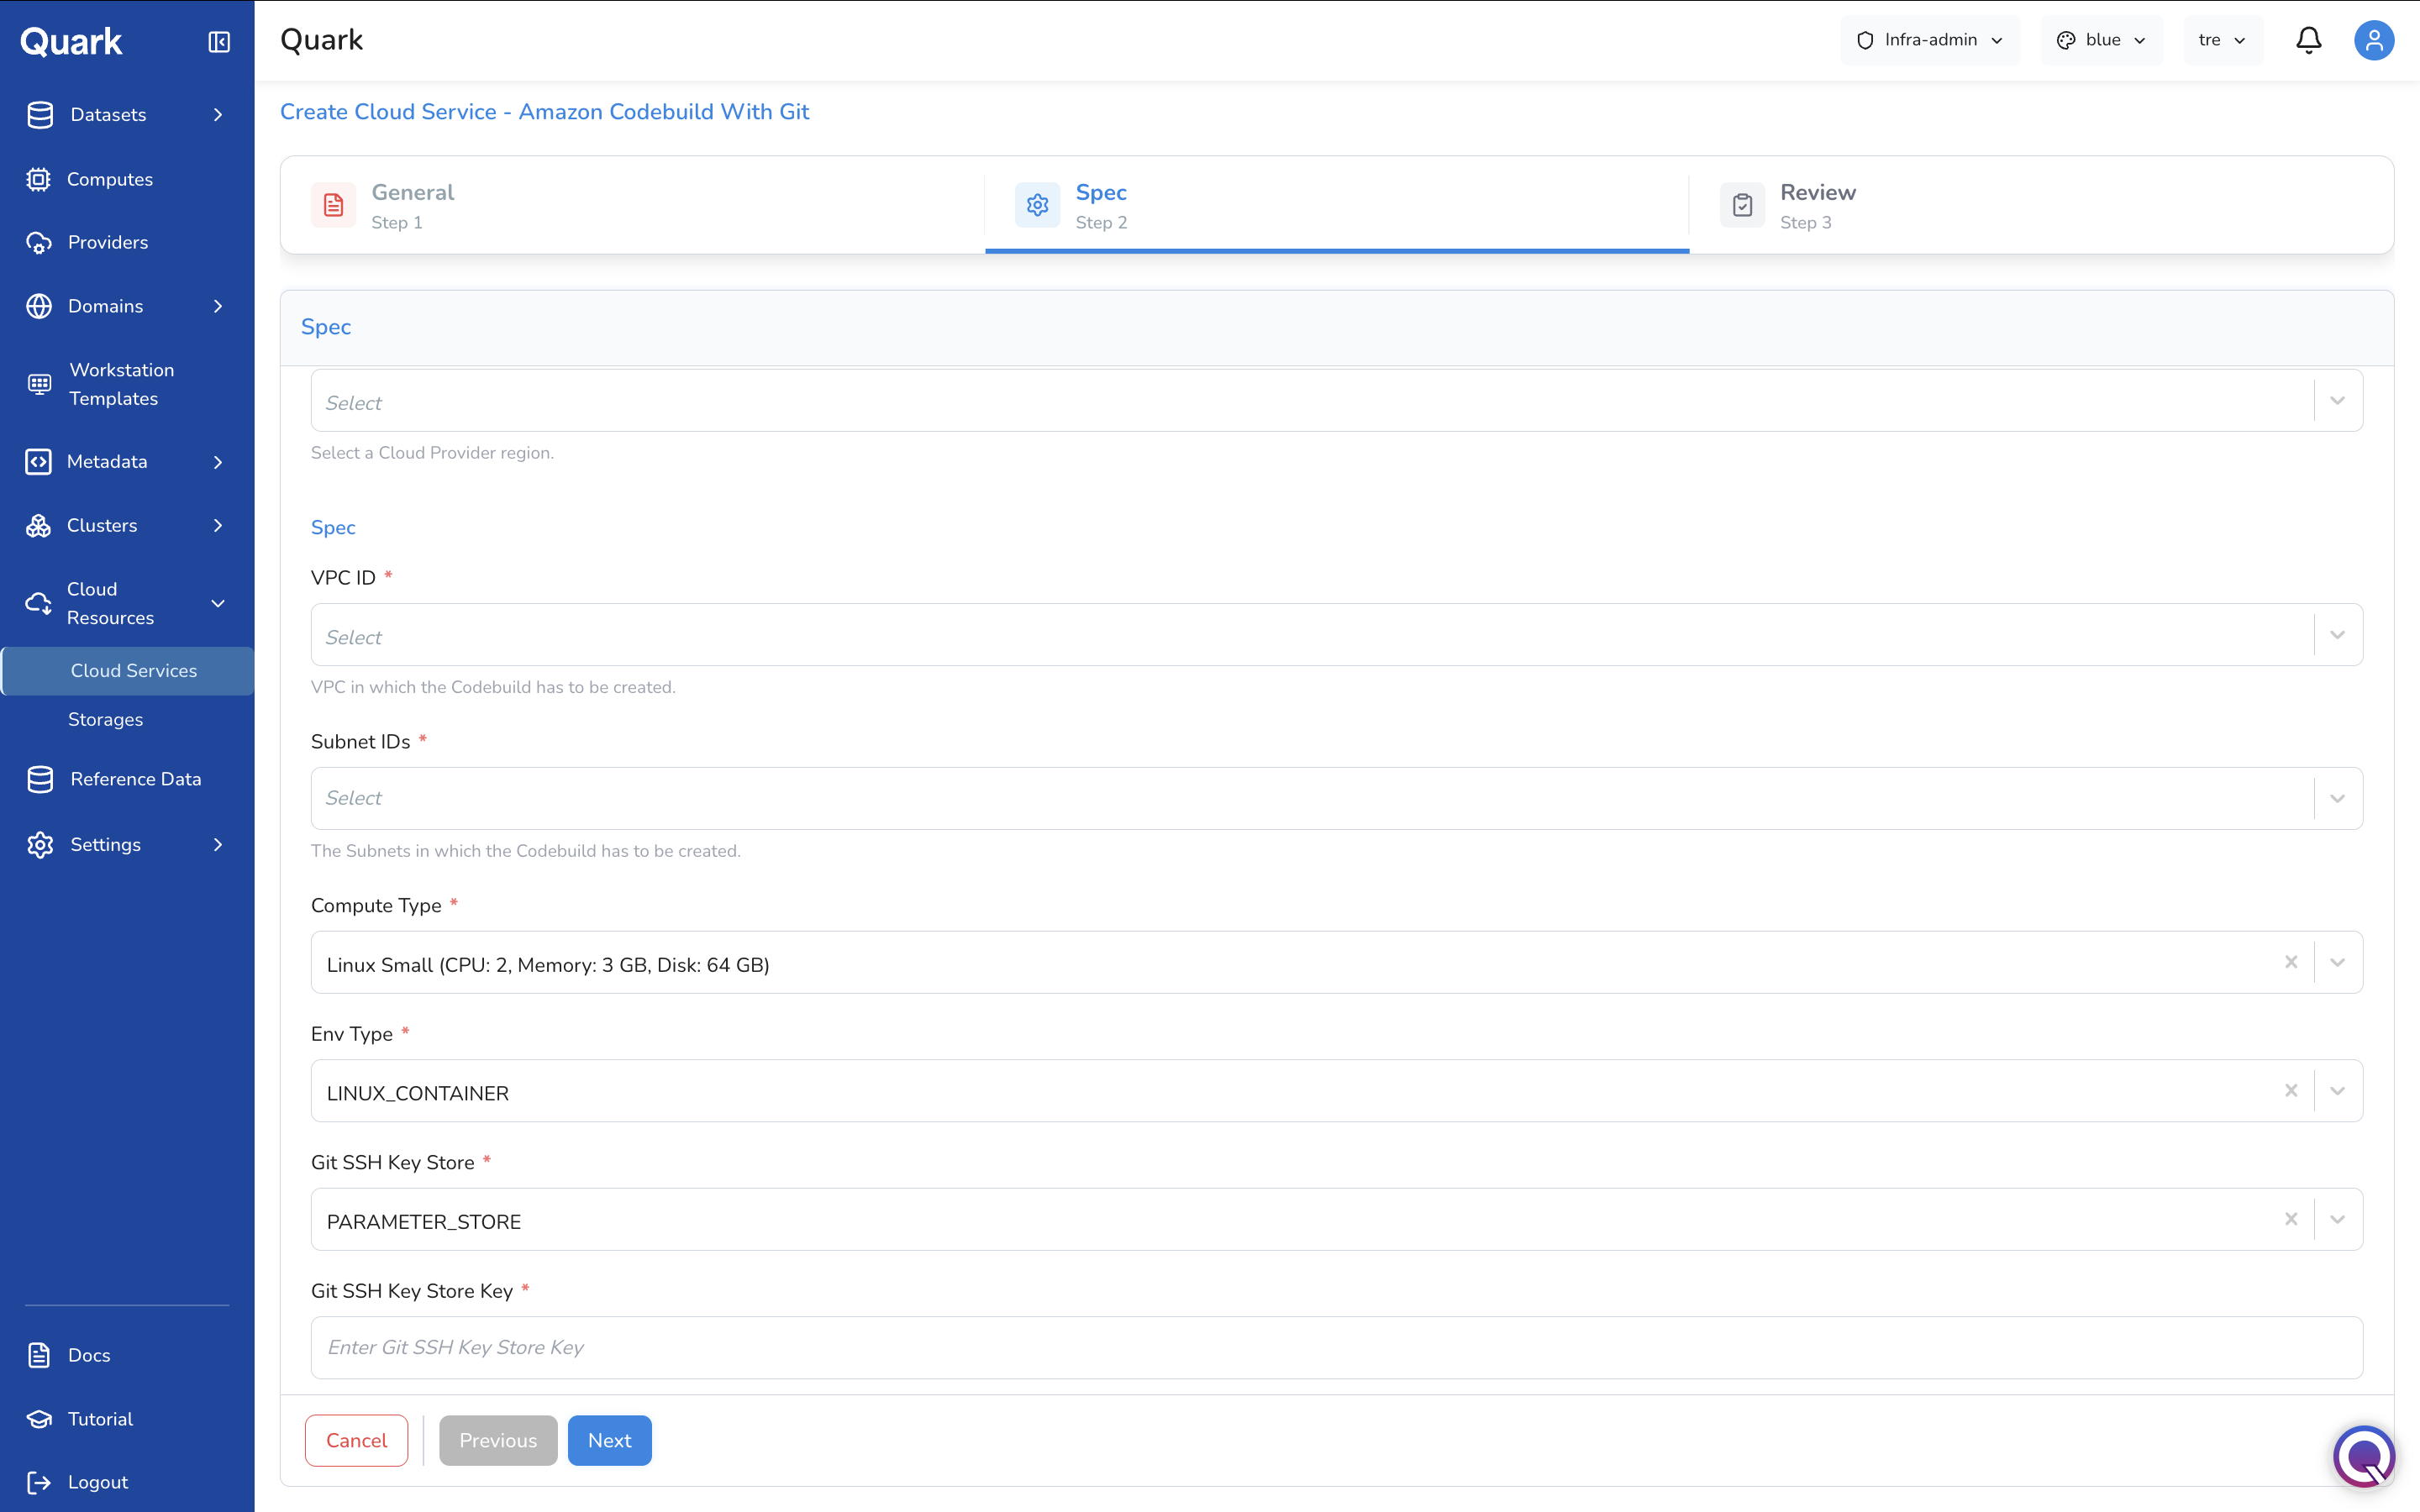
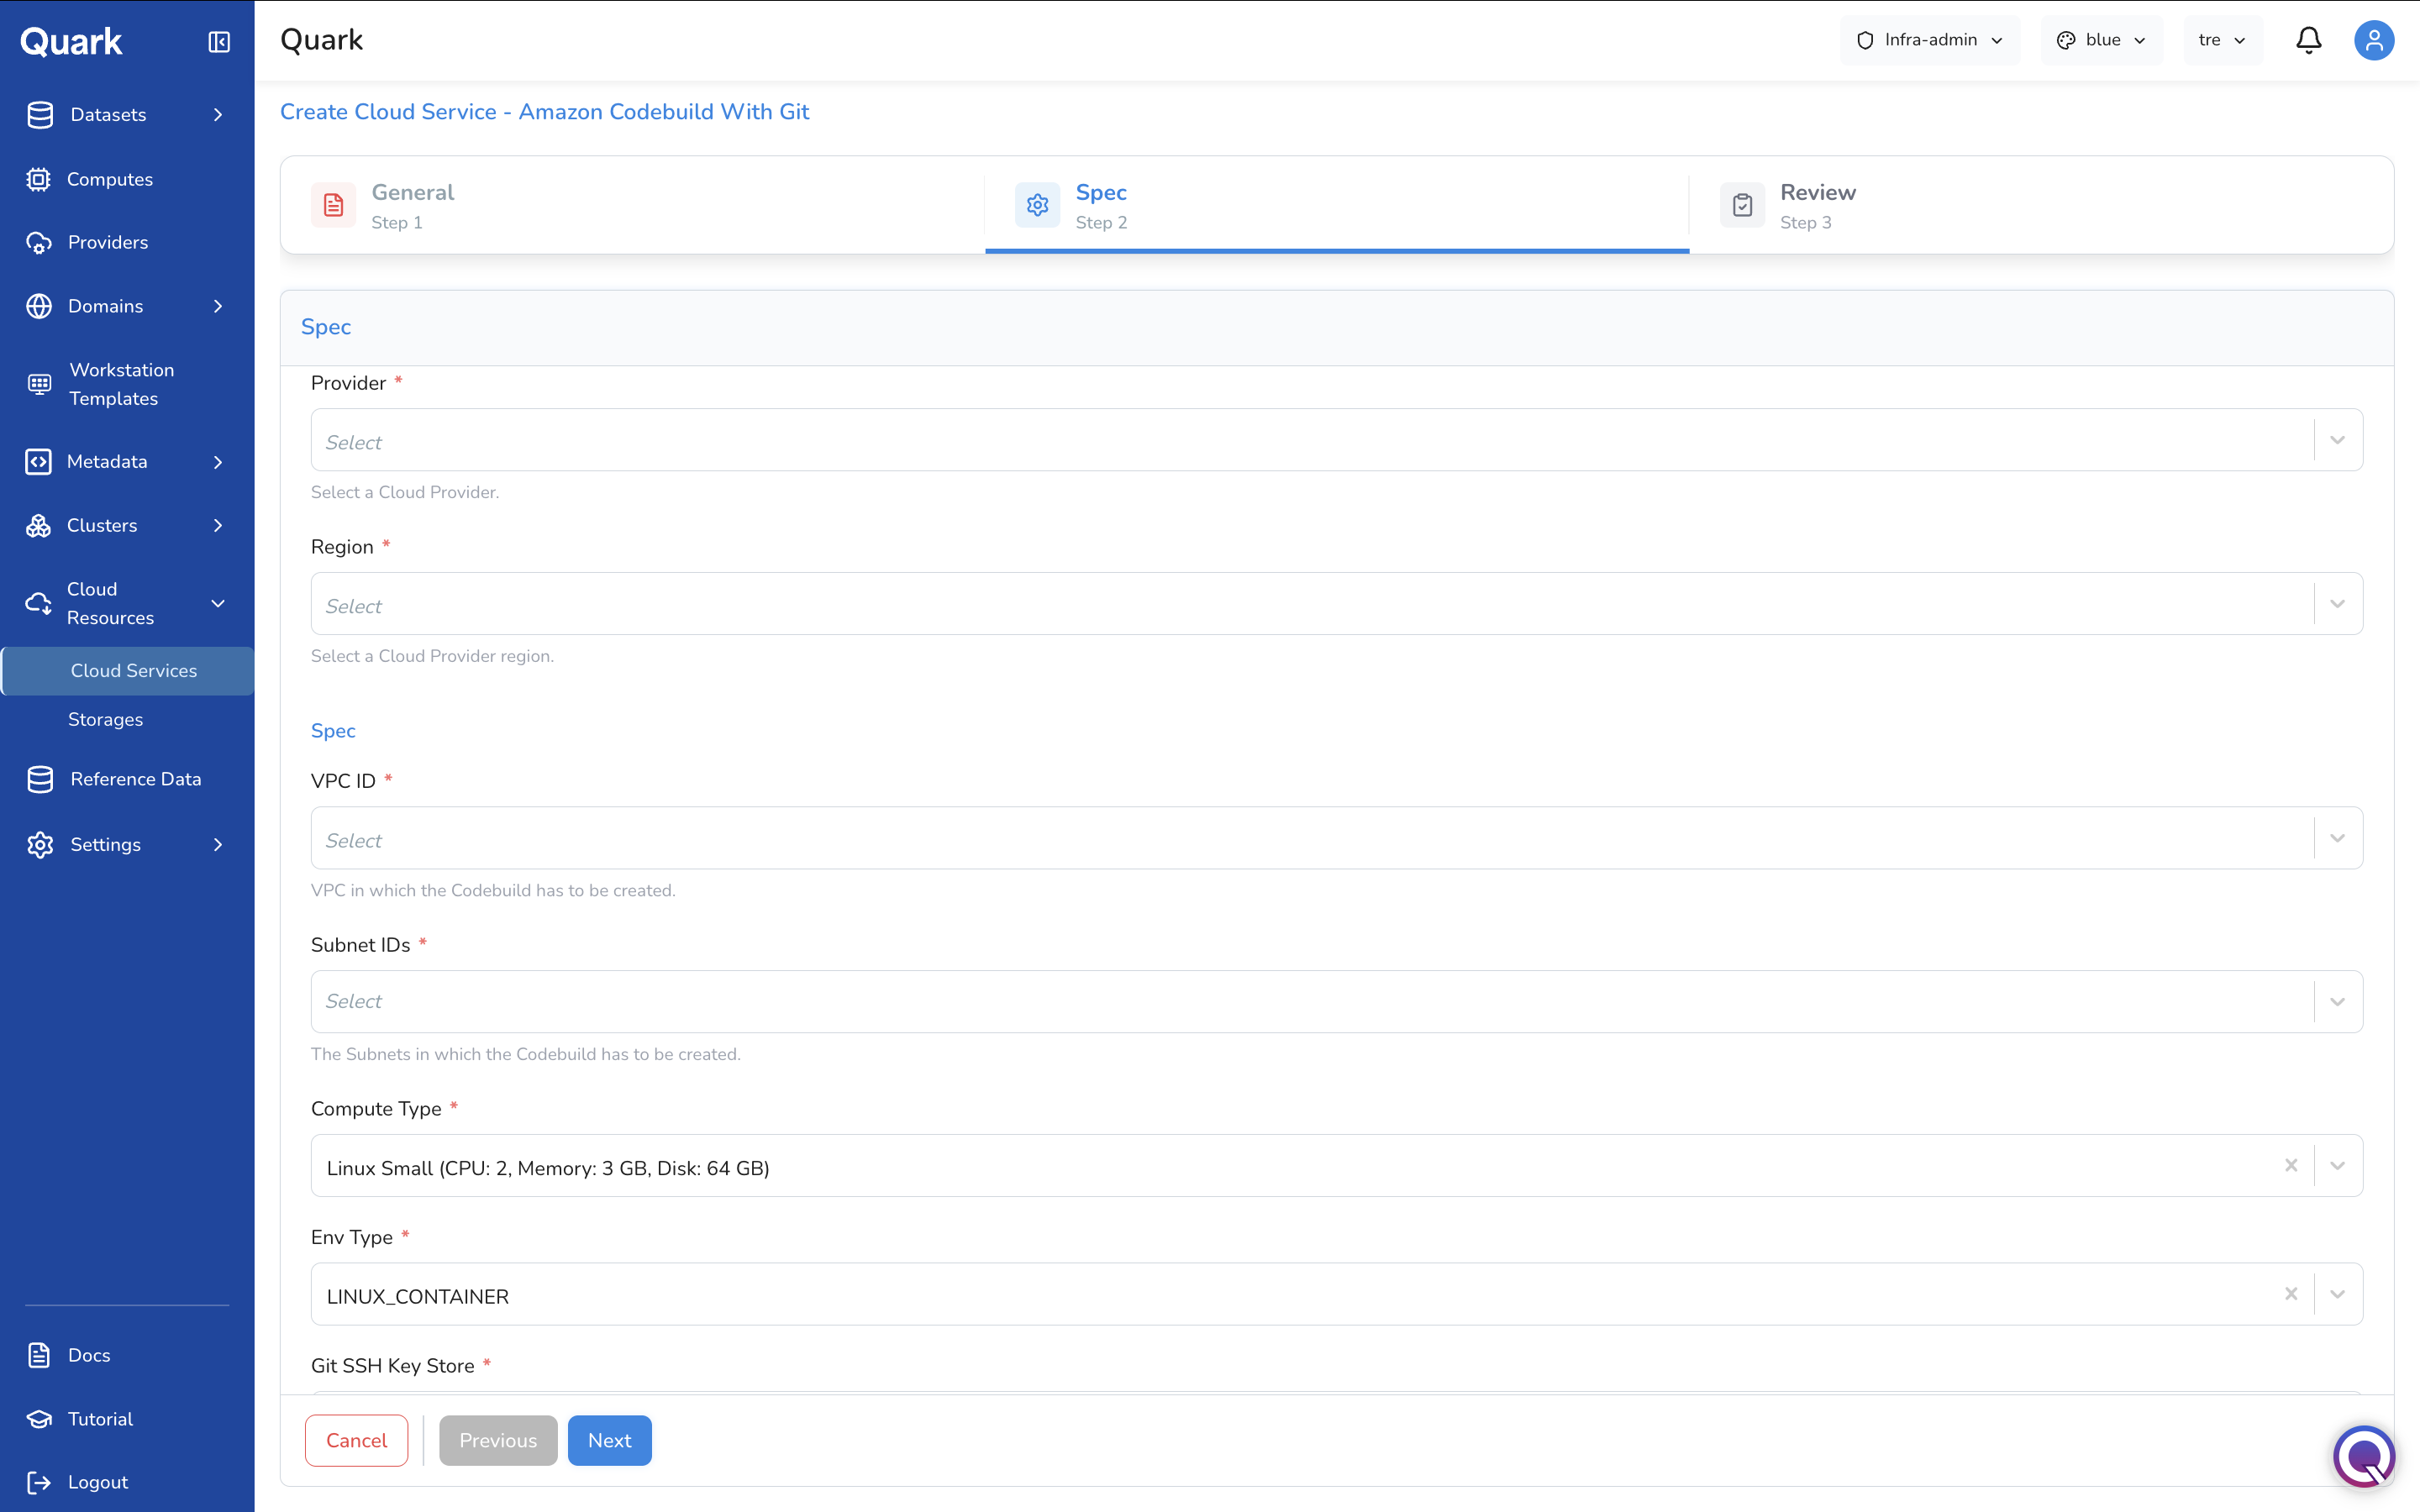
| Field | Description |
|---|---|
| Provider (mandatory) | The connected AWS cloud account where this CodeBuild project will be created. |
| Region (mandatory) | The AWS region in which to create the CodeBuild project. Only regions enabled for the selected provider are listed. |
| VPC ID (mandatory) | The VPC in which the CodeBuild project will be created. |
| Subnet IDs (mandatory) | The subnets within the selected VPC where CodeBuild will run. |
| Compute Type (mandatory) | The compute size for CodeBuild build environments (e.g., Linux Small (CPU: 2, Memory: 3 GB, Disk: 64 GB)). |
| Env Type (mandatory) | The build environment type (e.g., LINUX_CONTAINER). |
| Git SSH Key Store (mandatory) | The AWS service used to store the SSH key for Git access (e.g., PARAMETER_STORE). |
| Git SSH Key Store Key (mandatory) | The key name or path in the selected store where the SSH private key is stored. |
Step 3: Review
Review all configuration details, then click Create to provision the service.
Storages Tab
The Storages List
The Storages tab lists all storage backends connected to the platform. Each row shows:
| Column | Description |
|---|---|
| Name | The unique name assigned to this storage at registration time. |
| Status | Whether the storage is currently Available or in an error state. |
| Sync | The result of the last synchronisation with the cloud provider. |
| Tags | Labels showing the storage type. |
| Provider | The connected cloud account this storage belongs to. |
| Region | The cloud region where the storage is deployed. |
| Created At | The date and time this storage was registered. |
| Created By | The user who registered it. |
| Last Updated At | The date and time the storage was most recently modified. |
Each row has Edit and Delete actions, matching the Cloud Services tab.
Import vs Add New
The same distinction applies as in Cloud Services:
- Import — Registers an existing storage bucket or file system from your cloud account. Use for storage that already exists and needs to be made available to platform workloads.
- Add New — Provisions a new storage resource in your cloud account. Use when the platform needs to create and manage the storage.
The Import and Add New modals show different sets of storage types — the Import modal shows existing cloud-managed options, while the Add New modal includes provisioned storage types such as Google Filestore.
Importing a Storage
- Click Import in the toolbar.
-
The Select Storage modal appears with available import types.
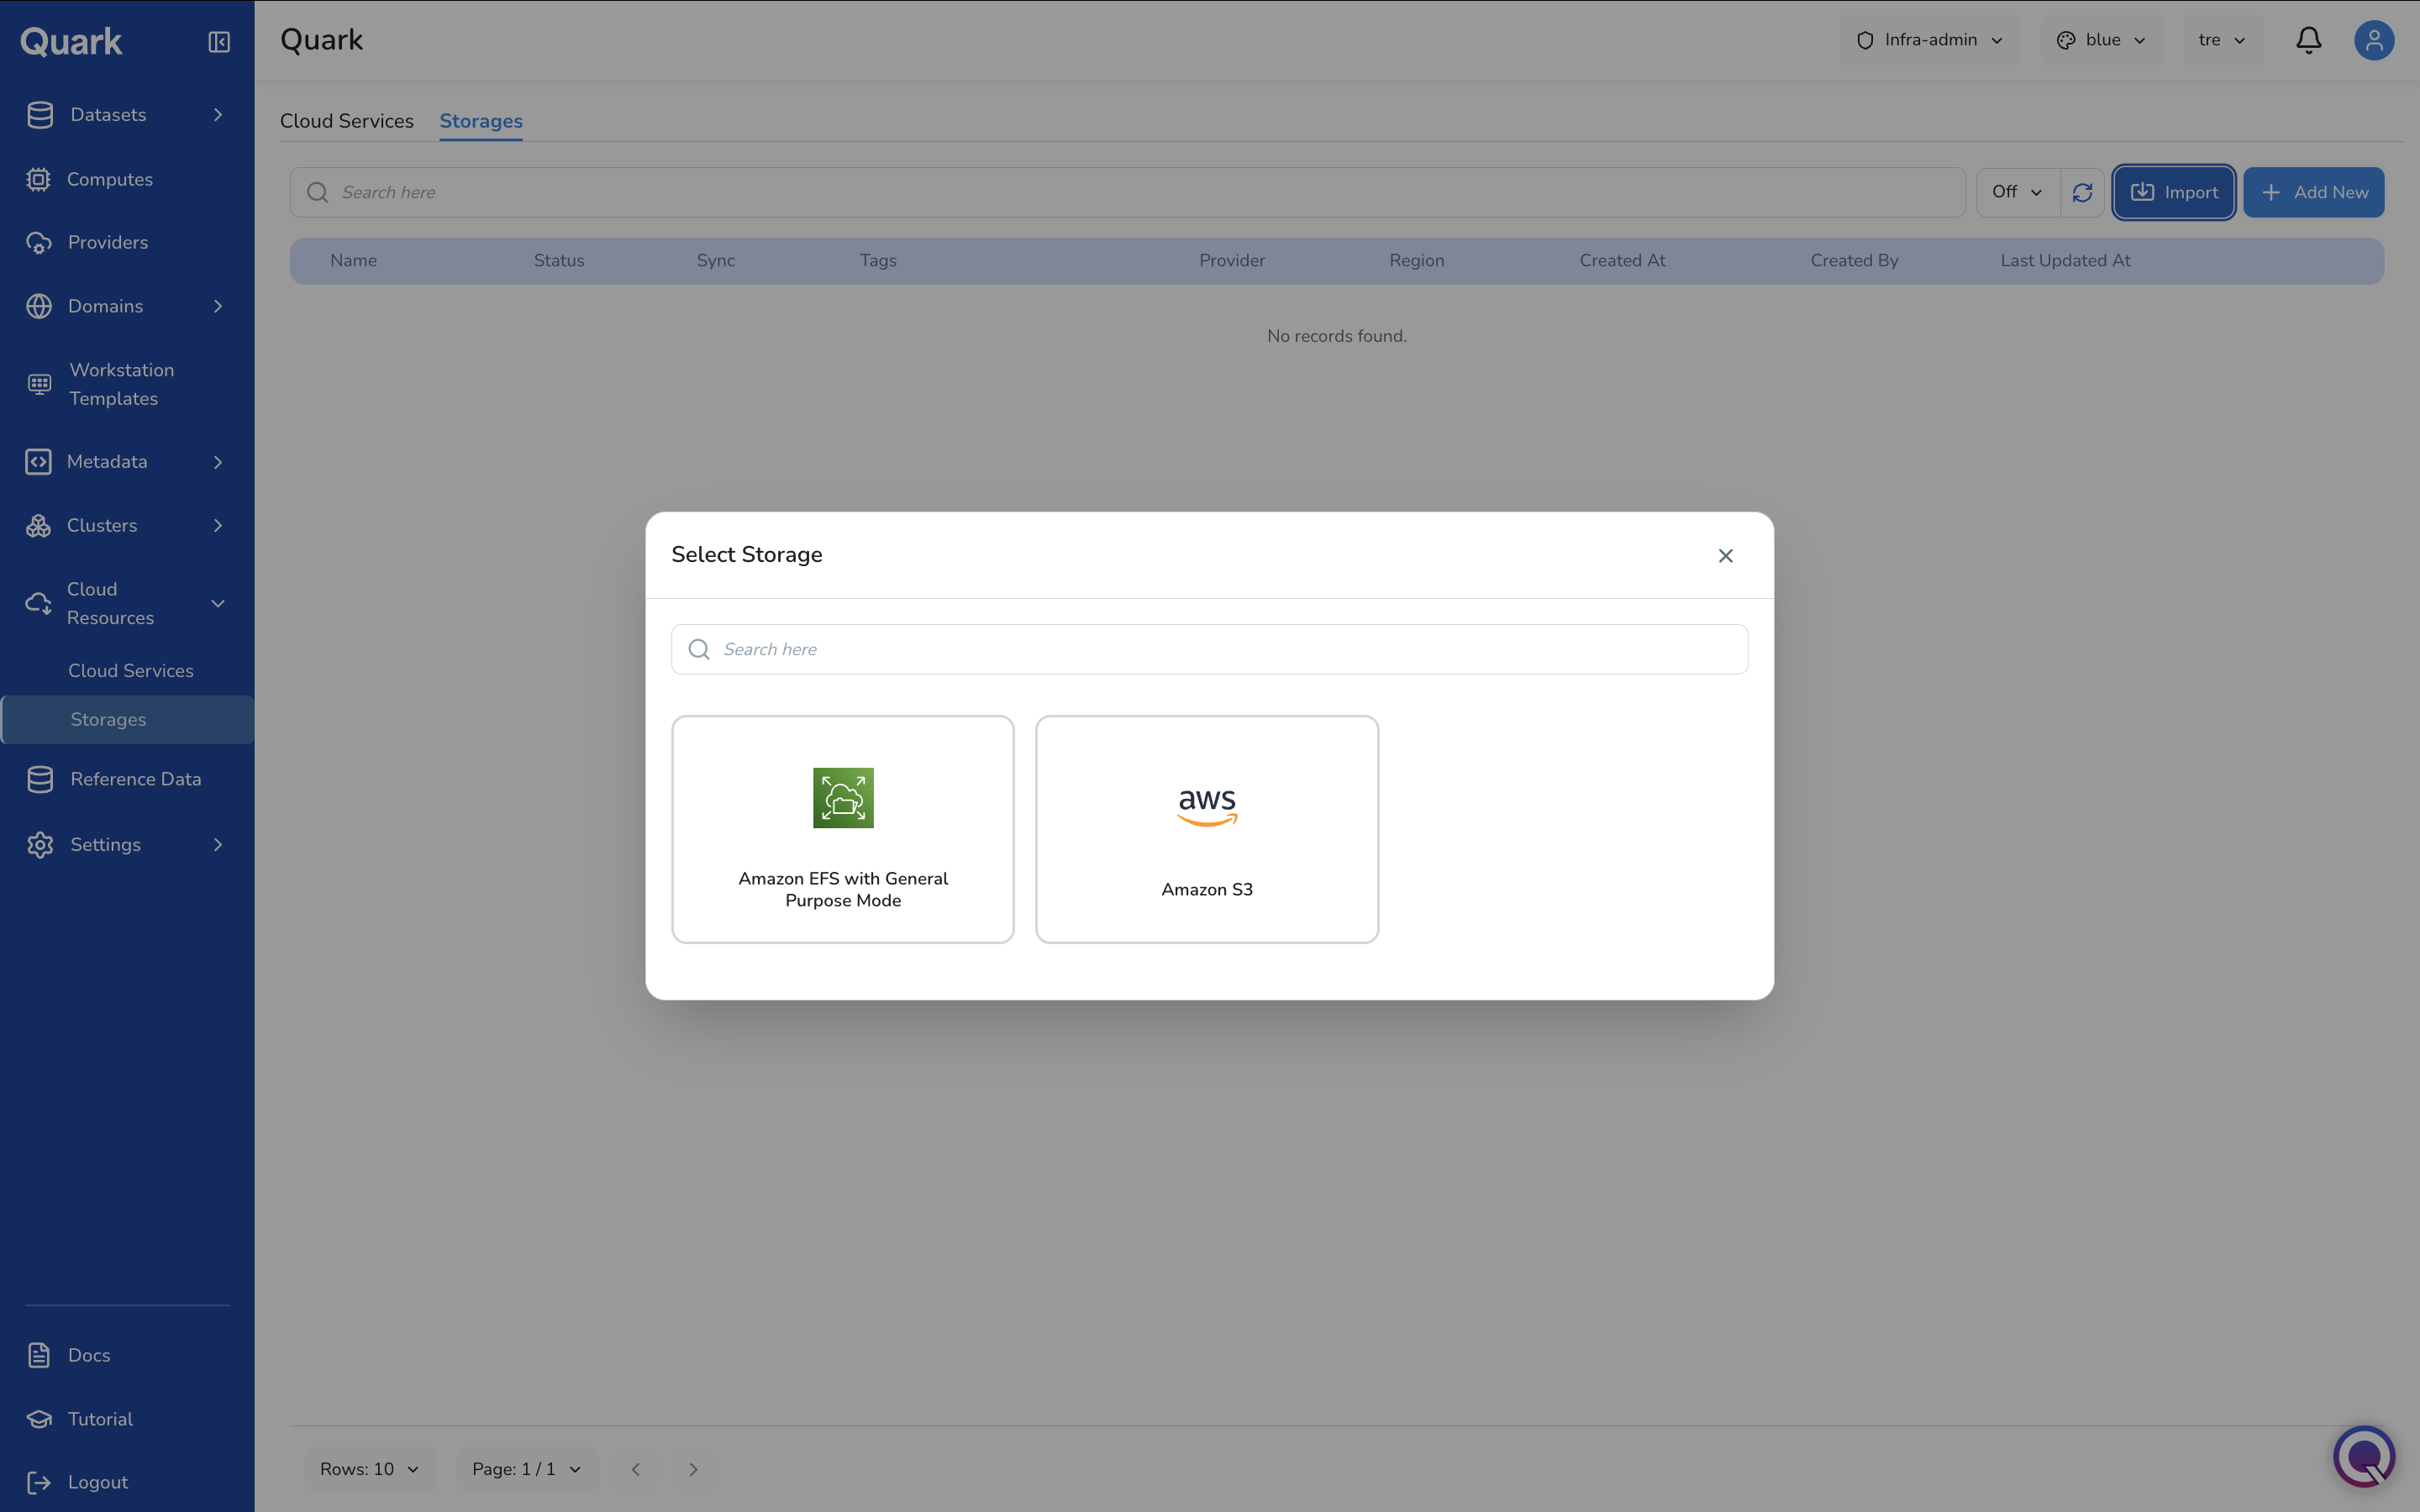
-
Select the desired storage type. The wizard opens for that type.
The example below walks through importing an Amazon S3 bucket.
Step 1: General
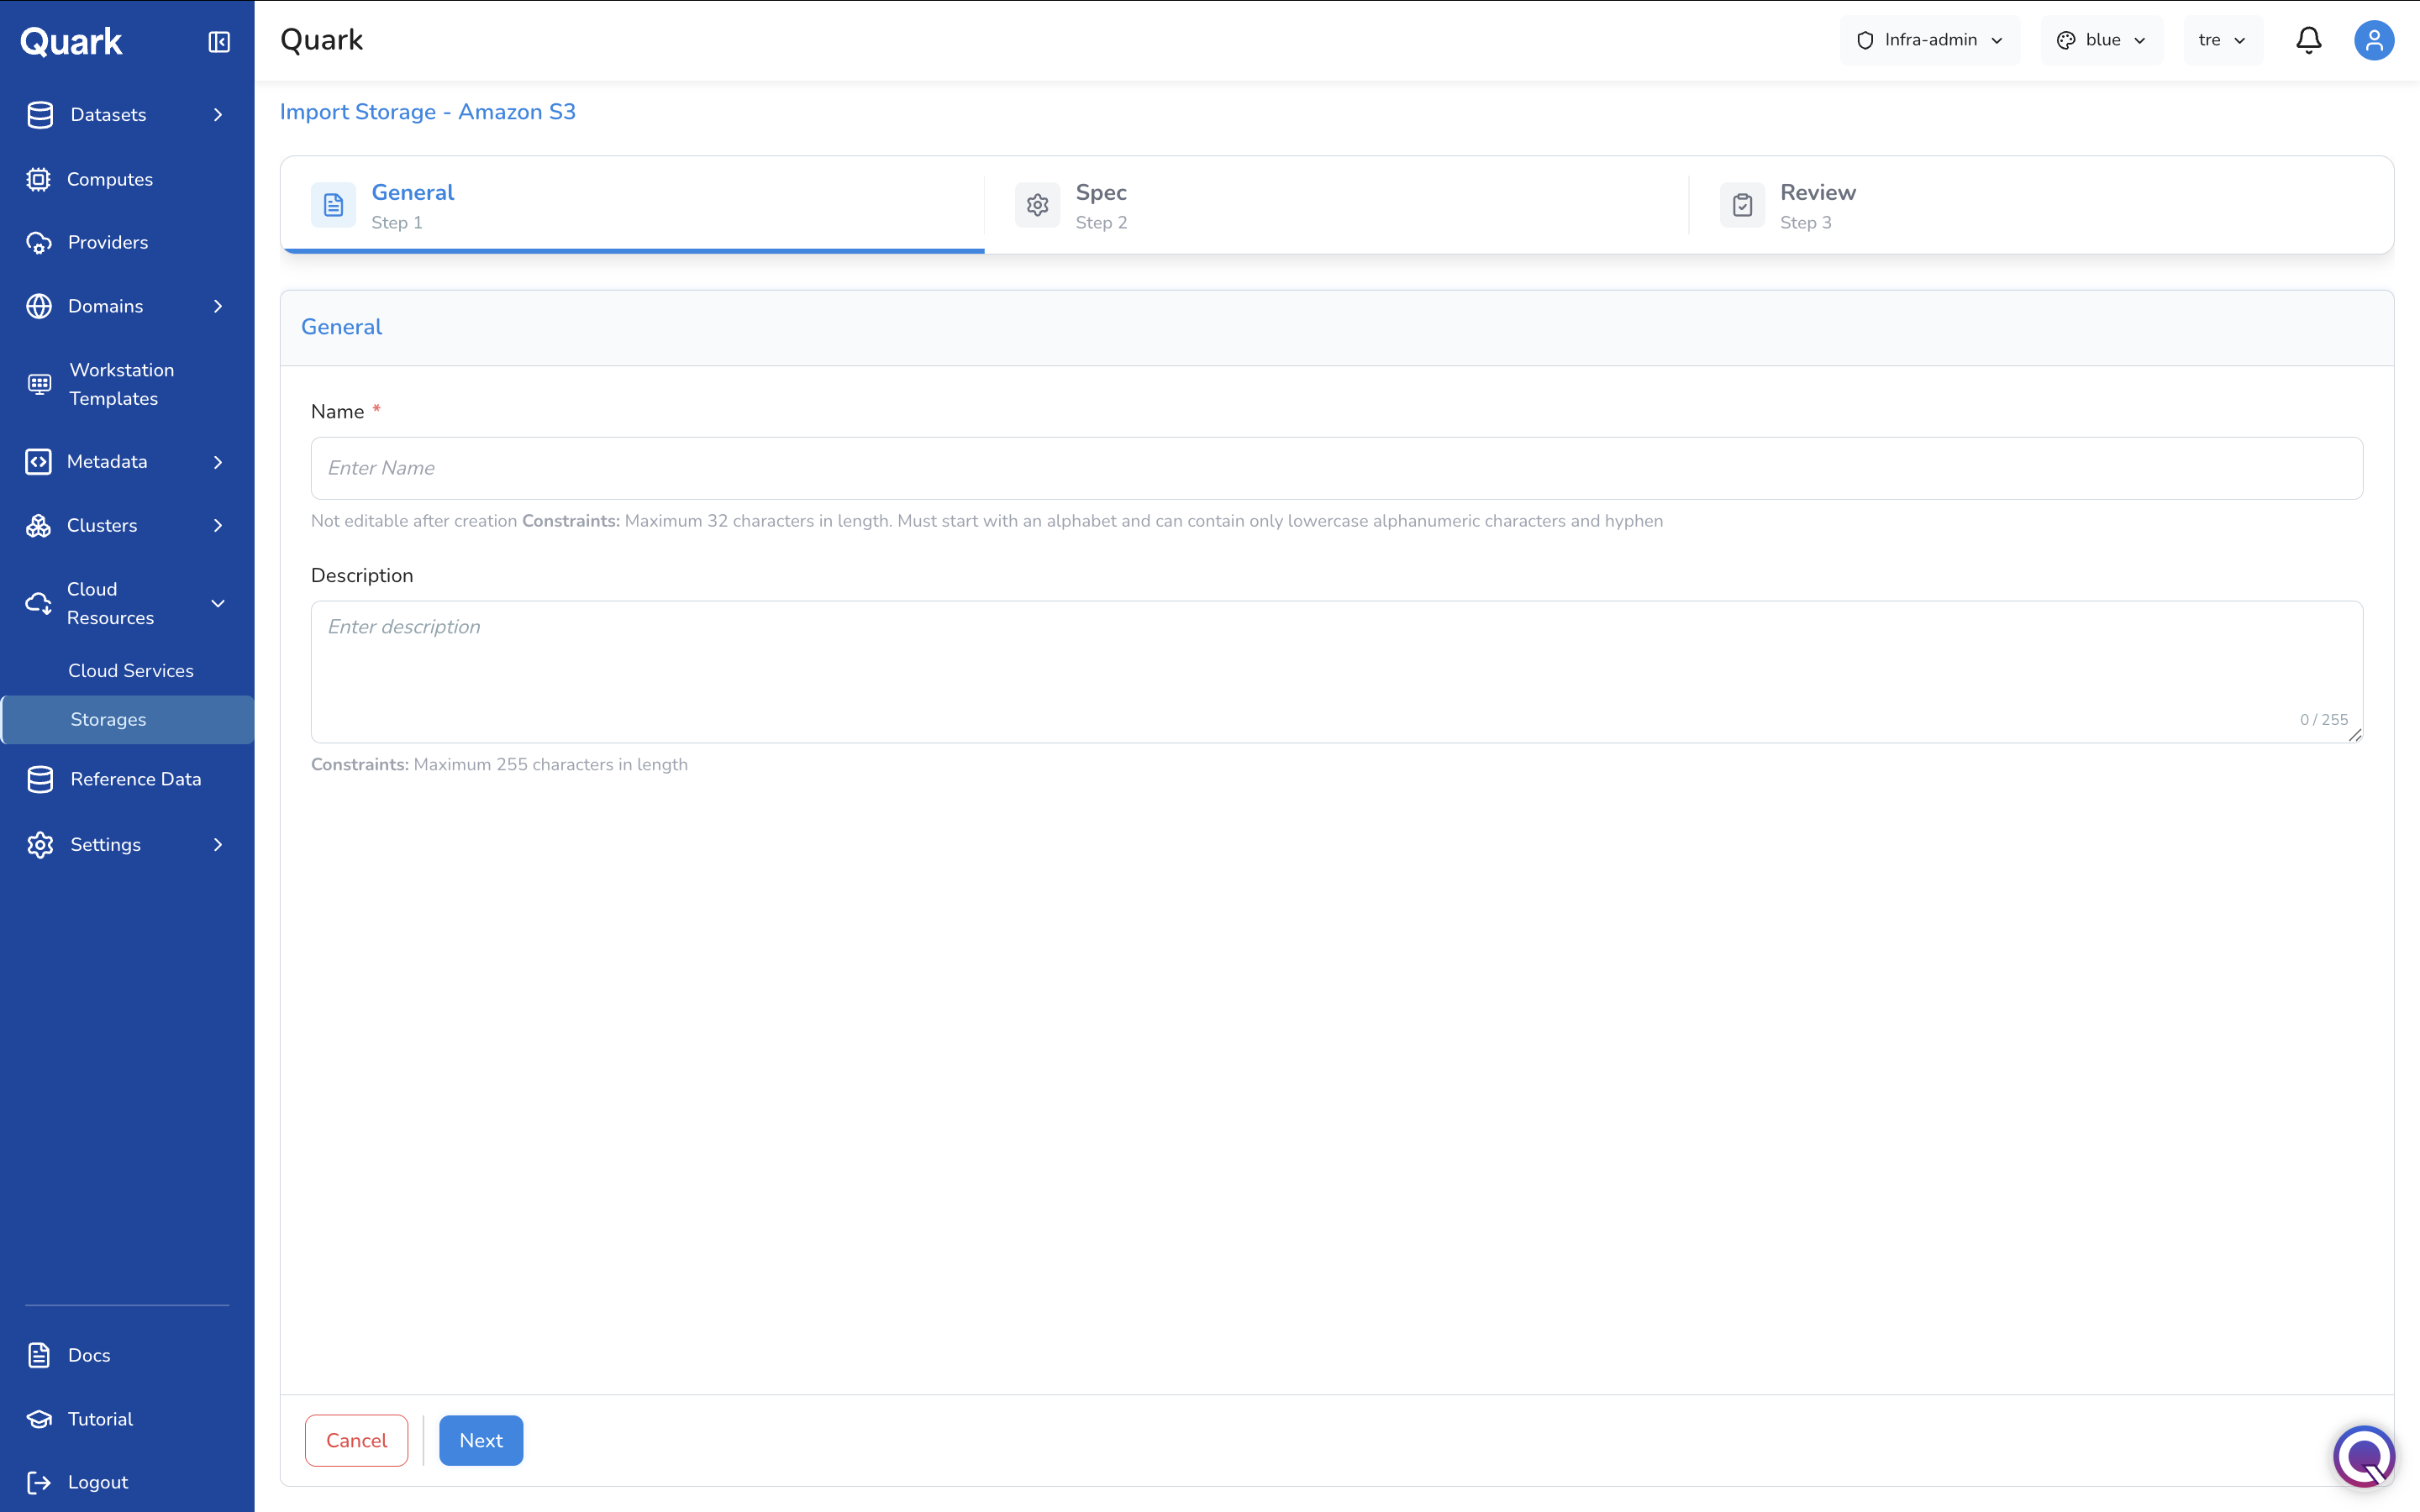
| Field | Description |
|---|---|
| Name (mandatory) | A unique name for this storage on the platform. Maximum 32 characters, lowercase alphanumeric and hyphens, not editable after creation. |
| Description | An optional description. Maximum 255 characters. |
Step 2: Spec
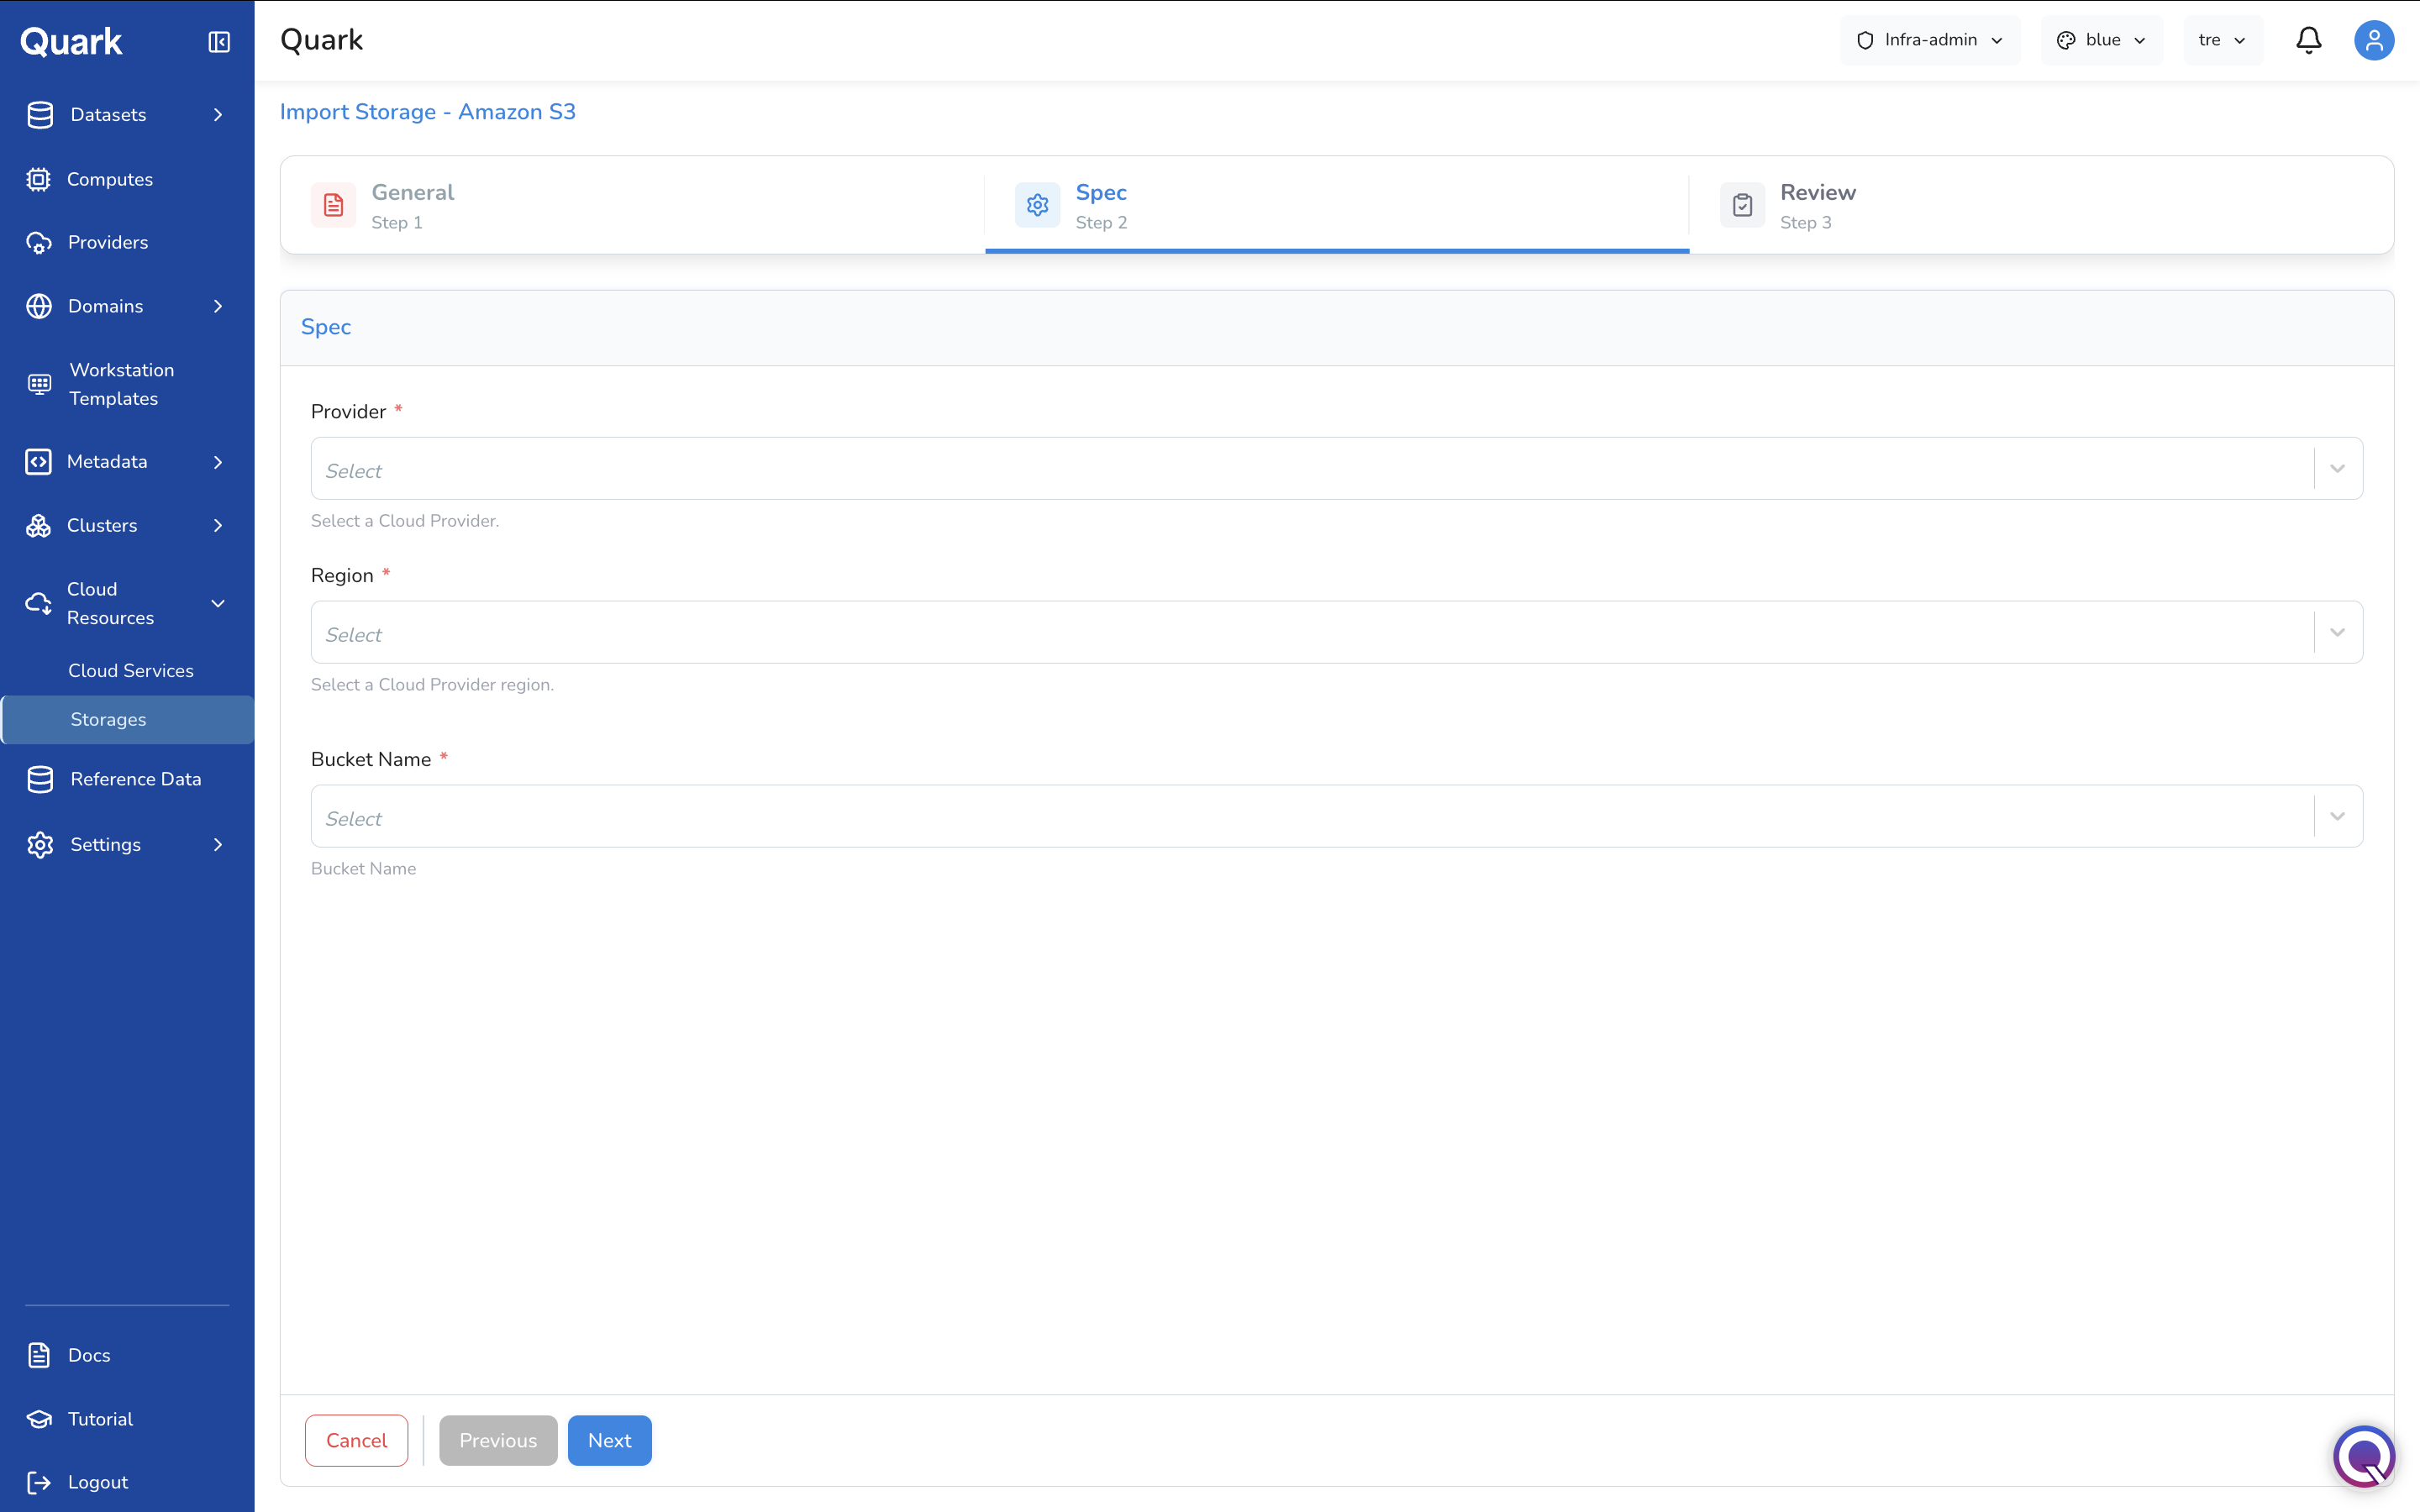
| Field | Description |
|---|---|
| Provider (mandatory) | The connected AWS cloud account where the S3 bucket resides. |
| Region (mandatory) | The AWS region where the bucket is located. |
| Bucket Name (mandatory) | The name of the existing S3 bucket to import. |
Step 3: Review
Review all configuration details, then click Create to register the storage.
Creating a New Storage
- Click + Add New in the toolbar.
-
The Select Storage modal appears with available provisioned storage types.
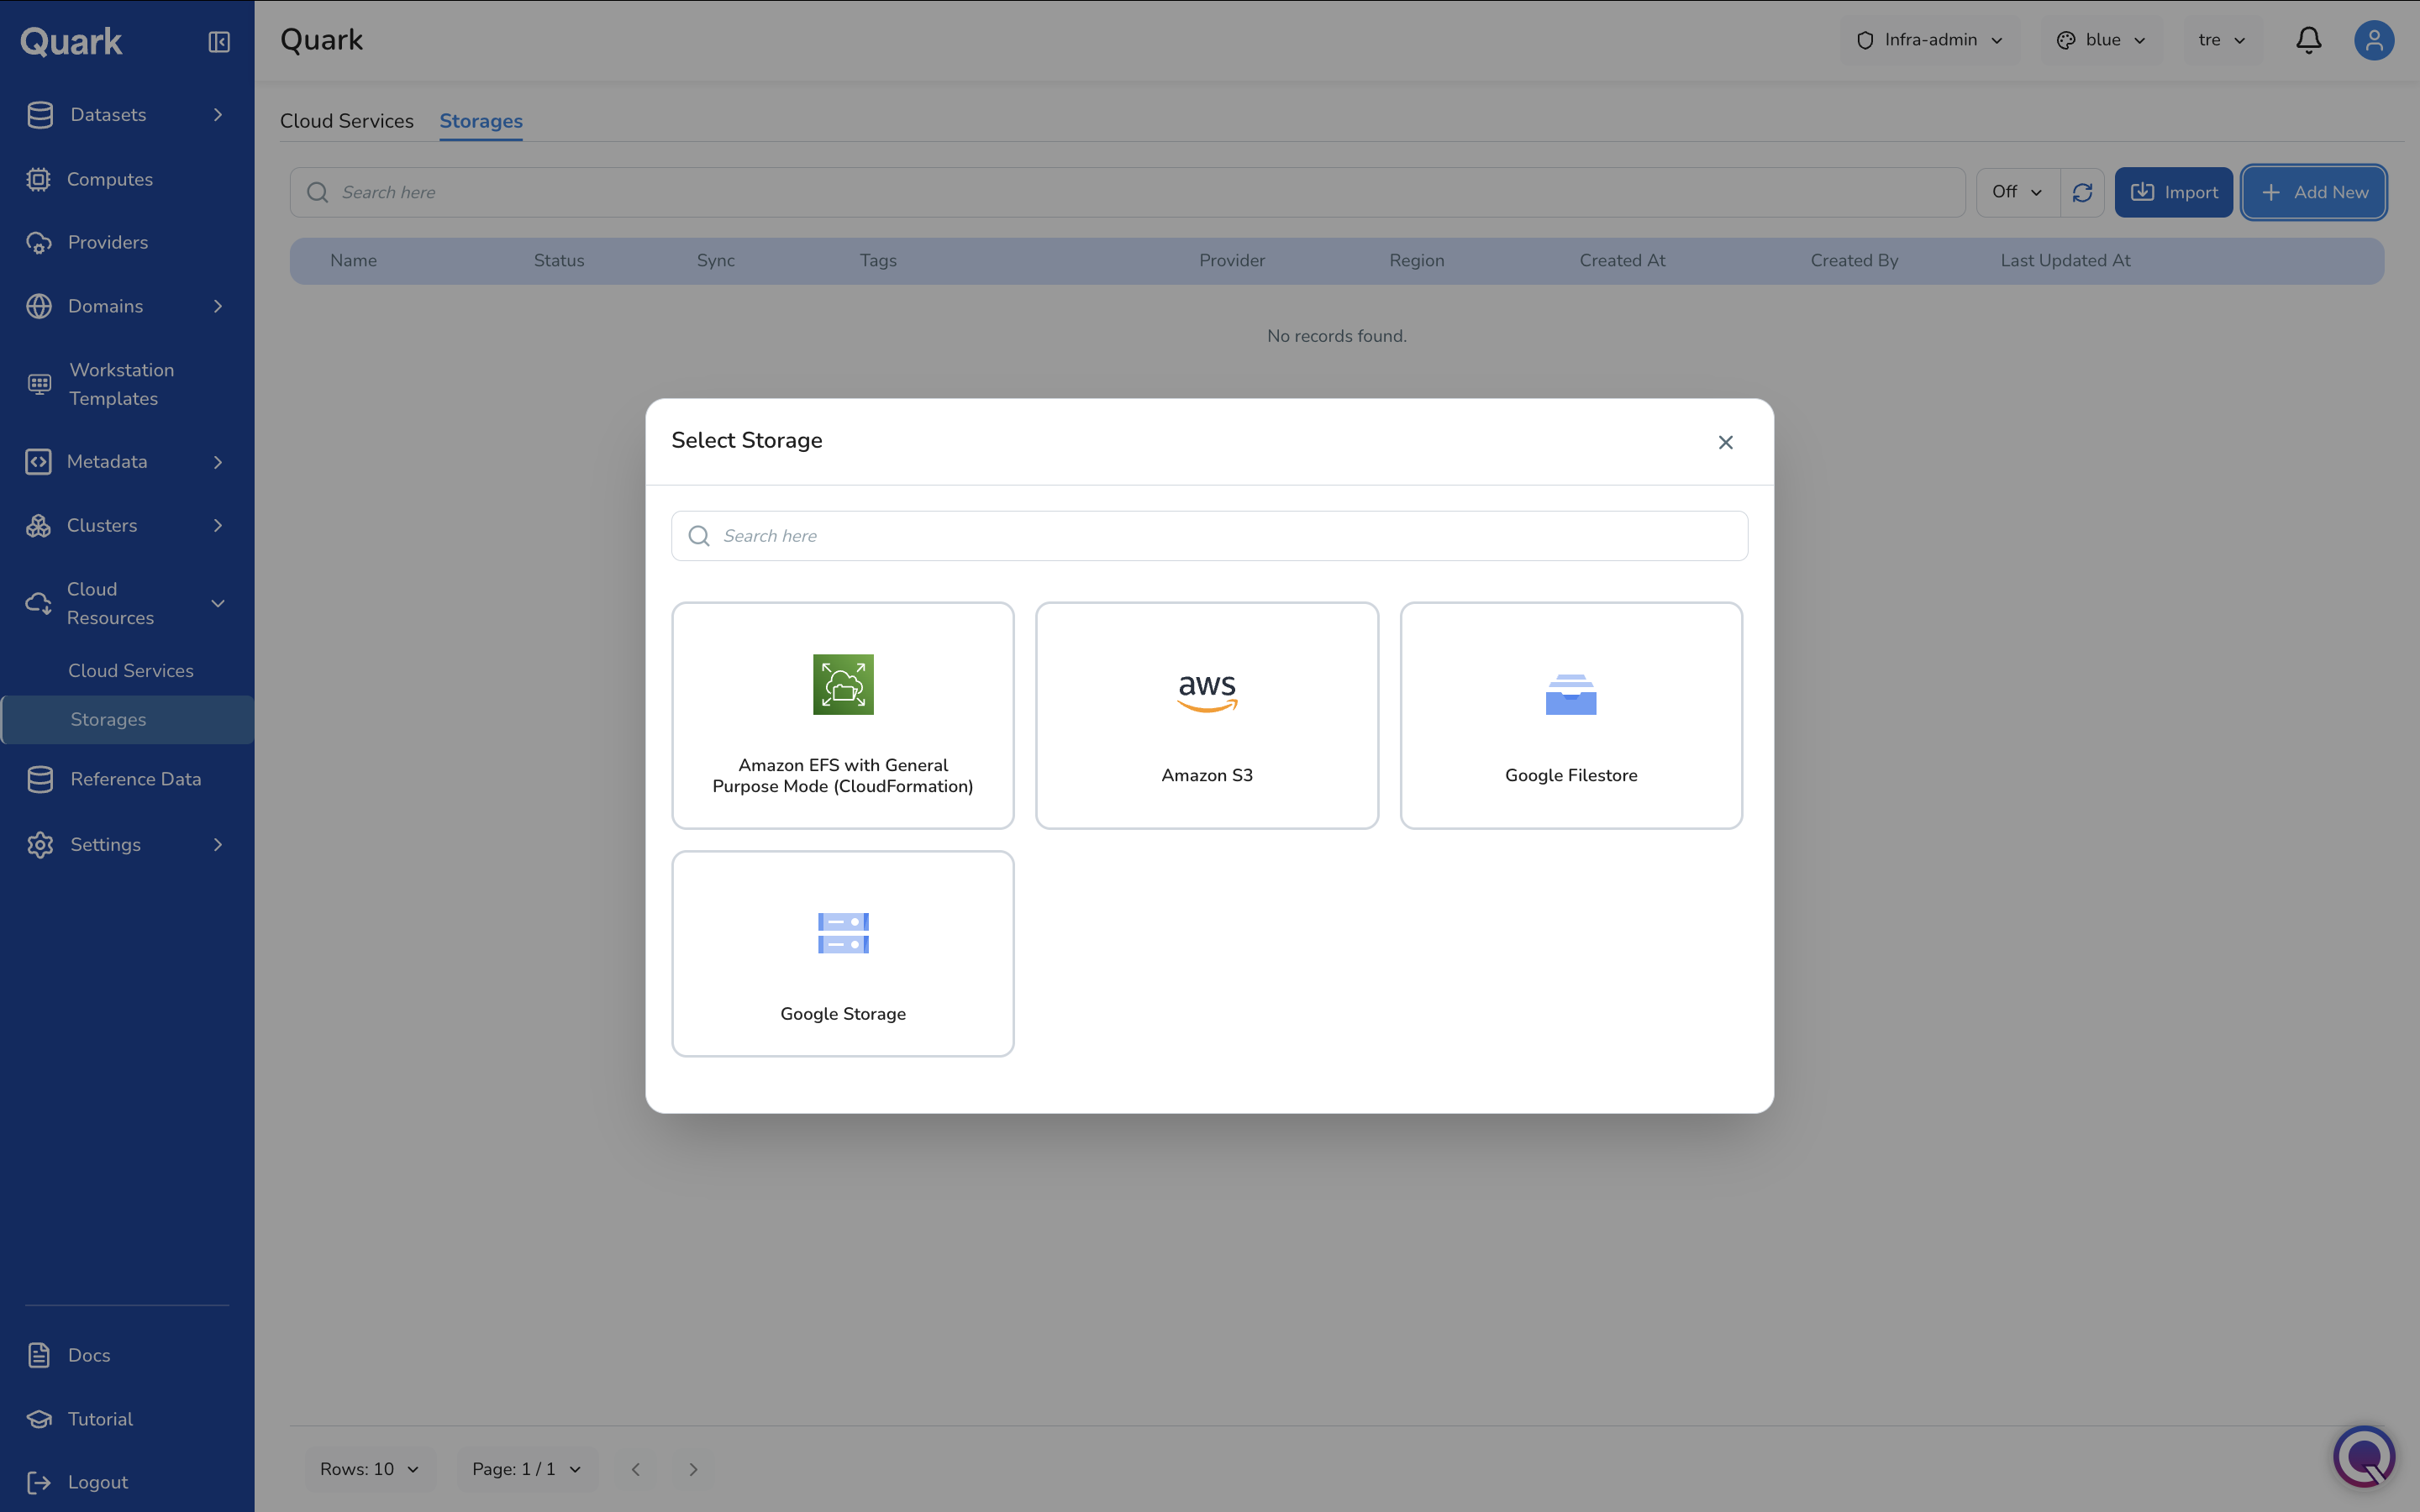
-
Select the desired storage type. The wizard opens for that type.
The example below walks through creating a Google Filestore instance.
Step 1: General
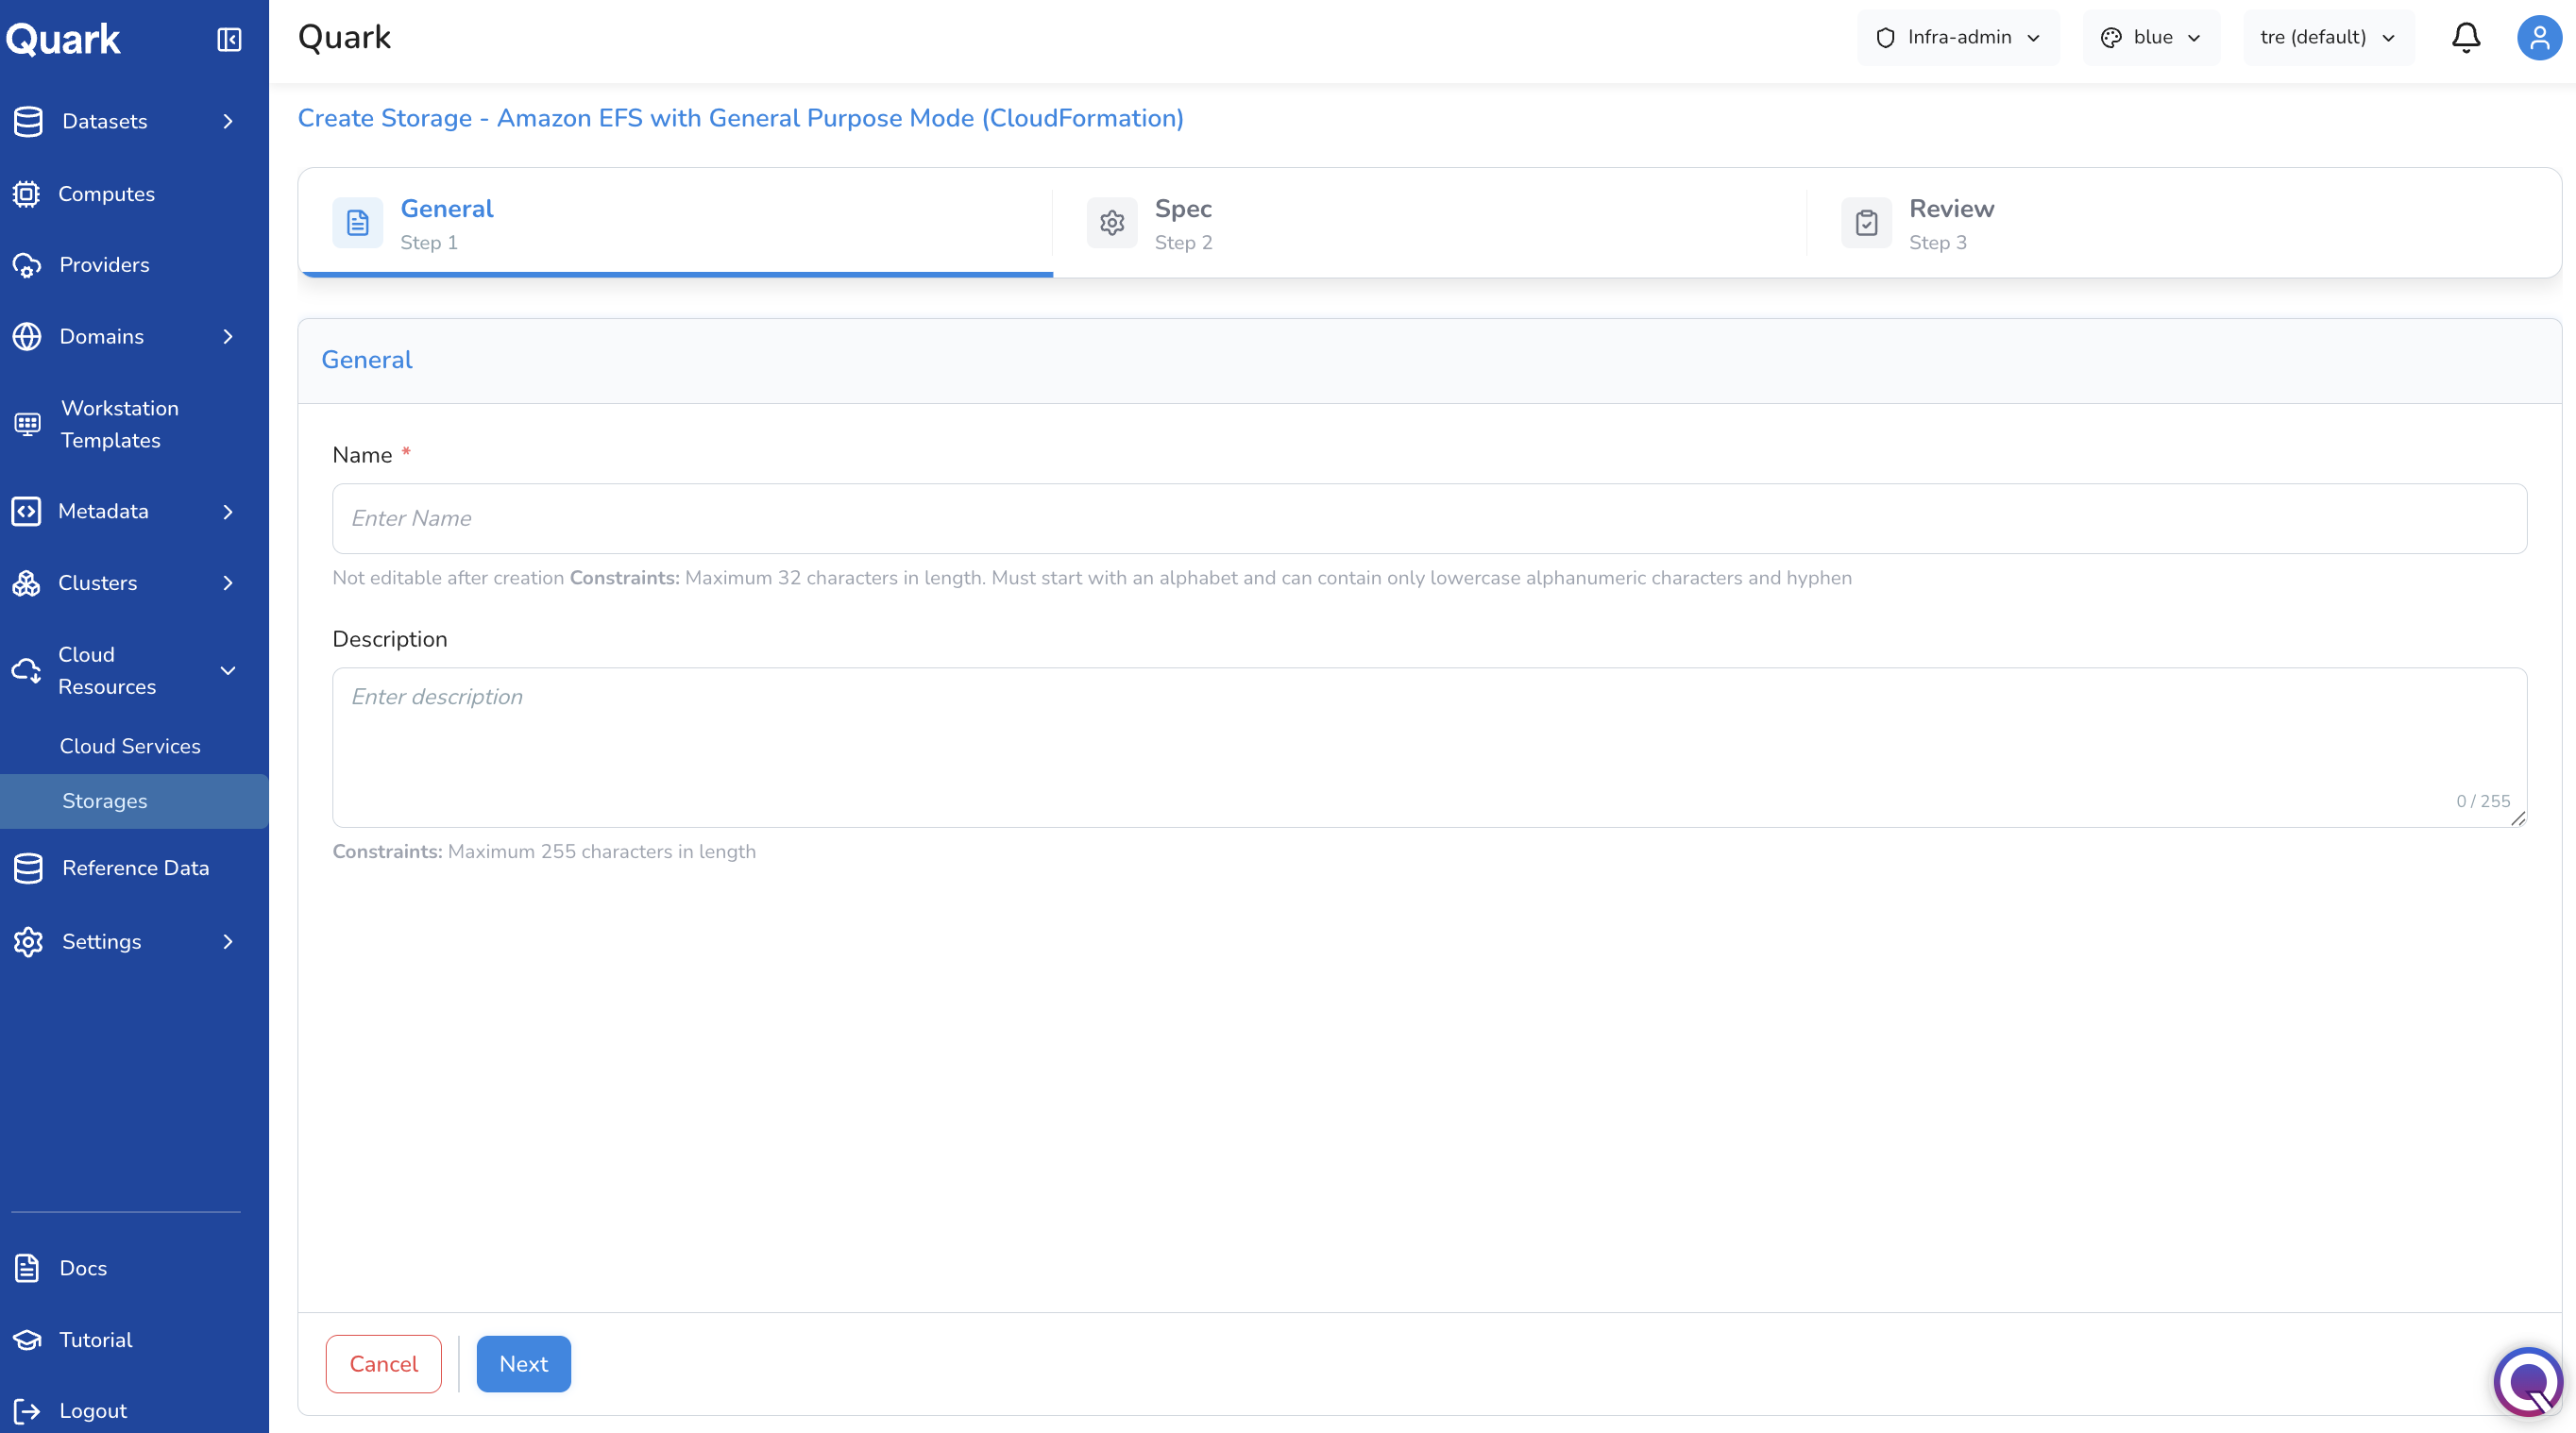
| Field | Description |
|---|---|
| Name (mandatory) | A unique name for this storage. Same constraints as above. |
| Description | An optional description. Maximum 255 characters. |
Step 2: Spec
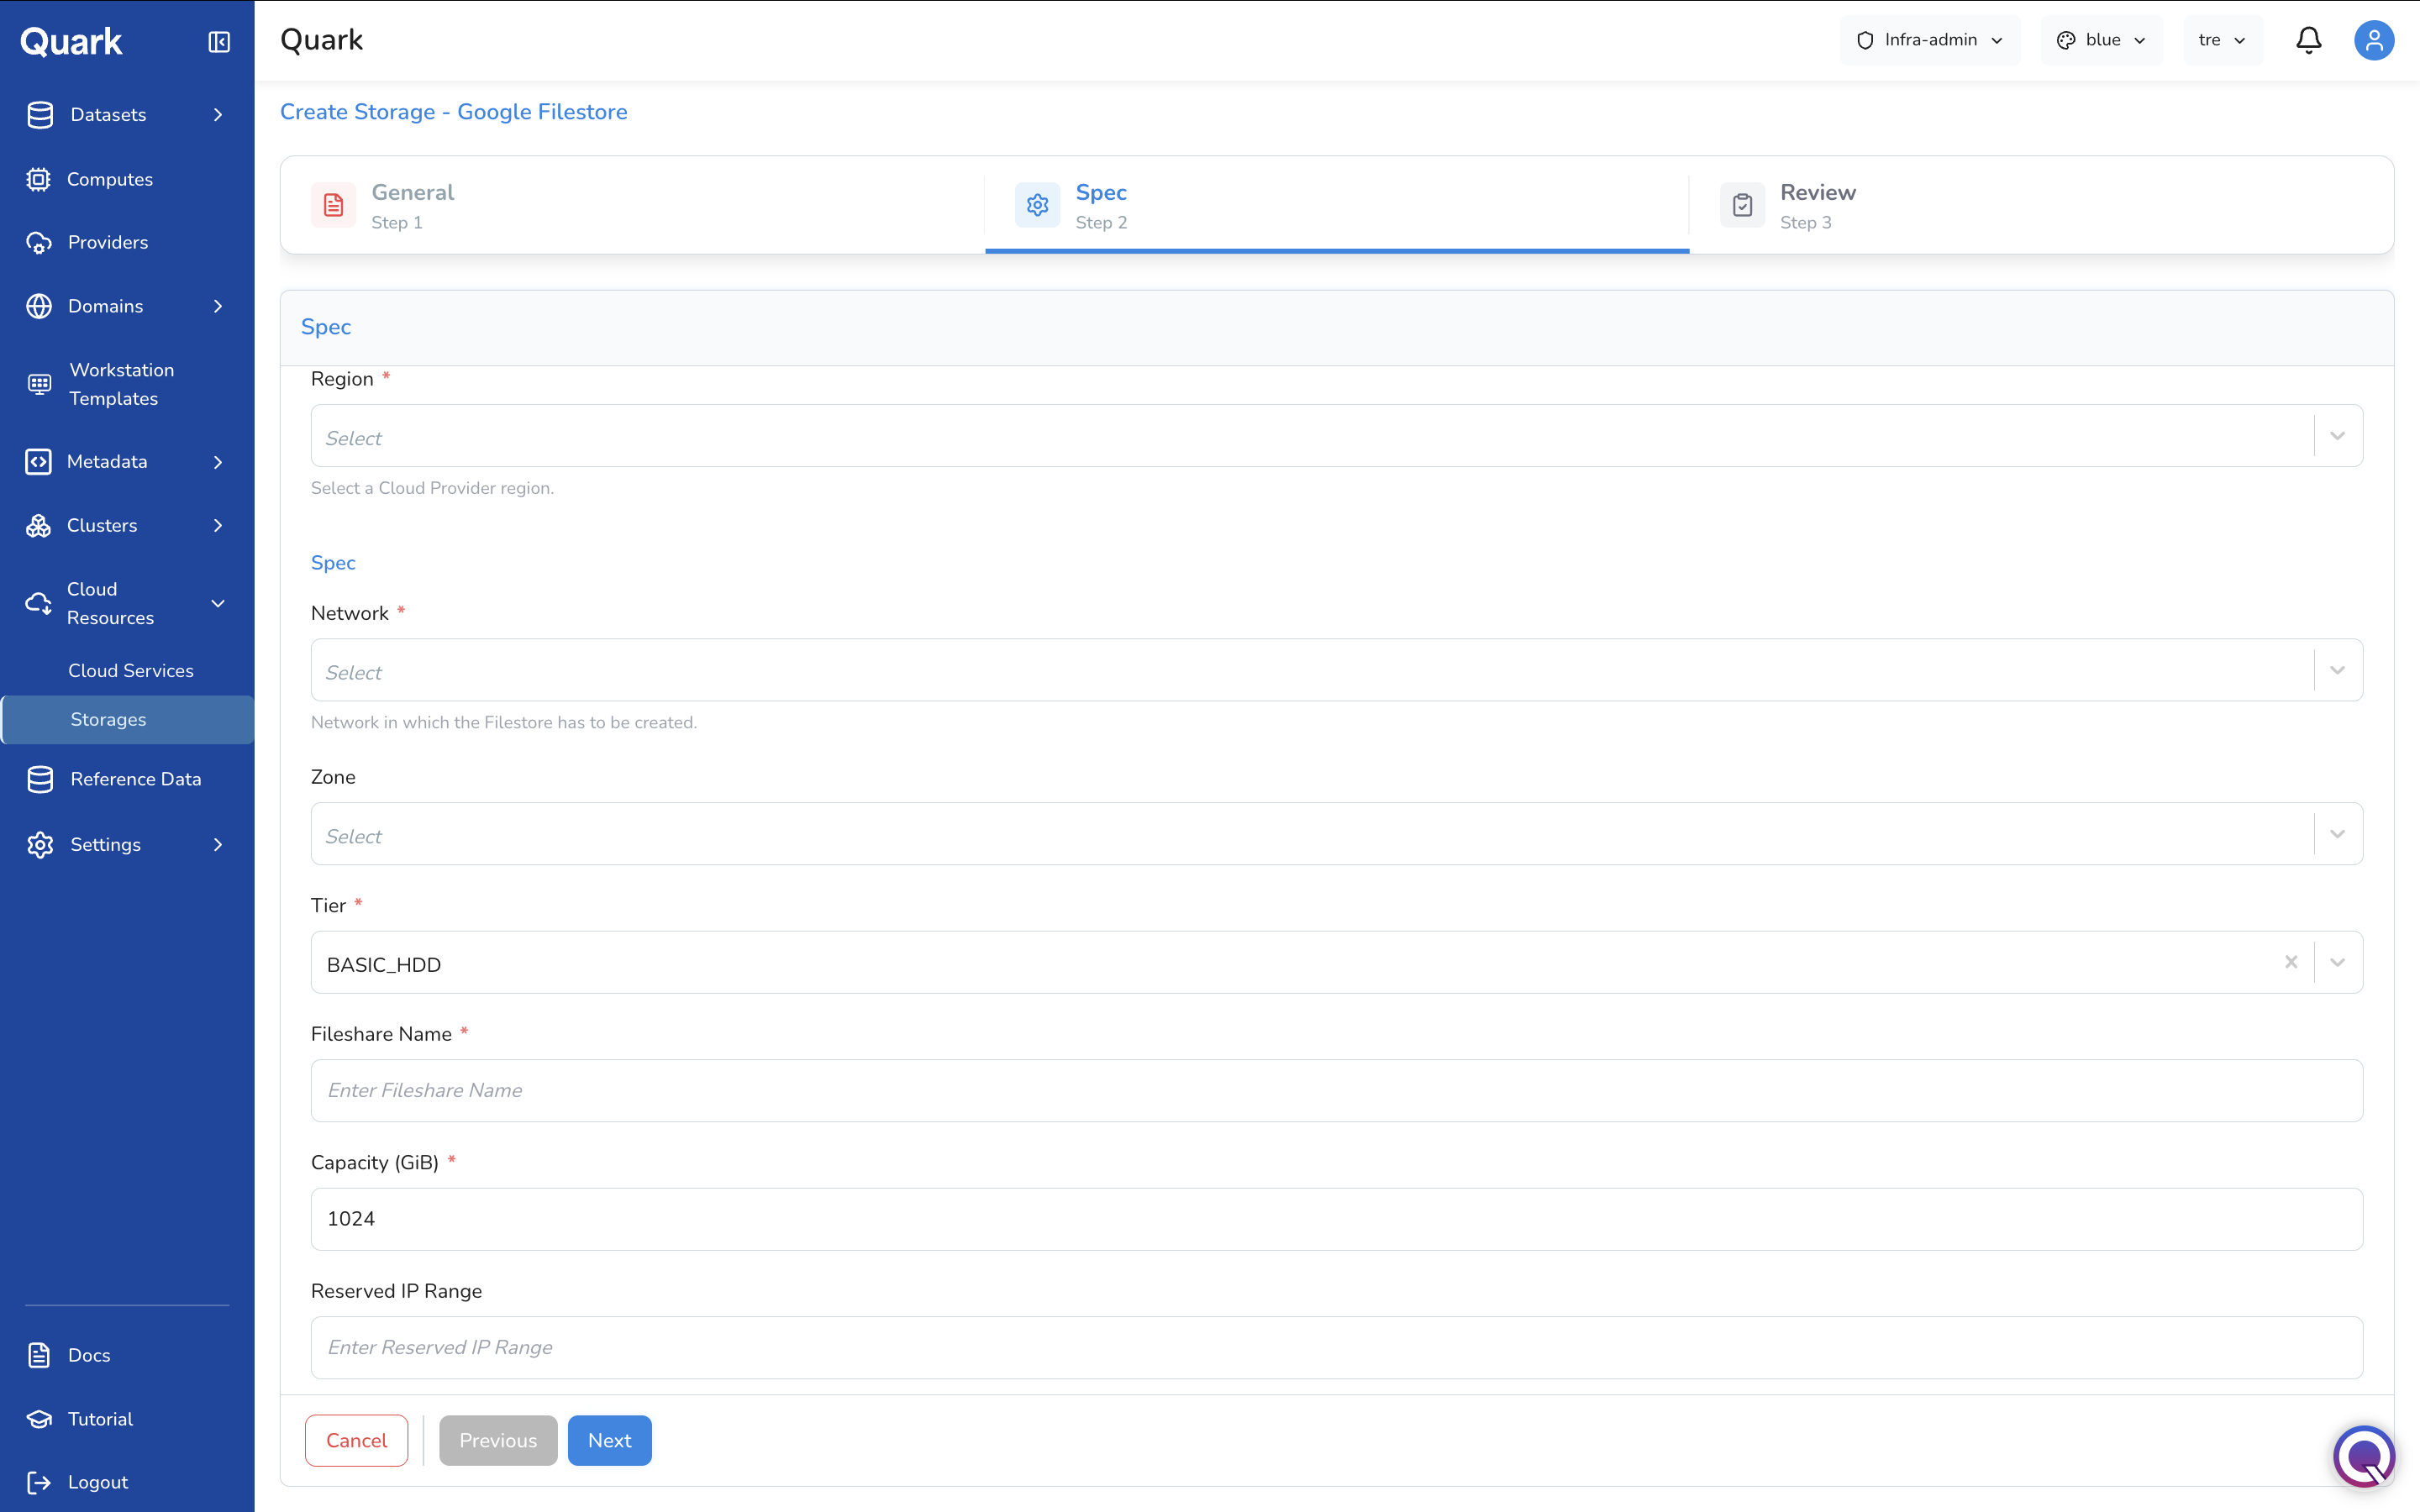
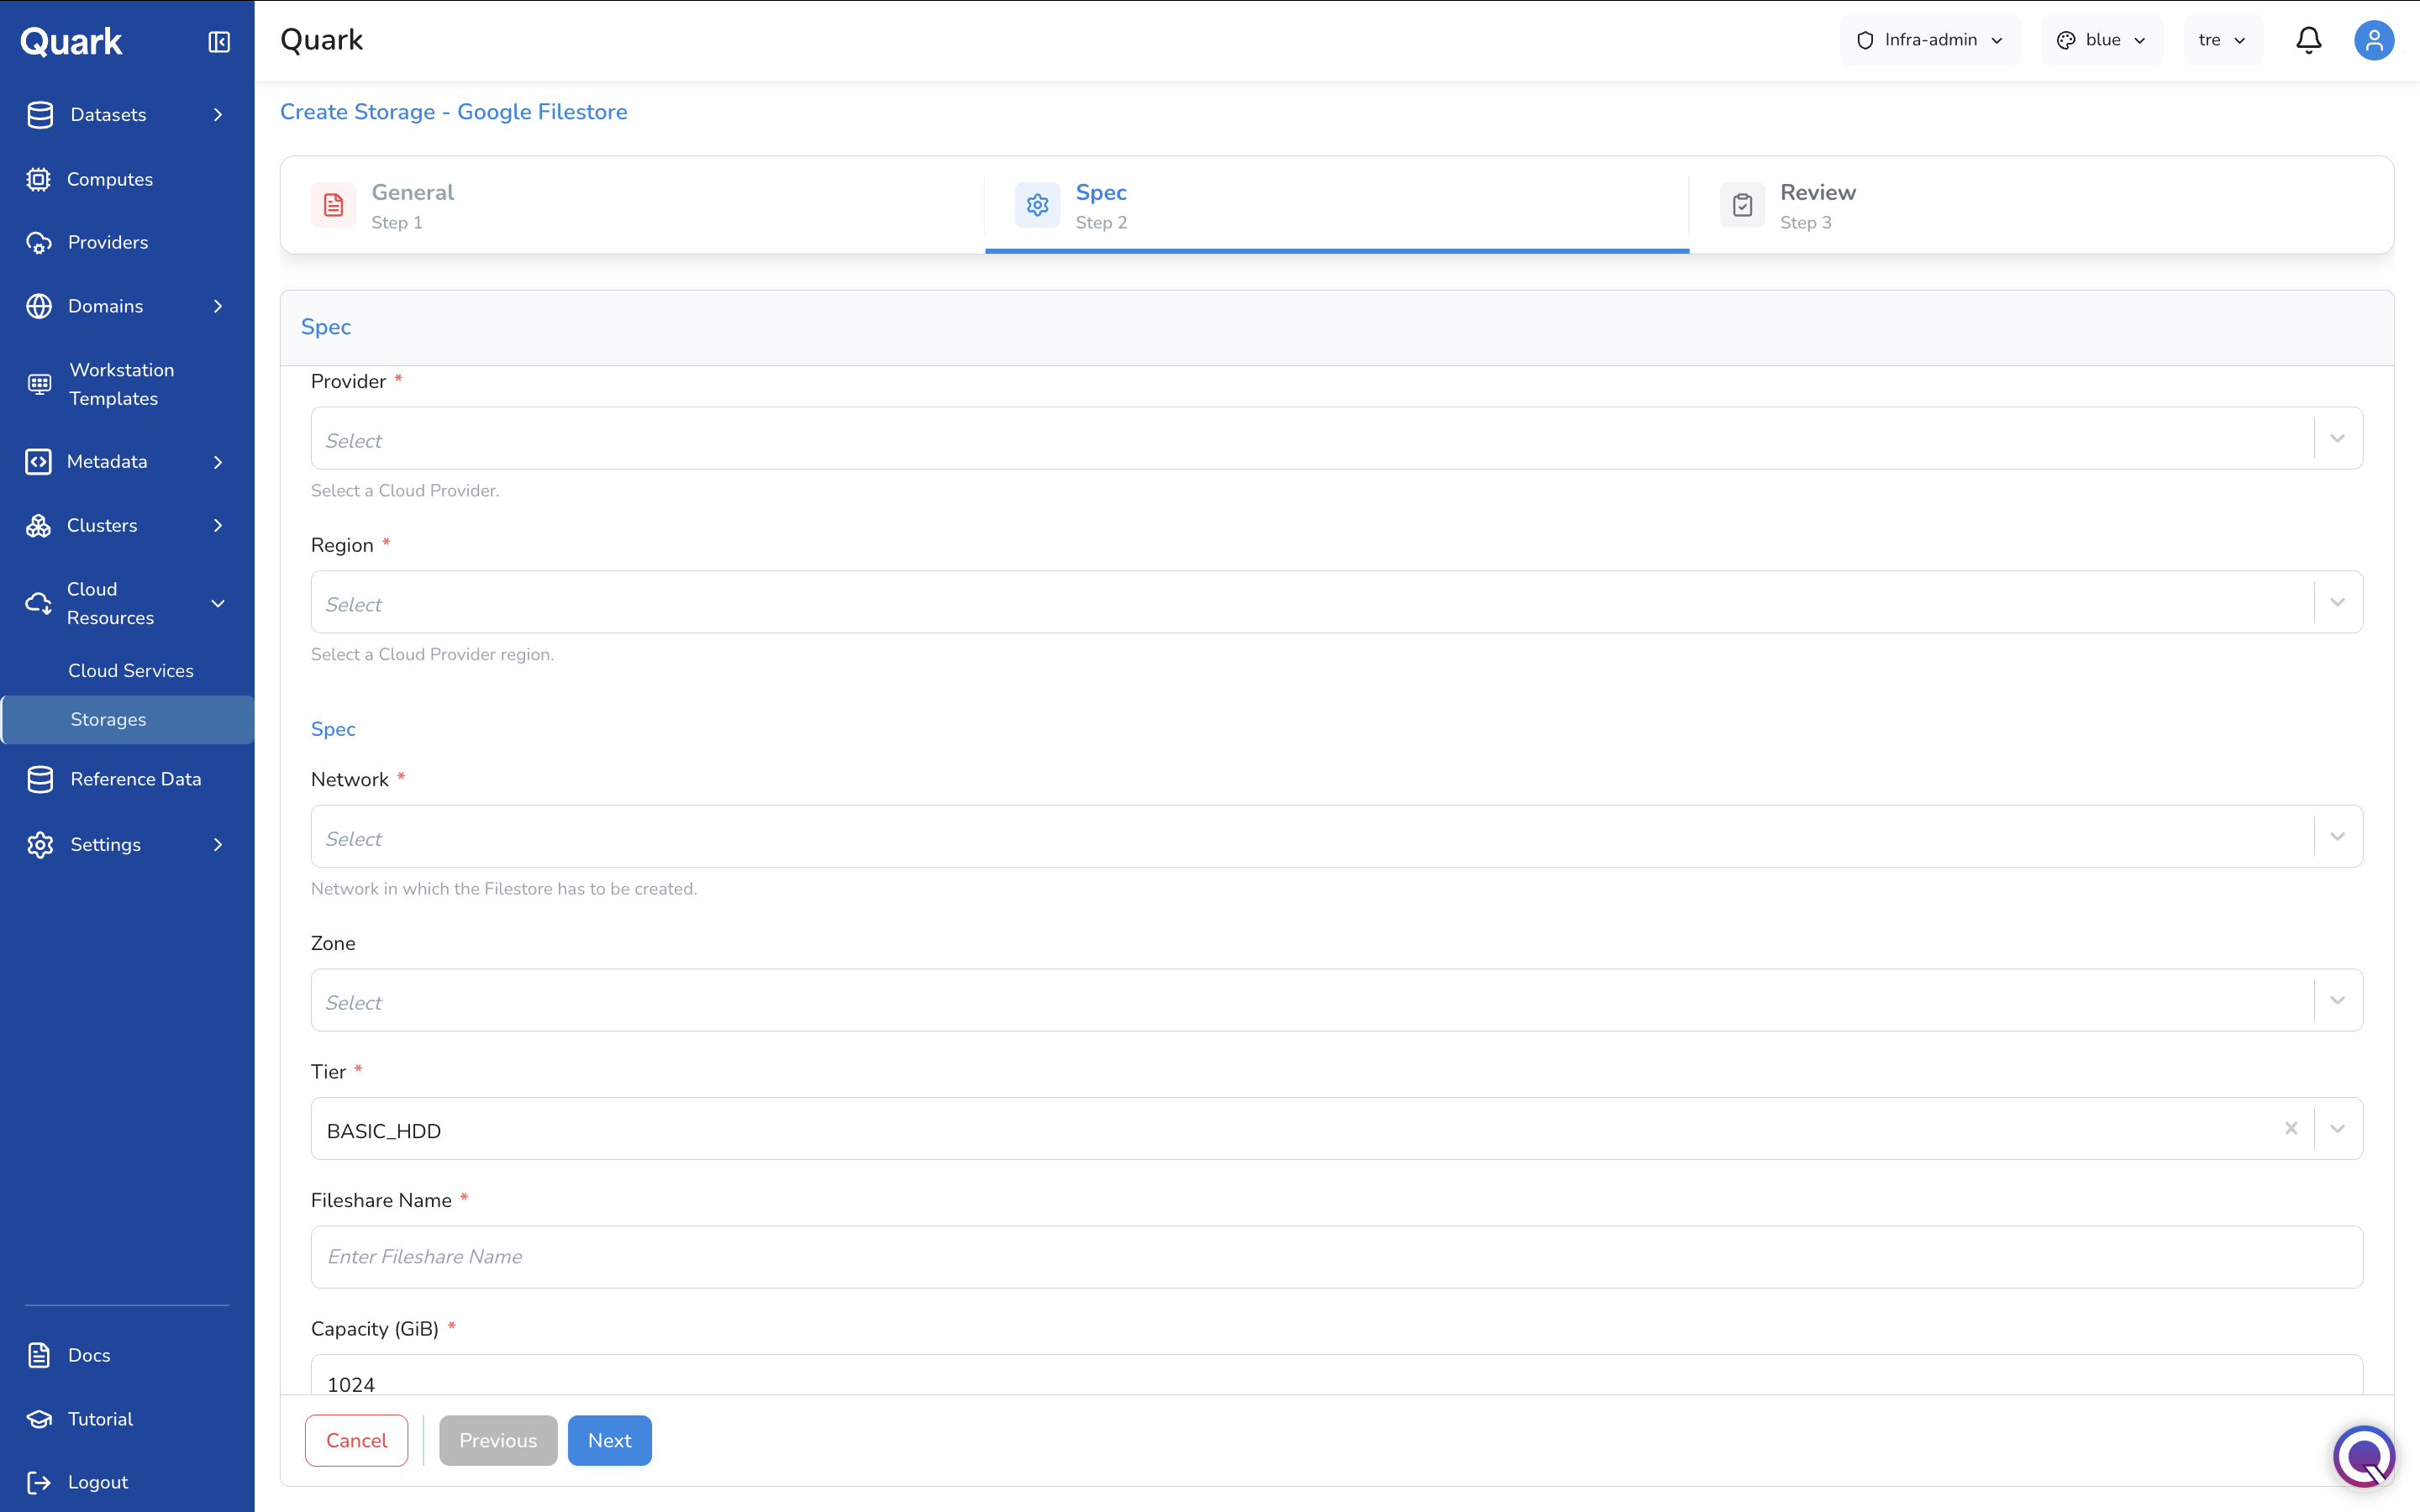
| Field | Description |
|---|---|
| Provider (mandatory) | The connected GCP cloud account where the Filestore instance will be created. |
| Region (mandatory) | The GCP region where the Filestore will be provisioned. |
| Network (mandatory) | The VPC network in which the Filestore instance will be created. |
| Zone | The specific zone within the region for the Filestore instance. |
| Tier (mandatory) | The Filestore service tier that determines performance and availability characteristics. Defaults to BASIC_HDD. |
| Fileshare Name (mandatory) | The name of the file share to create within the Filestore instance. |
| Capacity (GiB) (mandatory) | The storage capacity to provision, in gibibytes. Defaults to 1024. |
| Reserved IP Range | An optional IP range to reserve for the Filestore instance's private service access connection. |
Step 3: Review
Review all configuration details, then click Create to provision the storage.
What's Next
- Providers — Cloud provider accounts referenced in the Spec step of all cloud service and storage wizards must be registered in Providers before they appear in dropdowns.
- Clusters — Cloud services such as CodeBuild are commonly used in pipeline runs that execute on platform clusters. Ensure the relevant cluster is provisioned before registering dependent services.
- Computes — Compute configurations that back workloads consuming cloud services should be provisioned and scoped to the appropriate projects.