Launching Ready-to-Run Pipelines
Overview
Quark provides researchers with access to a range of pre-configured, ready-to-run bioinformatics pipelines that can be discovered and launched directly from the platform. These pipelines cover multi-omics data analysis workflows including DNA Sequencing, RNA Sequencing, scRNA Sequencing, Protein Folding, and others.
On Quark, a scientific pipeline refers to a containerised workflow of bioinformatics tools for multi-omics data analysis. All the bioinformatics tools needed for a given analysis are stitched together and containerised within the pipeline, enabling researchers to run complex workflows without managing infrastructure or software dependencies.
Pipelines are accessible through the Launchpad, which serves as a centralised hub for discovering, configuring, and executing analysis workflows.
Prerequisites
Before running a pipeline, ensure you have:
- Uploaded the required input data files (e.g., sample datasheets, FASTQ files). See My Files for guidance on file management.
Discovering Pipelines on the Launchpad
The Launchpad displays all available pipelines that can be run on the platform. To access the Launchpad:
- Select Pipelines from the Navigation Menu on the left.
- Click on the Launchpad tab.

Searching for a Pipeline
Use the Search bar at the top of the Launchpad to find a specific pipeline by name or keyword. For example:
- Search for
sarekordnato find genomics pipelines for DNA Sequencing analysis. - Search for
rnaseqto find RNA Sequencing pipelines.
Filtering Pipelines
Researchers can narrow the list of available pipelines using the Filter options:
- Type — Filter by pipeline framework (e.g., nf-core, AWS HealthOmics).
- Category — Filter by multi-omics workflow category (e.g., Genomics, Proteomics, Transcriptomics).
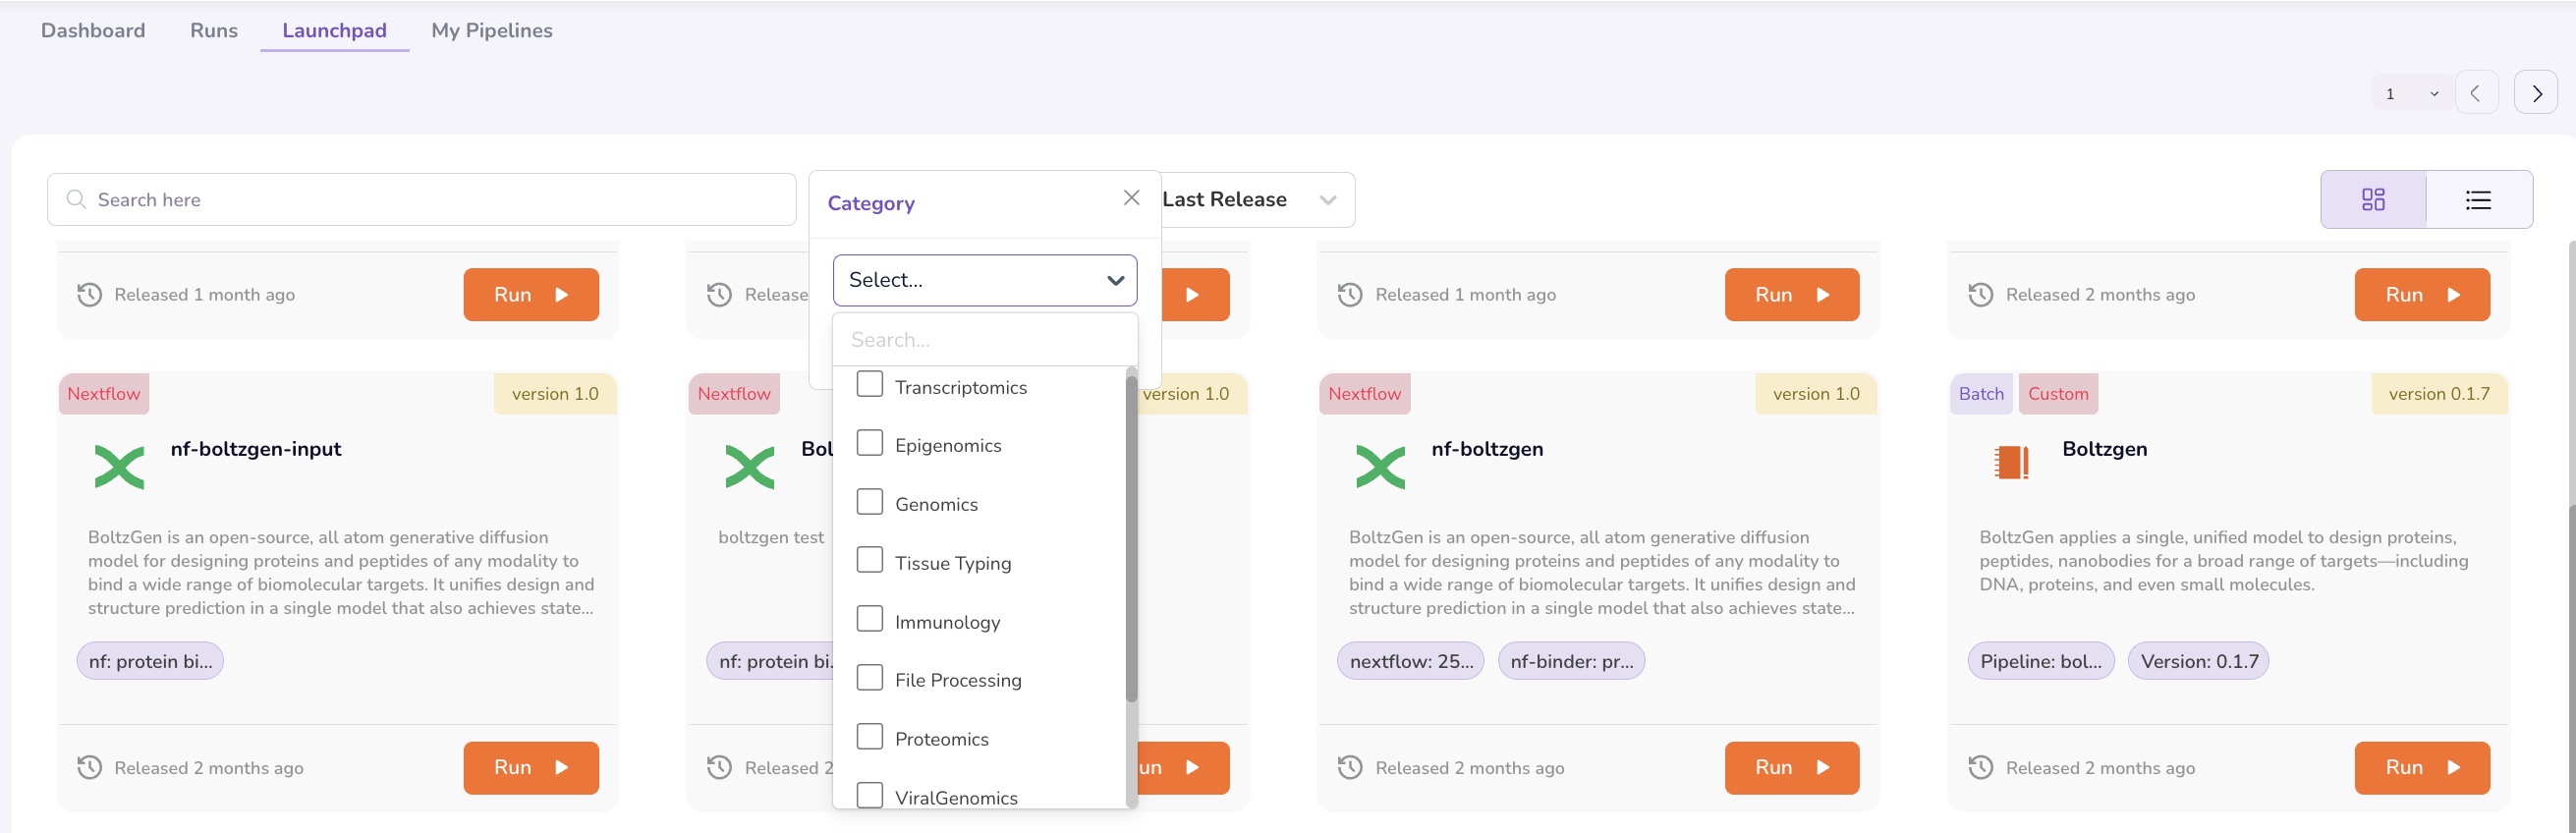
Sorting Results
Use the Sort By drop-down to order the pipeline results by:
- Name — Alphabetical order.
- Last Release — Most recent version first.
Running a Pipeline
Once you have identified the pipeline you wish to run, follow these steps to configure and execute.
Step 1: Select the Pipeline
- From the Launchpad, click on the pipeline you wish to run.
- Click the Run button. This opens the pipeline's configuration dashboard.
Step 2: Review Pipeline Requirements
The pipeline dashboard opens to the About page, which provides:
- A description of the pipeline and its intended use.
- A list of all Input Parameters or fields required to run the pipeline.
- The types of input files supported and their prescribed formats.

Important: Review the About tab carefully before proceeding. Ensure your input data files are in the correct format as specified by the pipeline.
Step 3: Configure Input Parameters
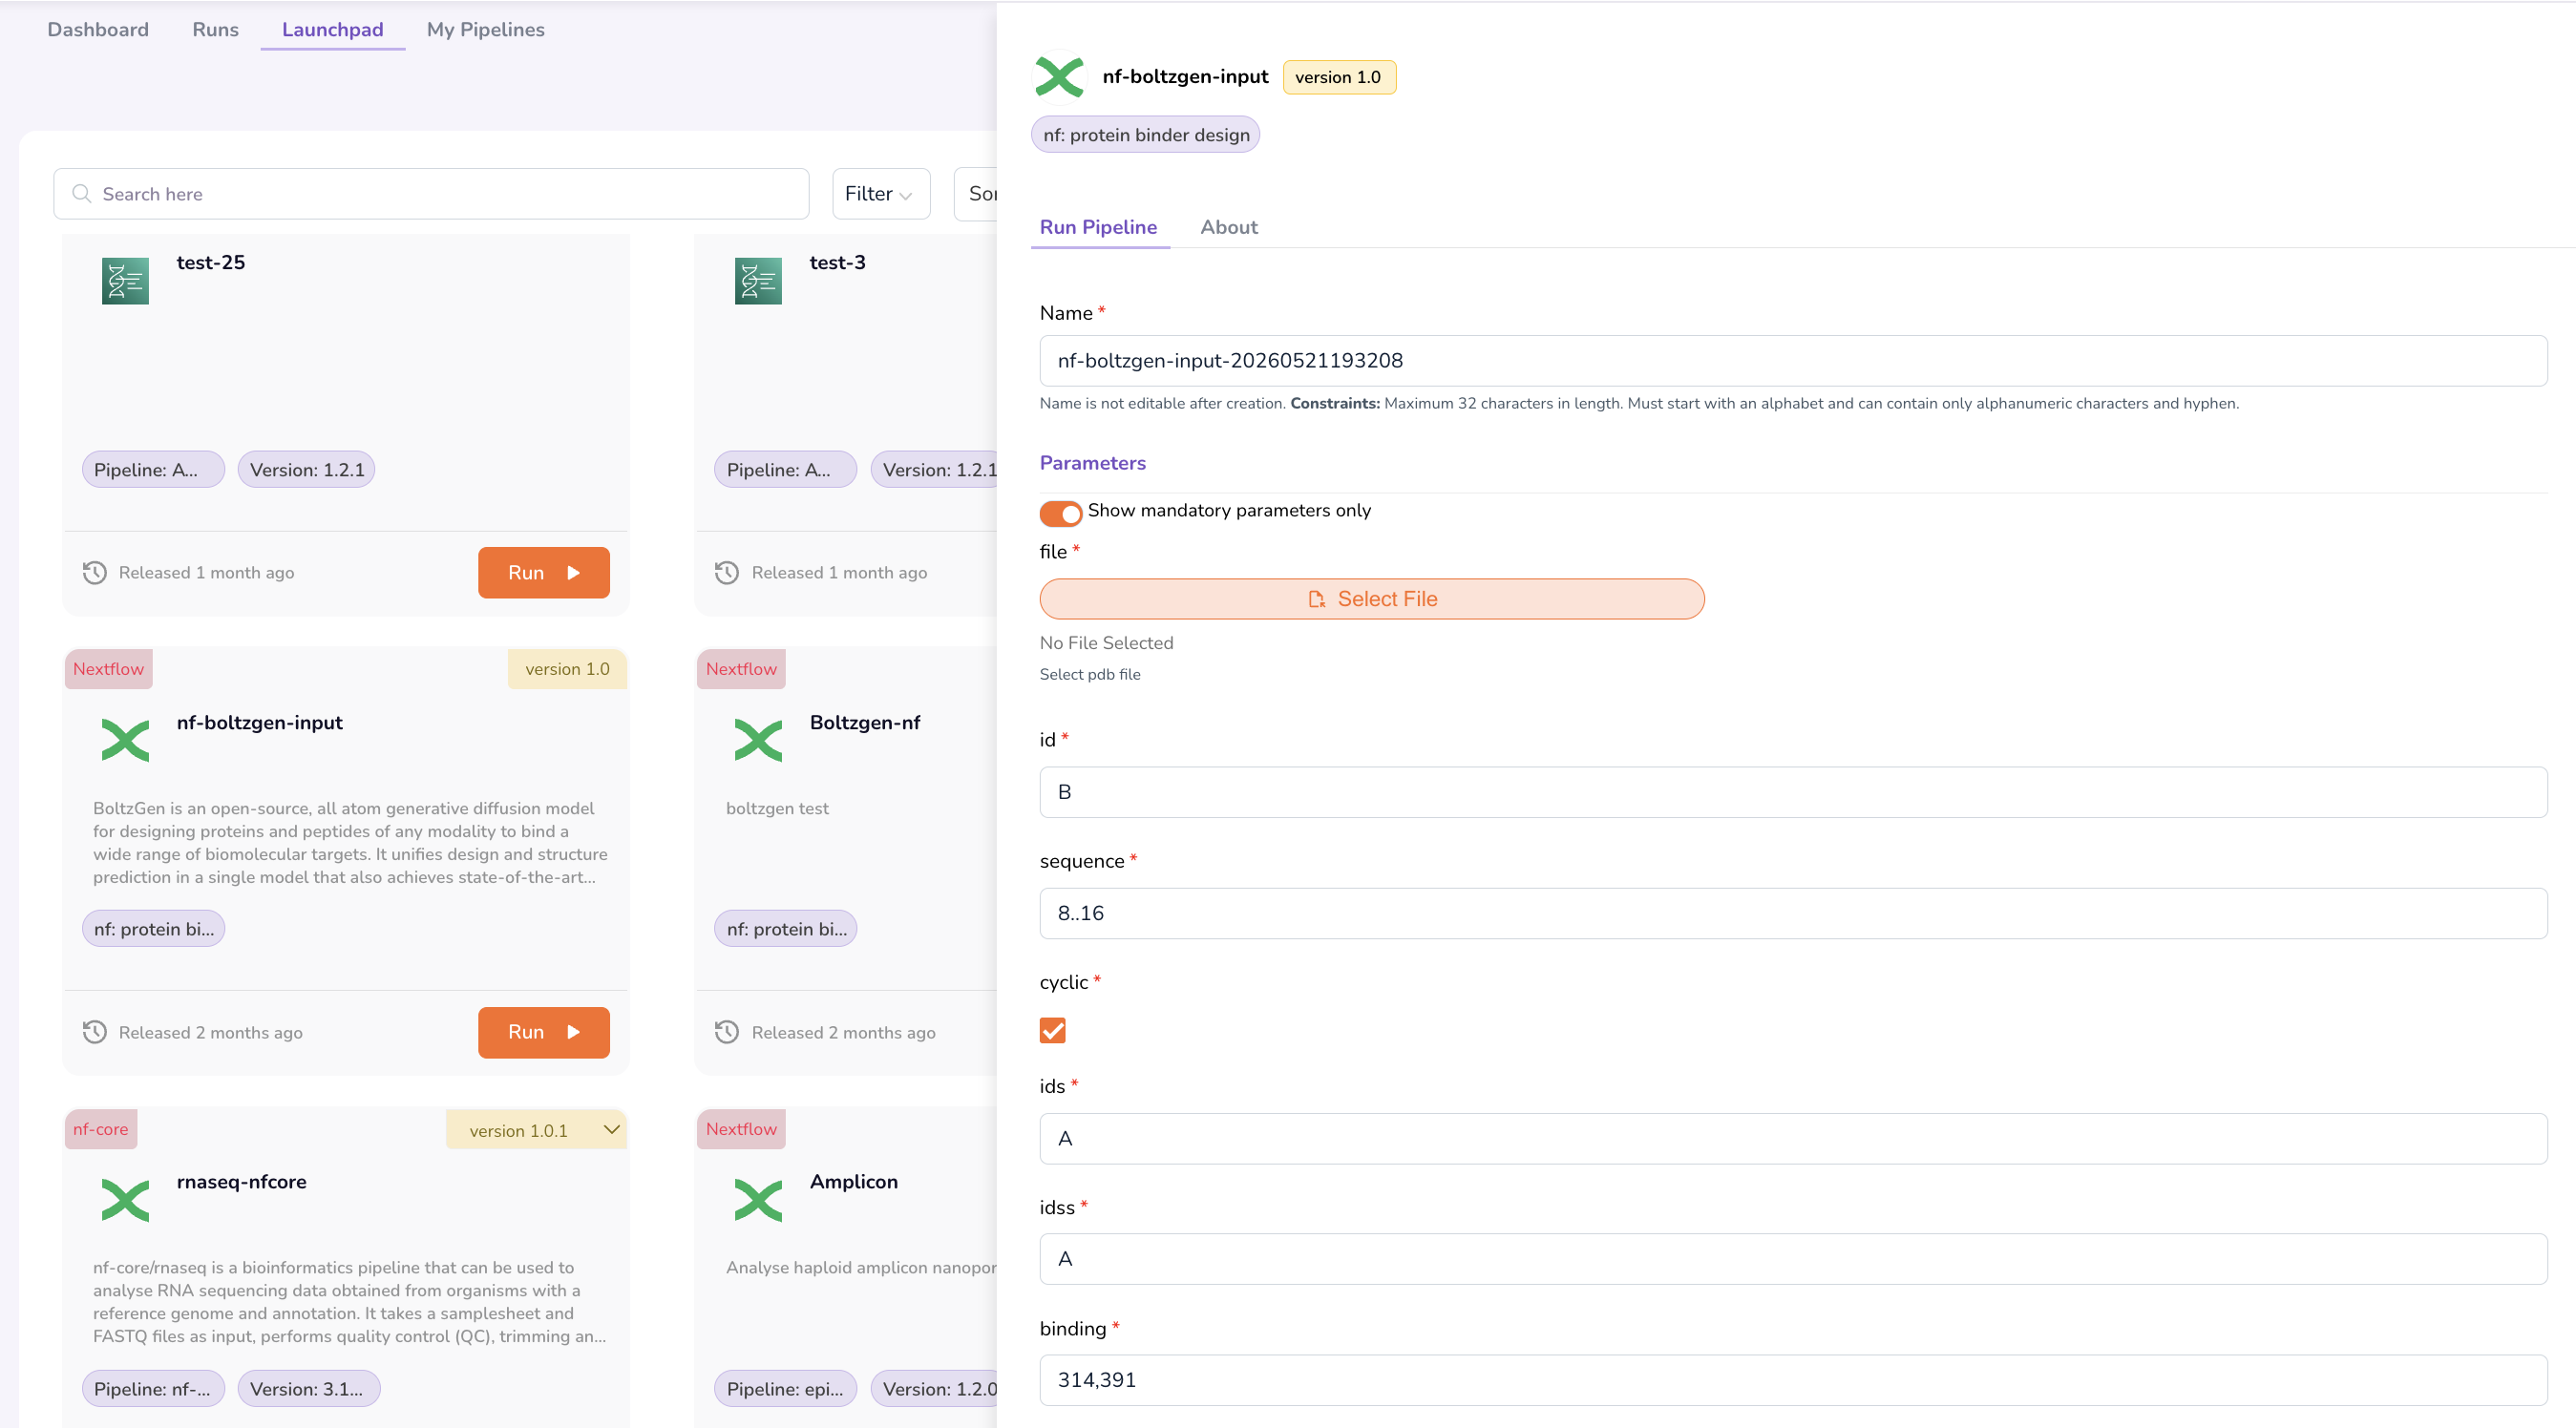
- Click the Run Pipeline tab.
- Enter a Name for this pipeline run.
- Upload your sample datasheets and input data files in the format prescribed on the About tab.
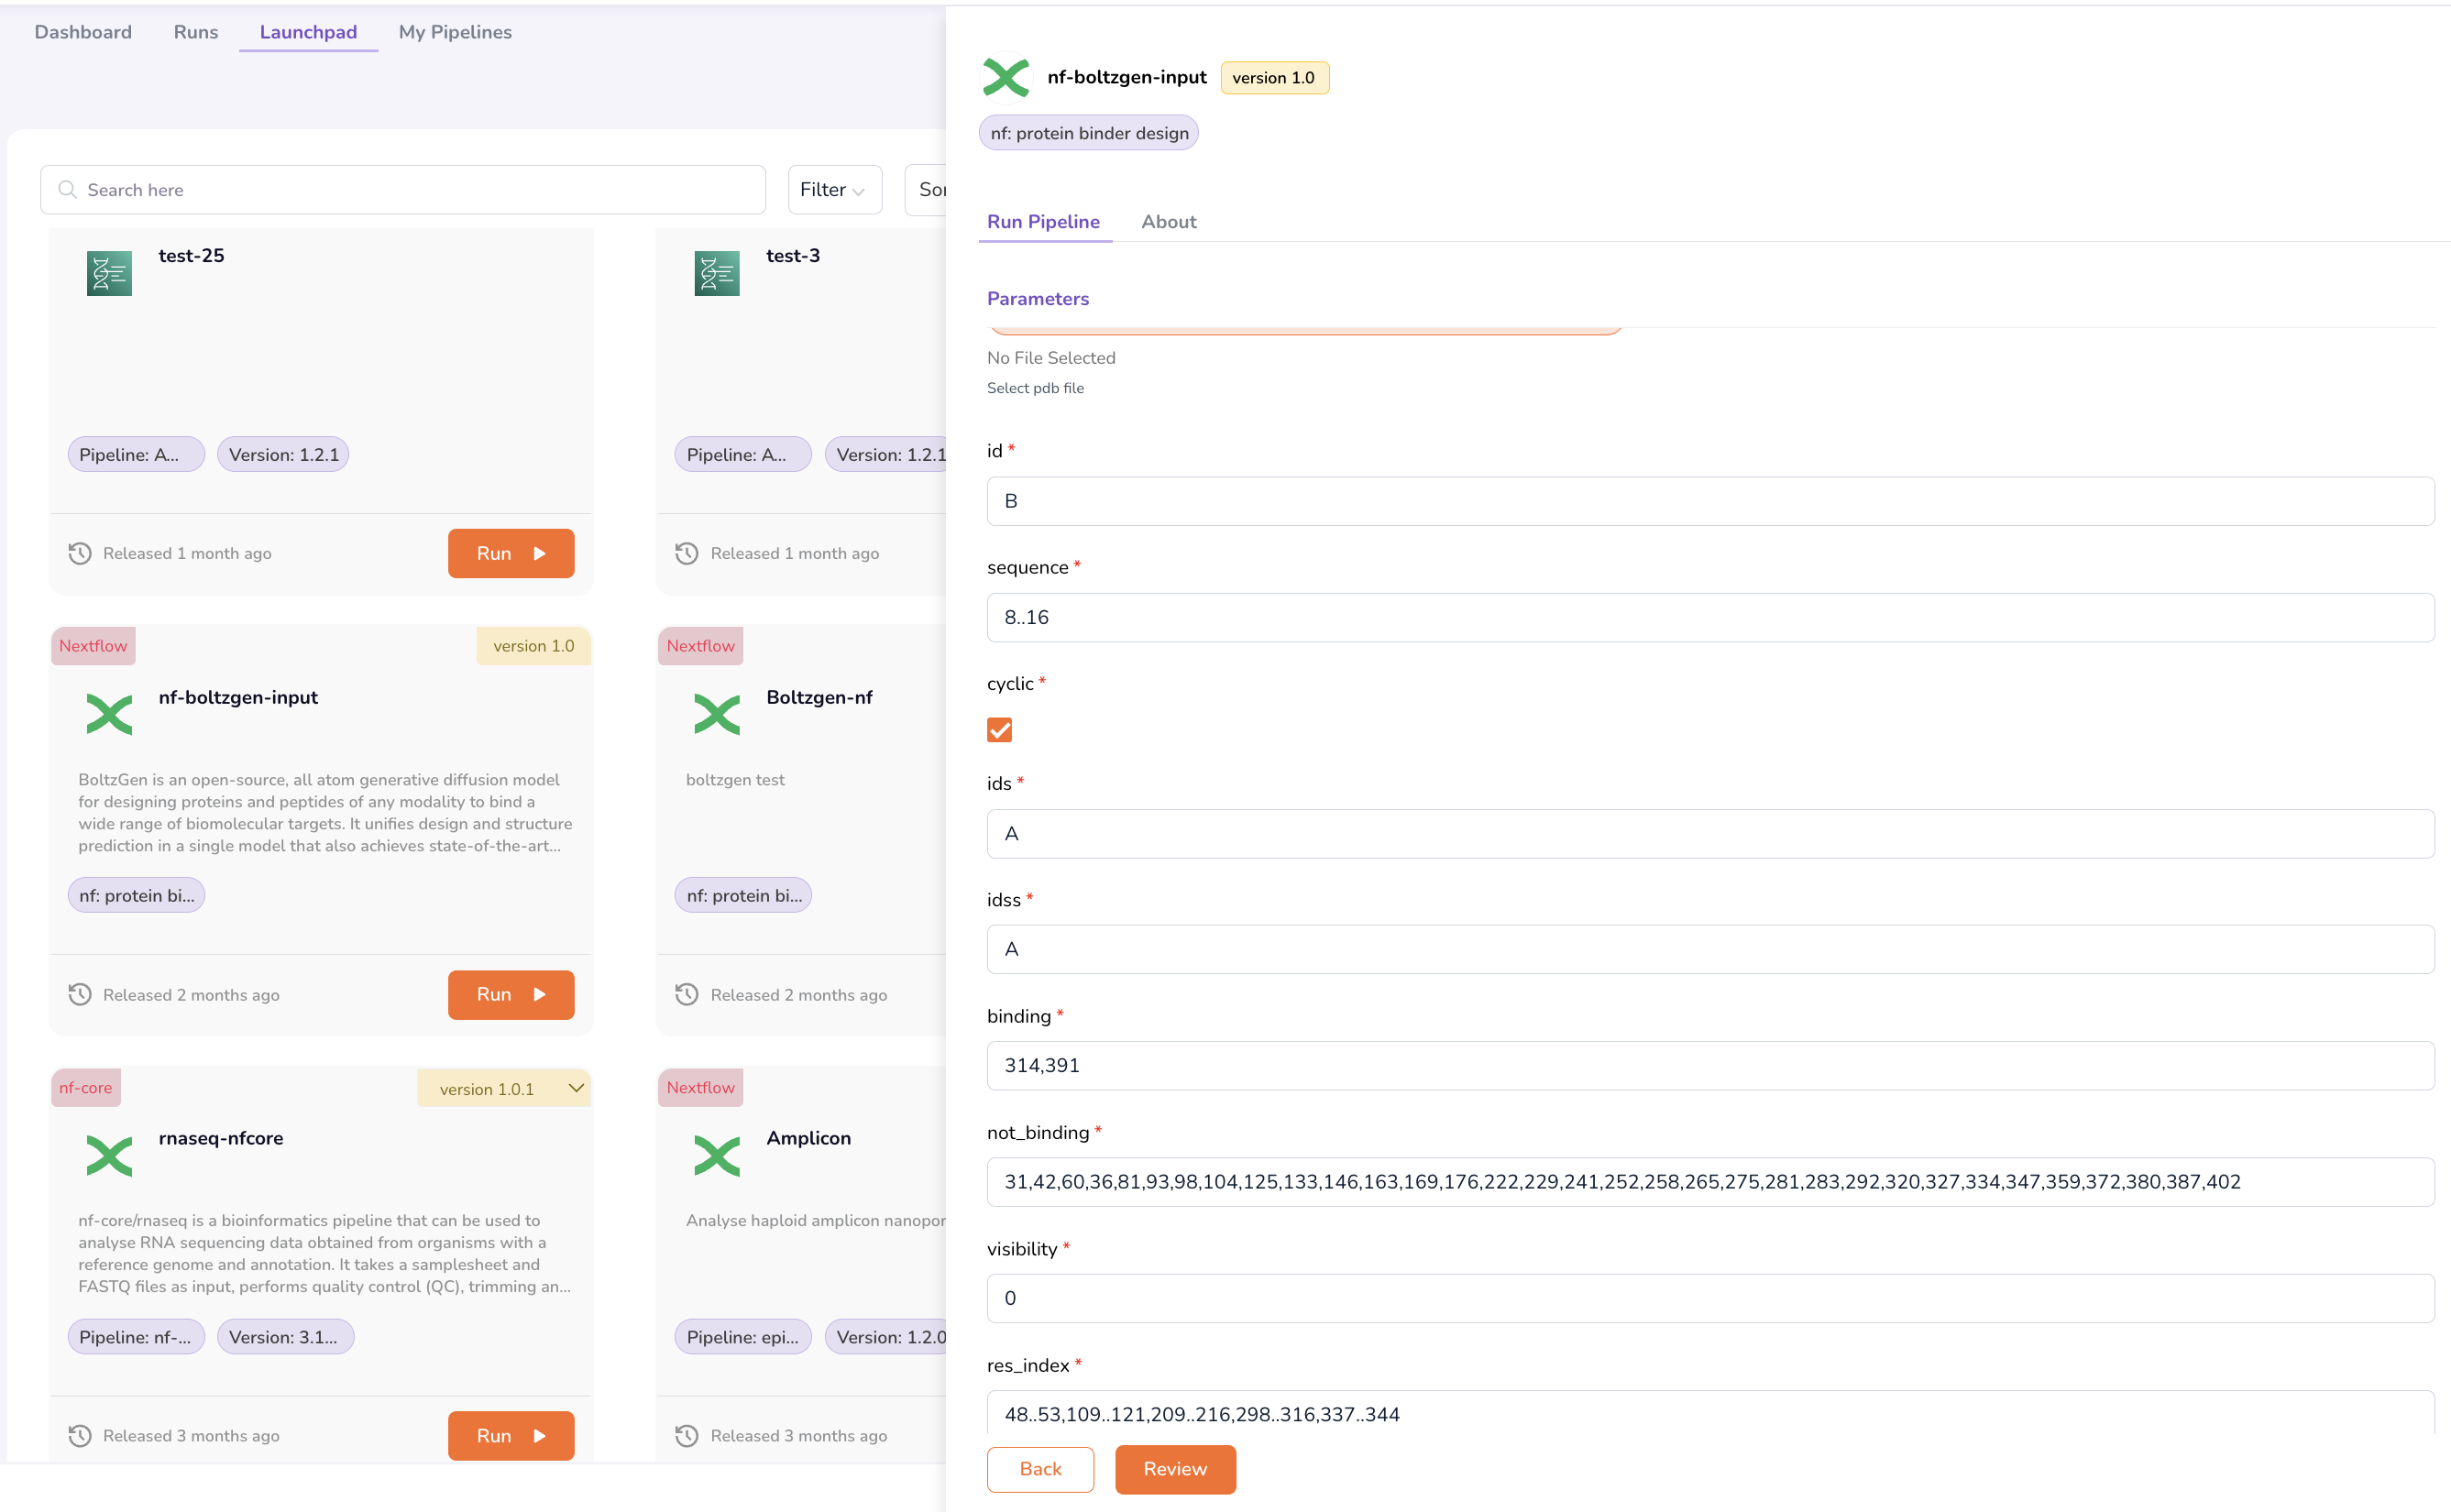
- Configure additional input parameters from the respective drop-down menus (e.g., reference genome, analysis options).
Step 4: Review and Execute
- Click Review to verify all configured input parameters, including uploaded files, input settings, and output configurations.
- Confirm that all parameters are correct.
- Click Run to execute the pipeline.
The pipeline will begin execution. You can monitor its progress from the Runs tab.
What's Next
- View pipeline results to retrieve the results of your pipeline run.