Projects
Projects are the organisational unit in Quark V3 for grouping related pipelines, workspaces, data, and team members under a single managed environment. Projects provide controlled access, consistent configuration, and a shared space for collaboration across research and development.
Audience: Bioinformaticians and Administrators
Access: Select Projects from the left navigation pane
Overview
A Project in Quark V3 defines:
- The type of work being done (Developer, Data Science, or All)
- The networking configuration via Istio service mesh
- The domain (FQDN and domain model) through which project resources are accessible
- The authentication settings governing who can access the project
Creating a New Project
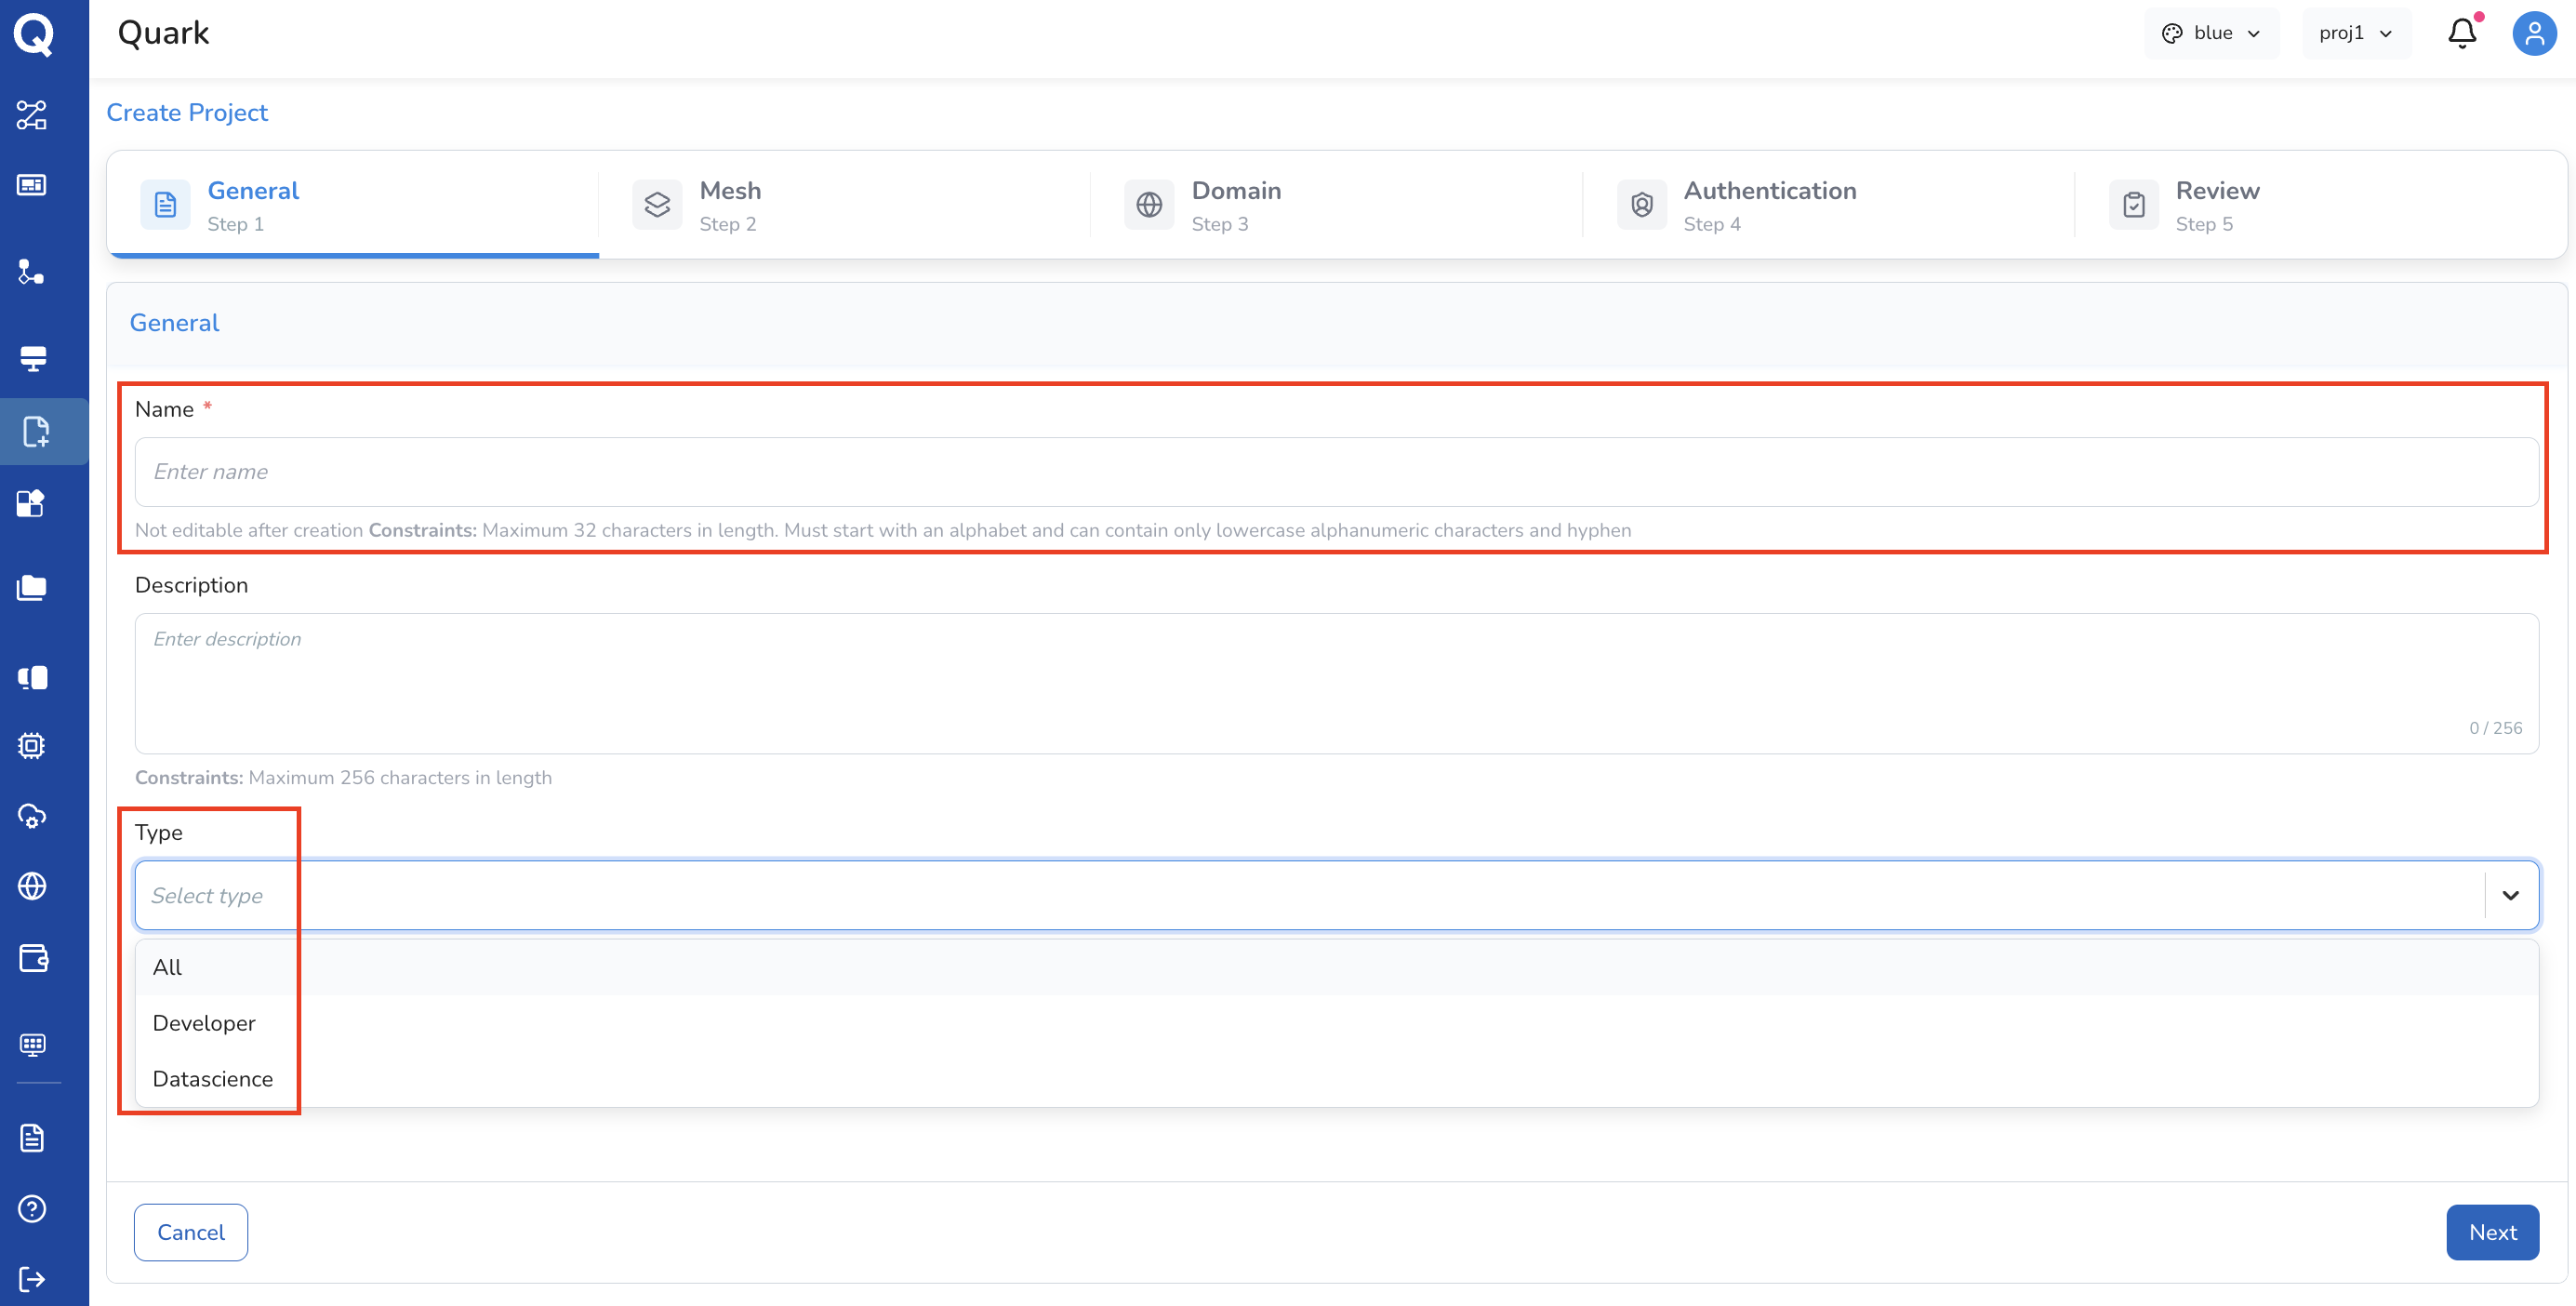
To create a project, click the Add New button in the top right corner of the Projects tab. Project setup follows a five-step guided workflow:

Step 1: General
Configure the basic identity and purpose of the project.
| Field | Description |
|---|---|
| Project Name | A unique name for the project (e.g. oncology-rna-seq-q2) |
| Description (optional) | A brief summary of the project's scope or goals |
| Project Type | Select the type of work this project supports (see below) |
Project Types:
| Type | Use case |
|---|---|
| Developer | Engineering, pipeline development, and infrastructure configuration |
| Data Science | Analytical research, exploratory data analysis, and ML workflows |
| All | Unrestricted — covers both Developer and Data Science use cases |
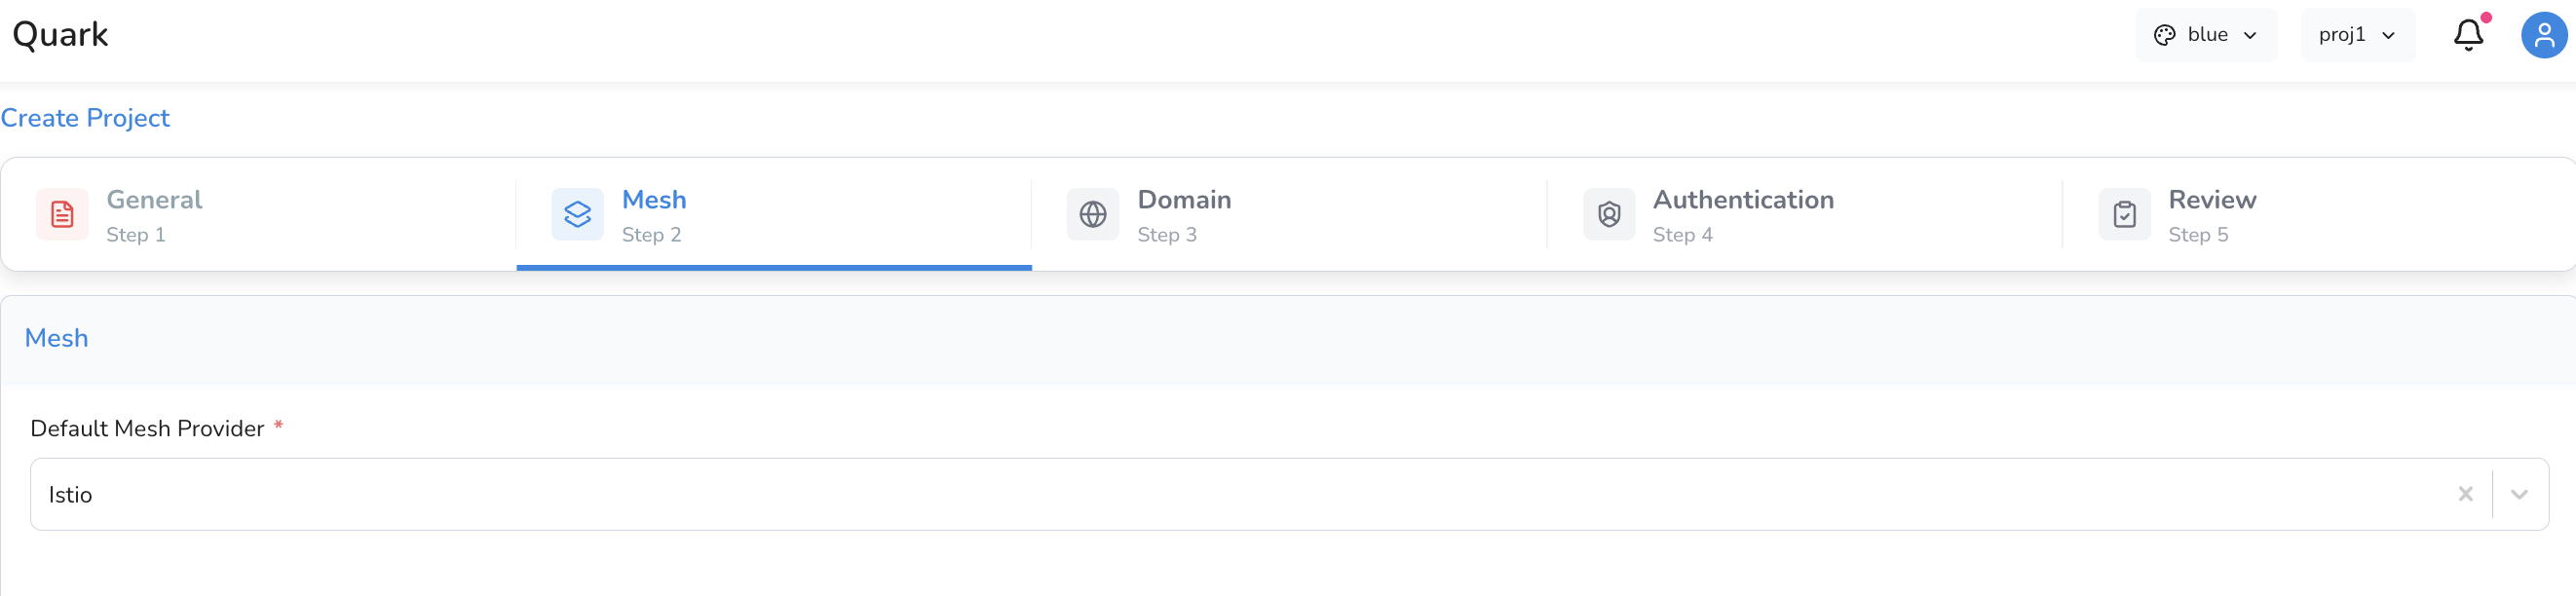
Step 2: Mesh
Configure the service mesh for the project. The service mesh manages secure, observable communication between services running within the project.
| Field | Description |
|---|---|
| Mesh Provider | Select the mesh provider — Istio is the default and currently supported provider |
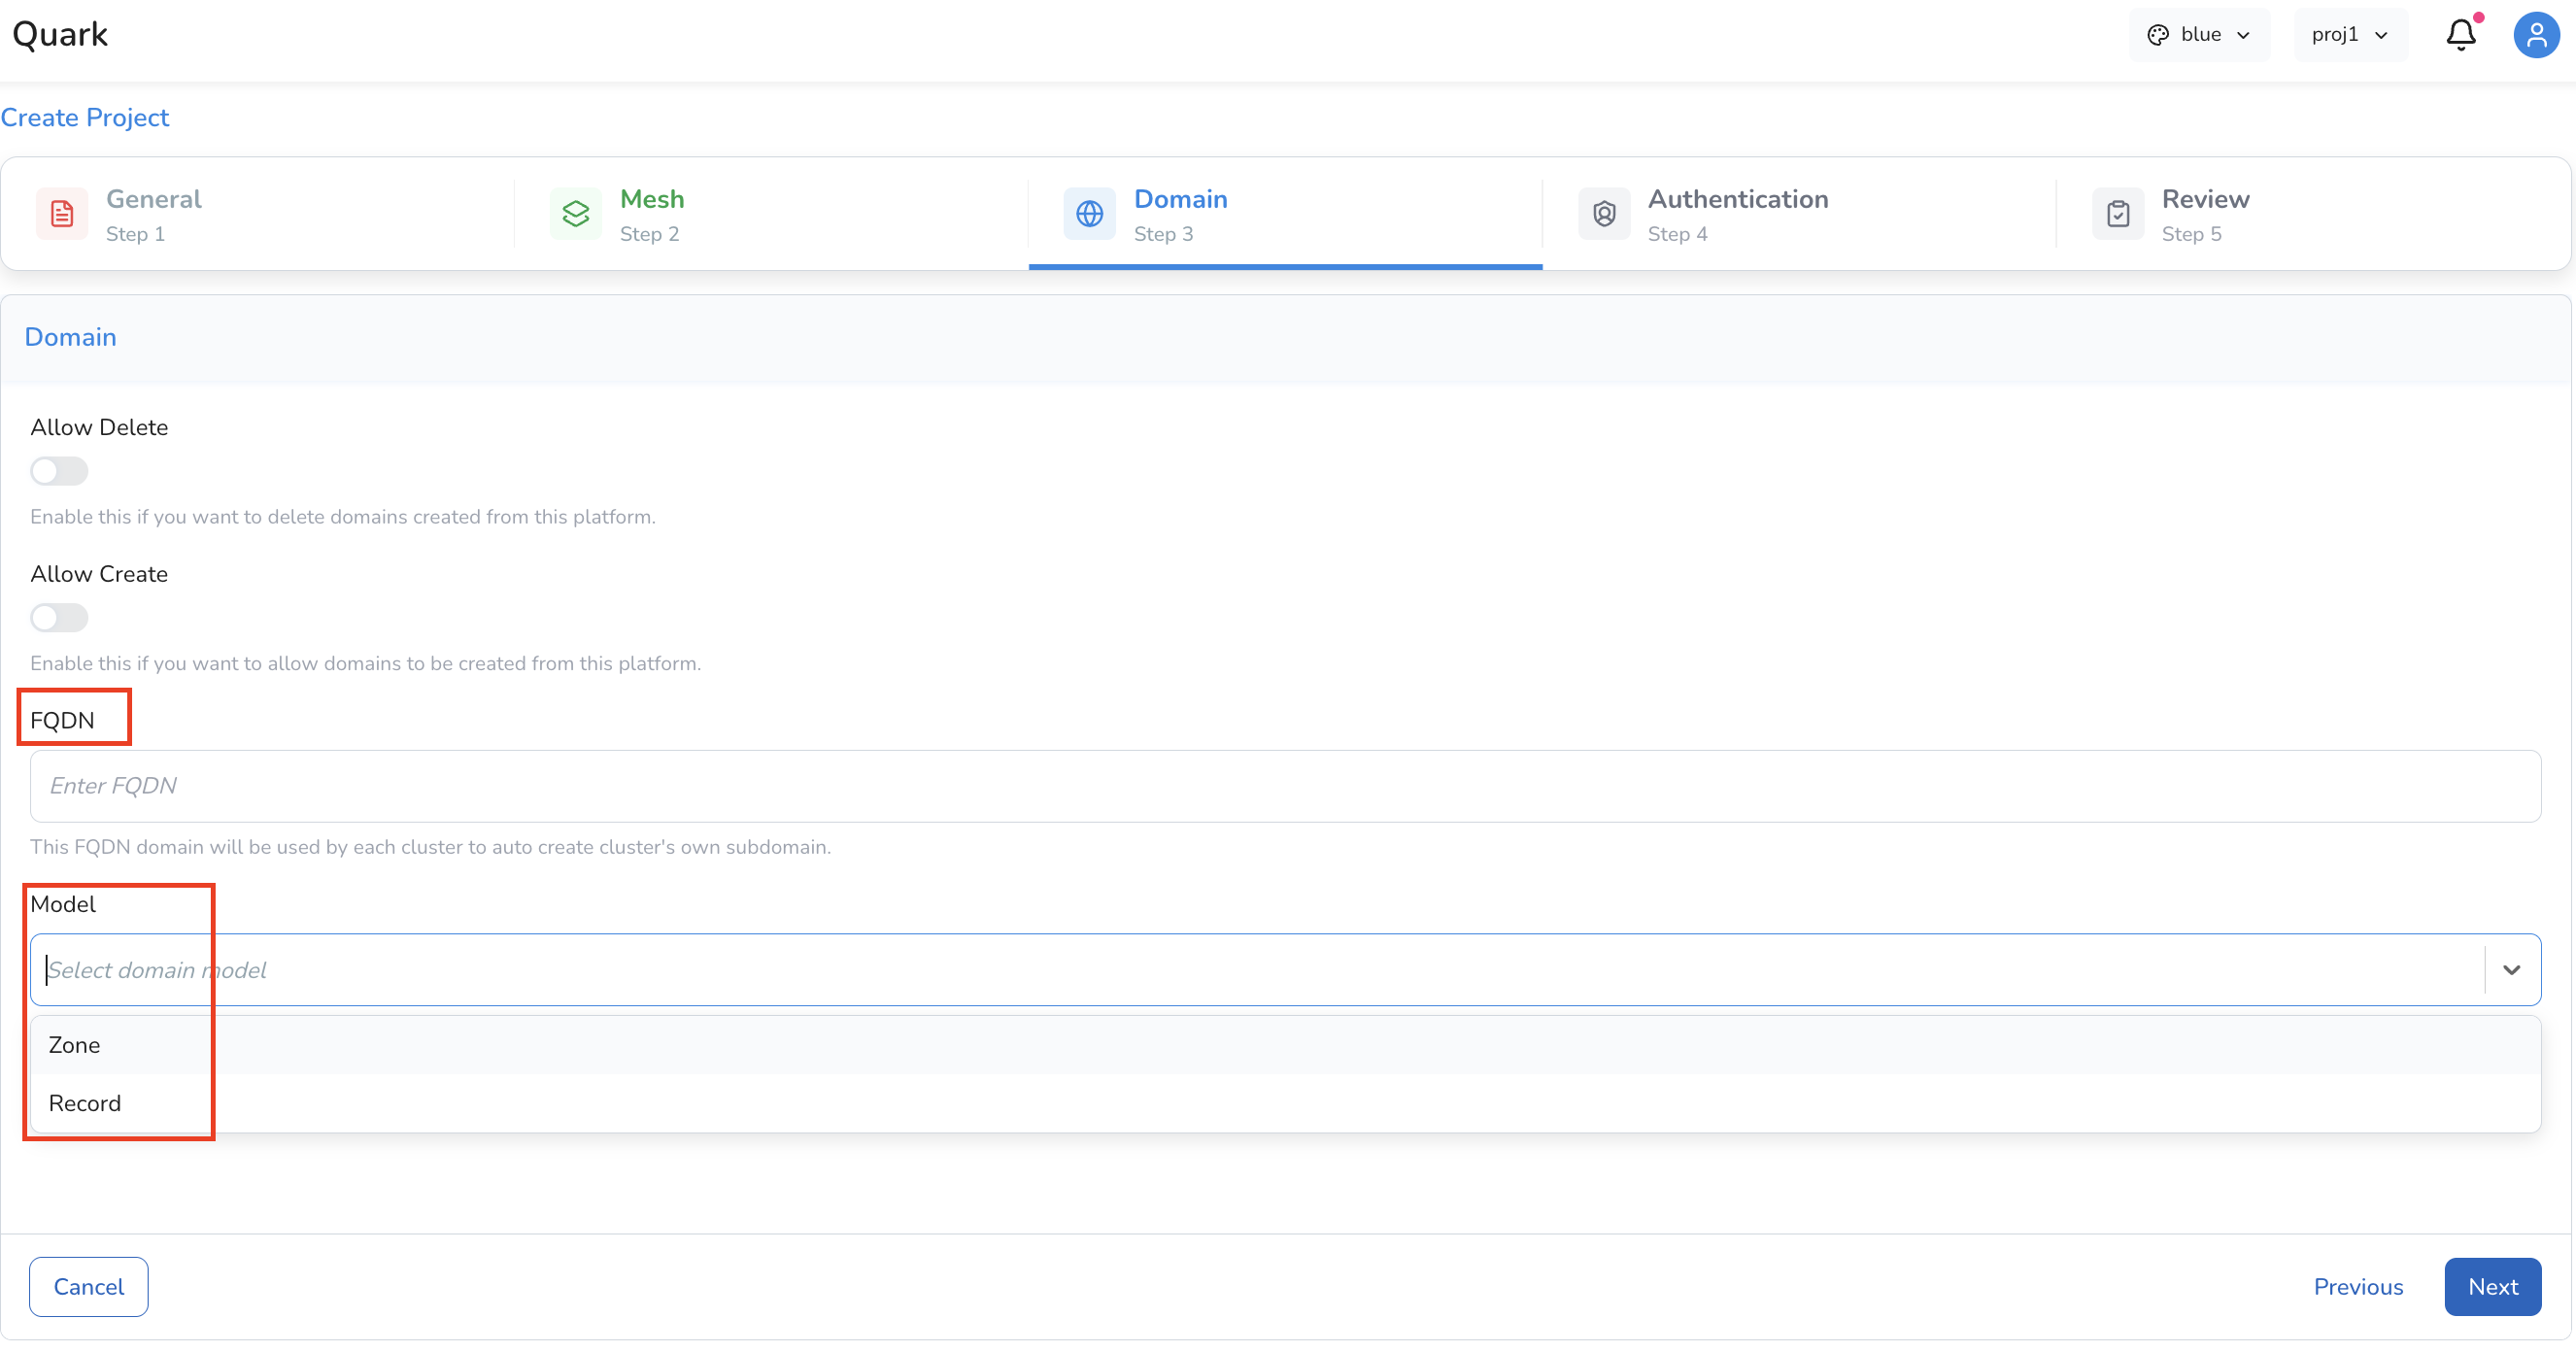
Step 3: Domain
Configure the project's domain settings, which determine how project resources are addressed and accessed.
| Field | Description |
|---|---|
| Allow Delete | Enable this toggle if you want to delete domains created from this platform |
| Allow Create | Enable this toggle if you want to allow domains to be created from this platform. |
| FQDN | The Fully Qualified Domain Name for the project (e.g. my-project.quark.myorg.com) |
| Domain Model | Select the domain model appropriate for your organisation's setup |
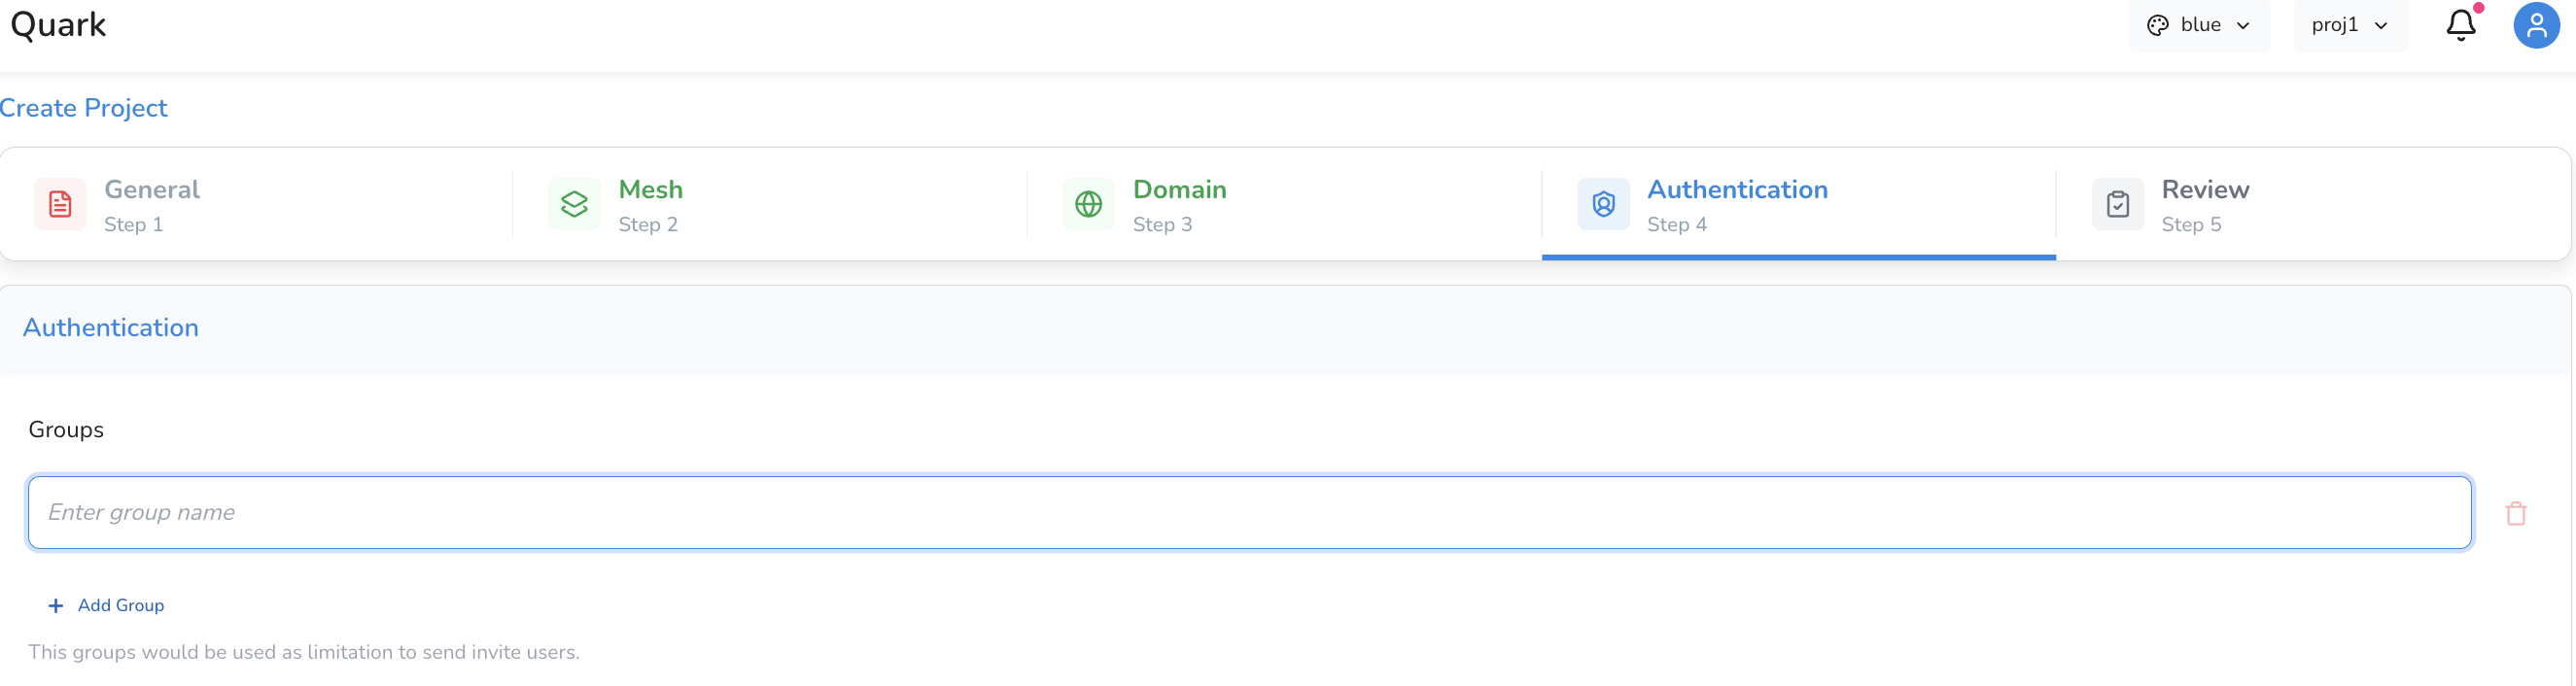
Step 4: Authentication
Define the identity and access settings for the project.
Configure who can access the project by creating a Group. This constrains who can access this project.
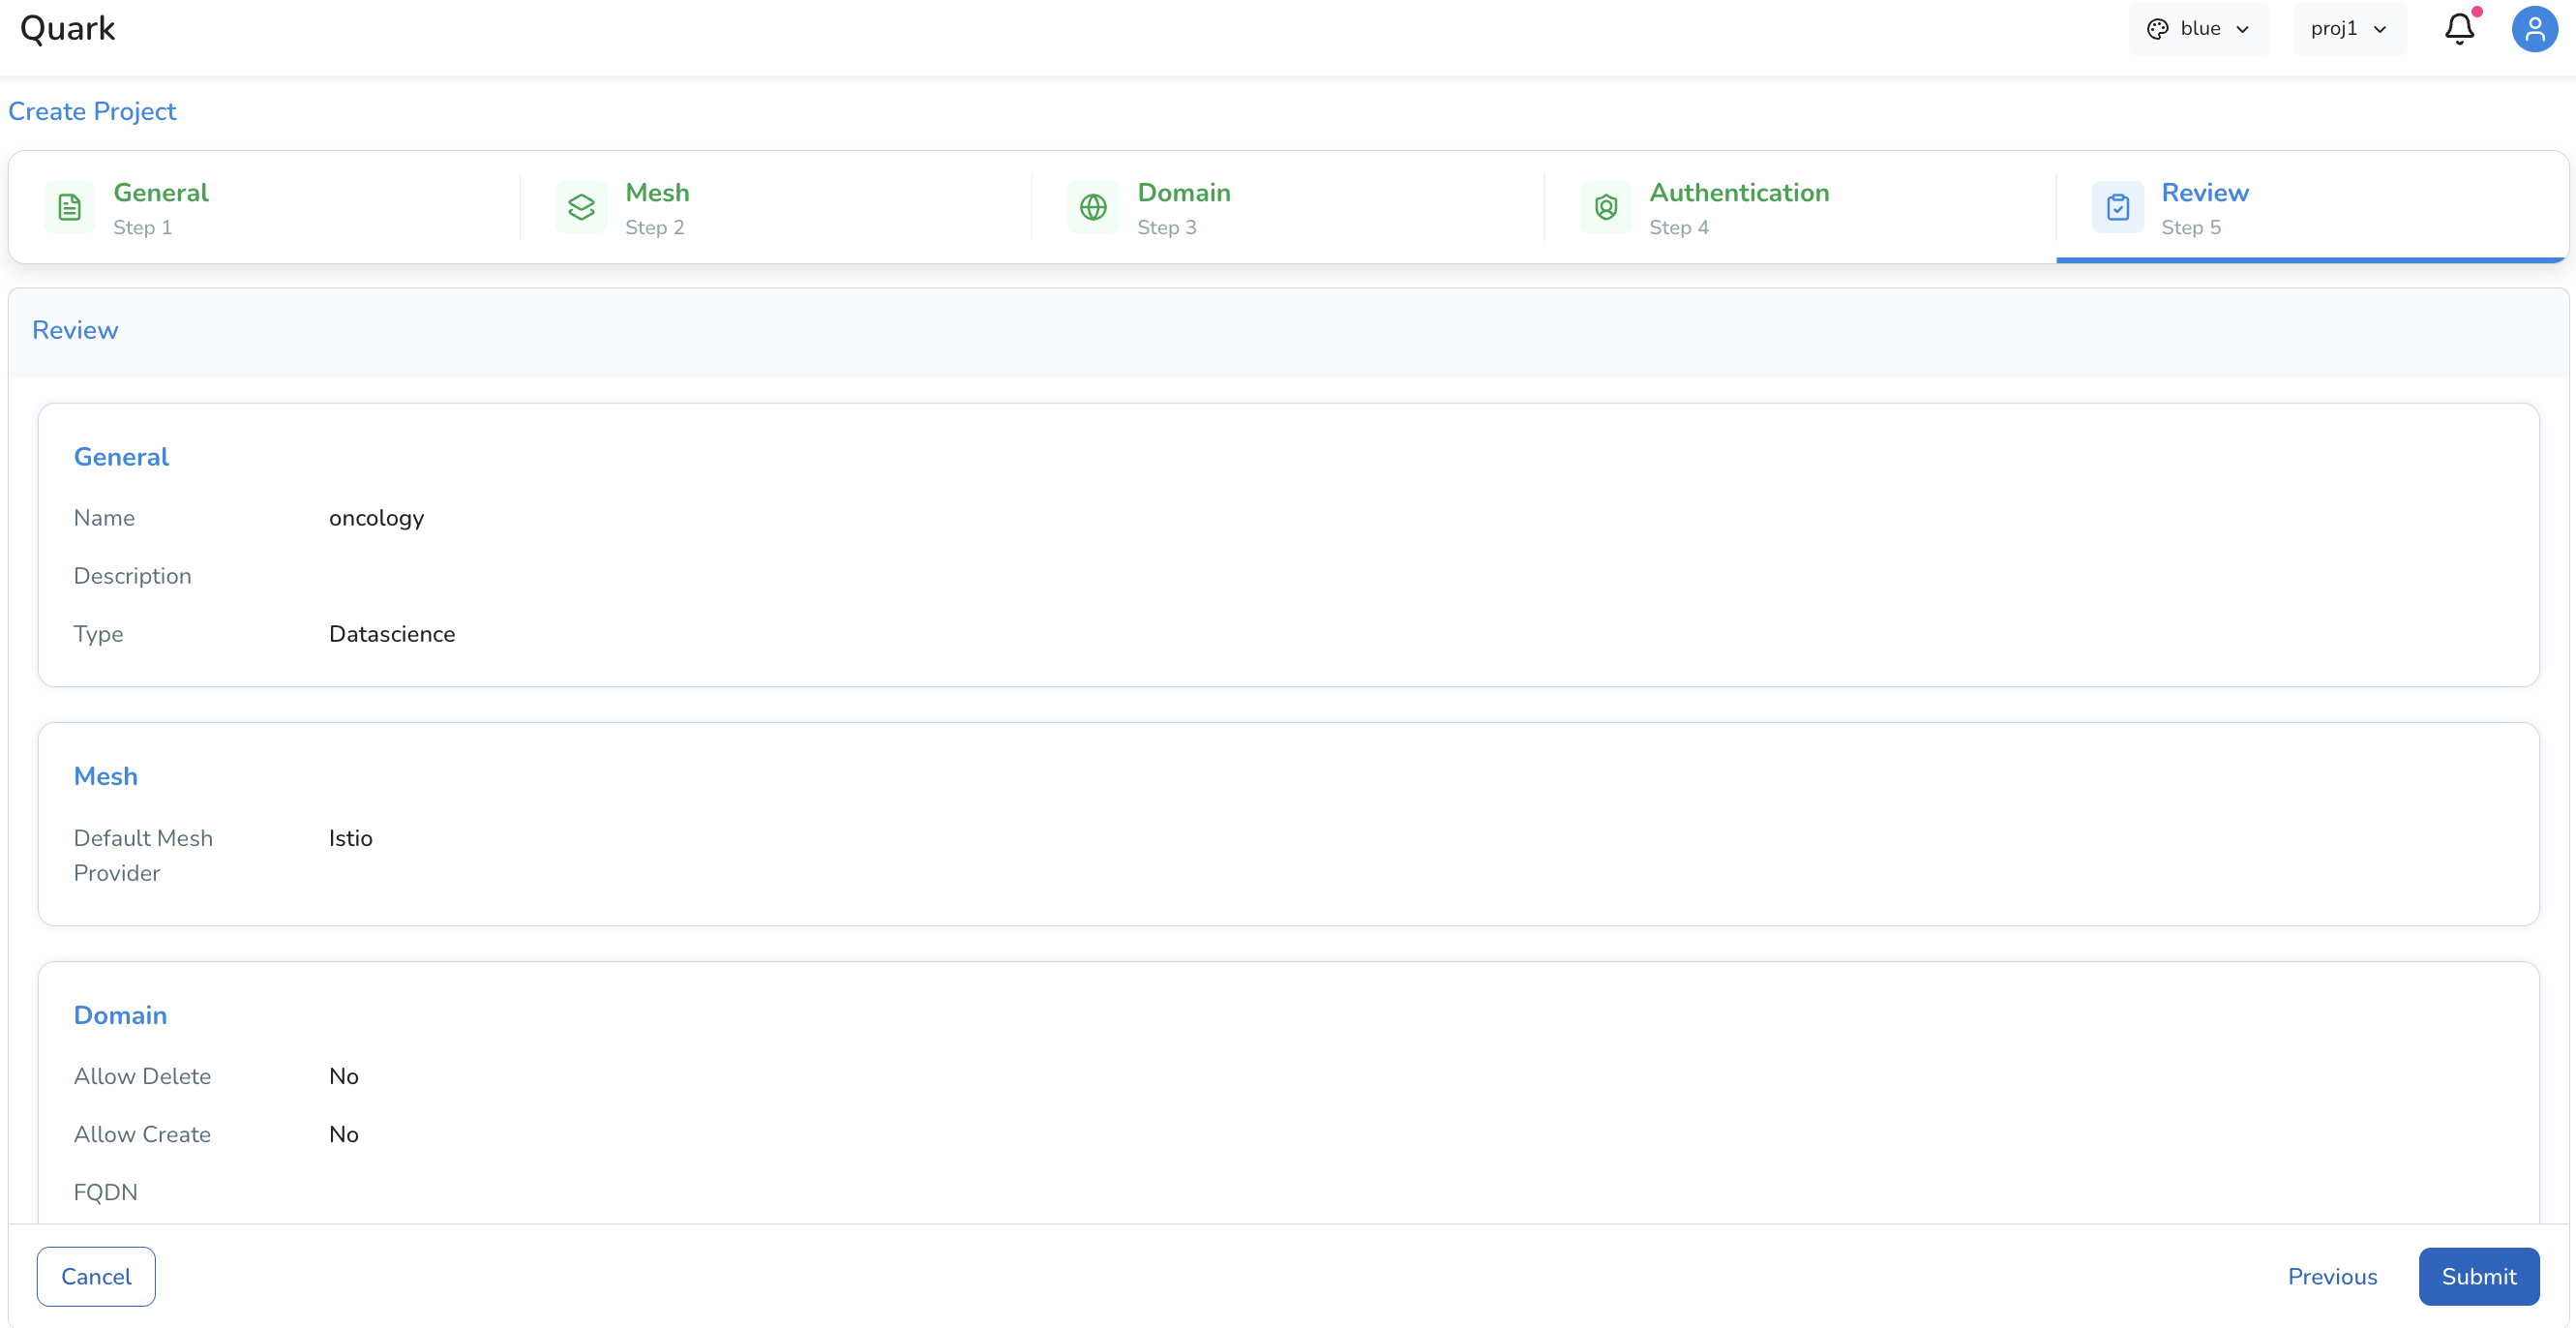
Step 5: Review
The final step presents a full summary of all configuration choices made across the previous four steps. Review each section carefully before confirming.
- If any setting needs to be changed, navigate back to the relevant step using the step indicators at the top of the wizard
- Once satisfied, click Submit to provision the project
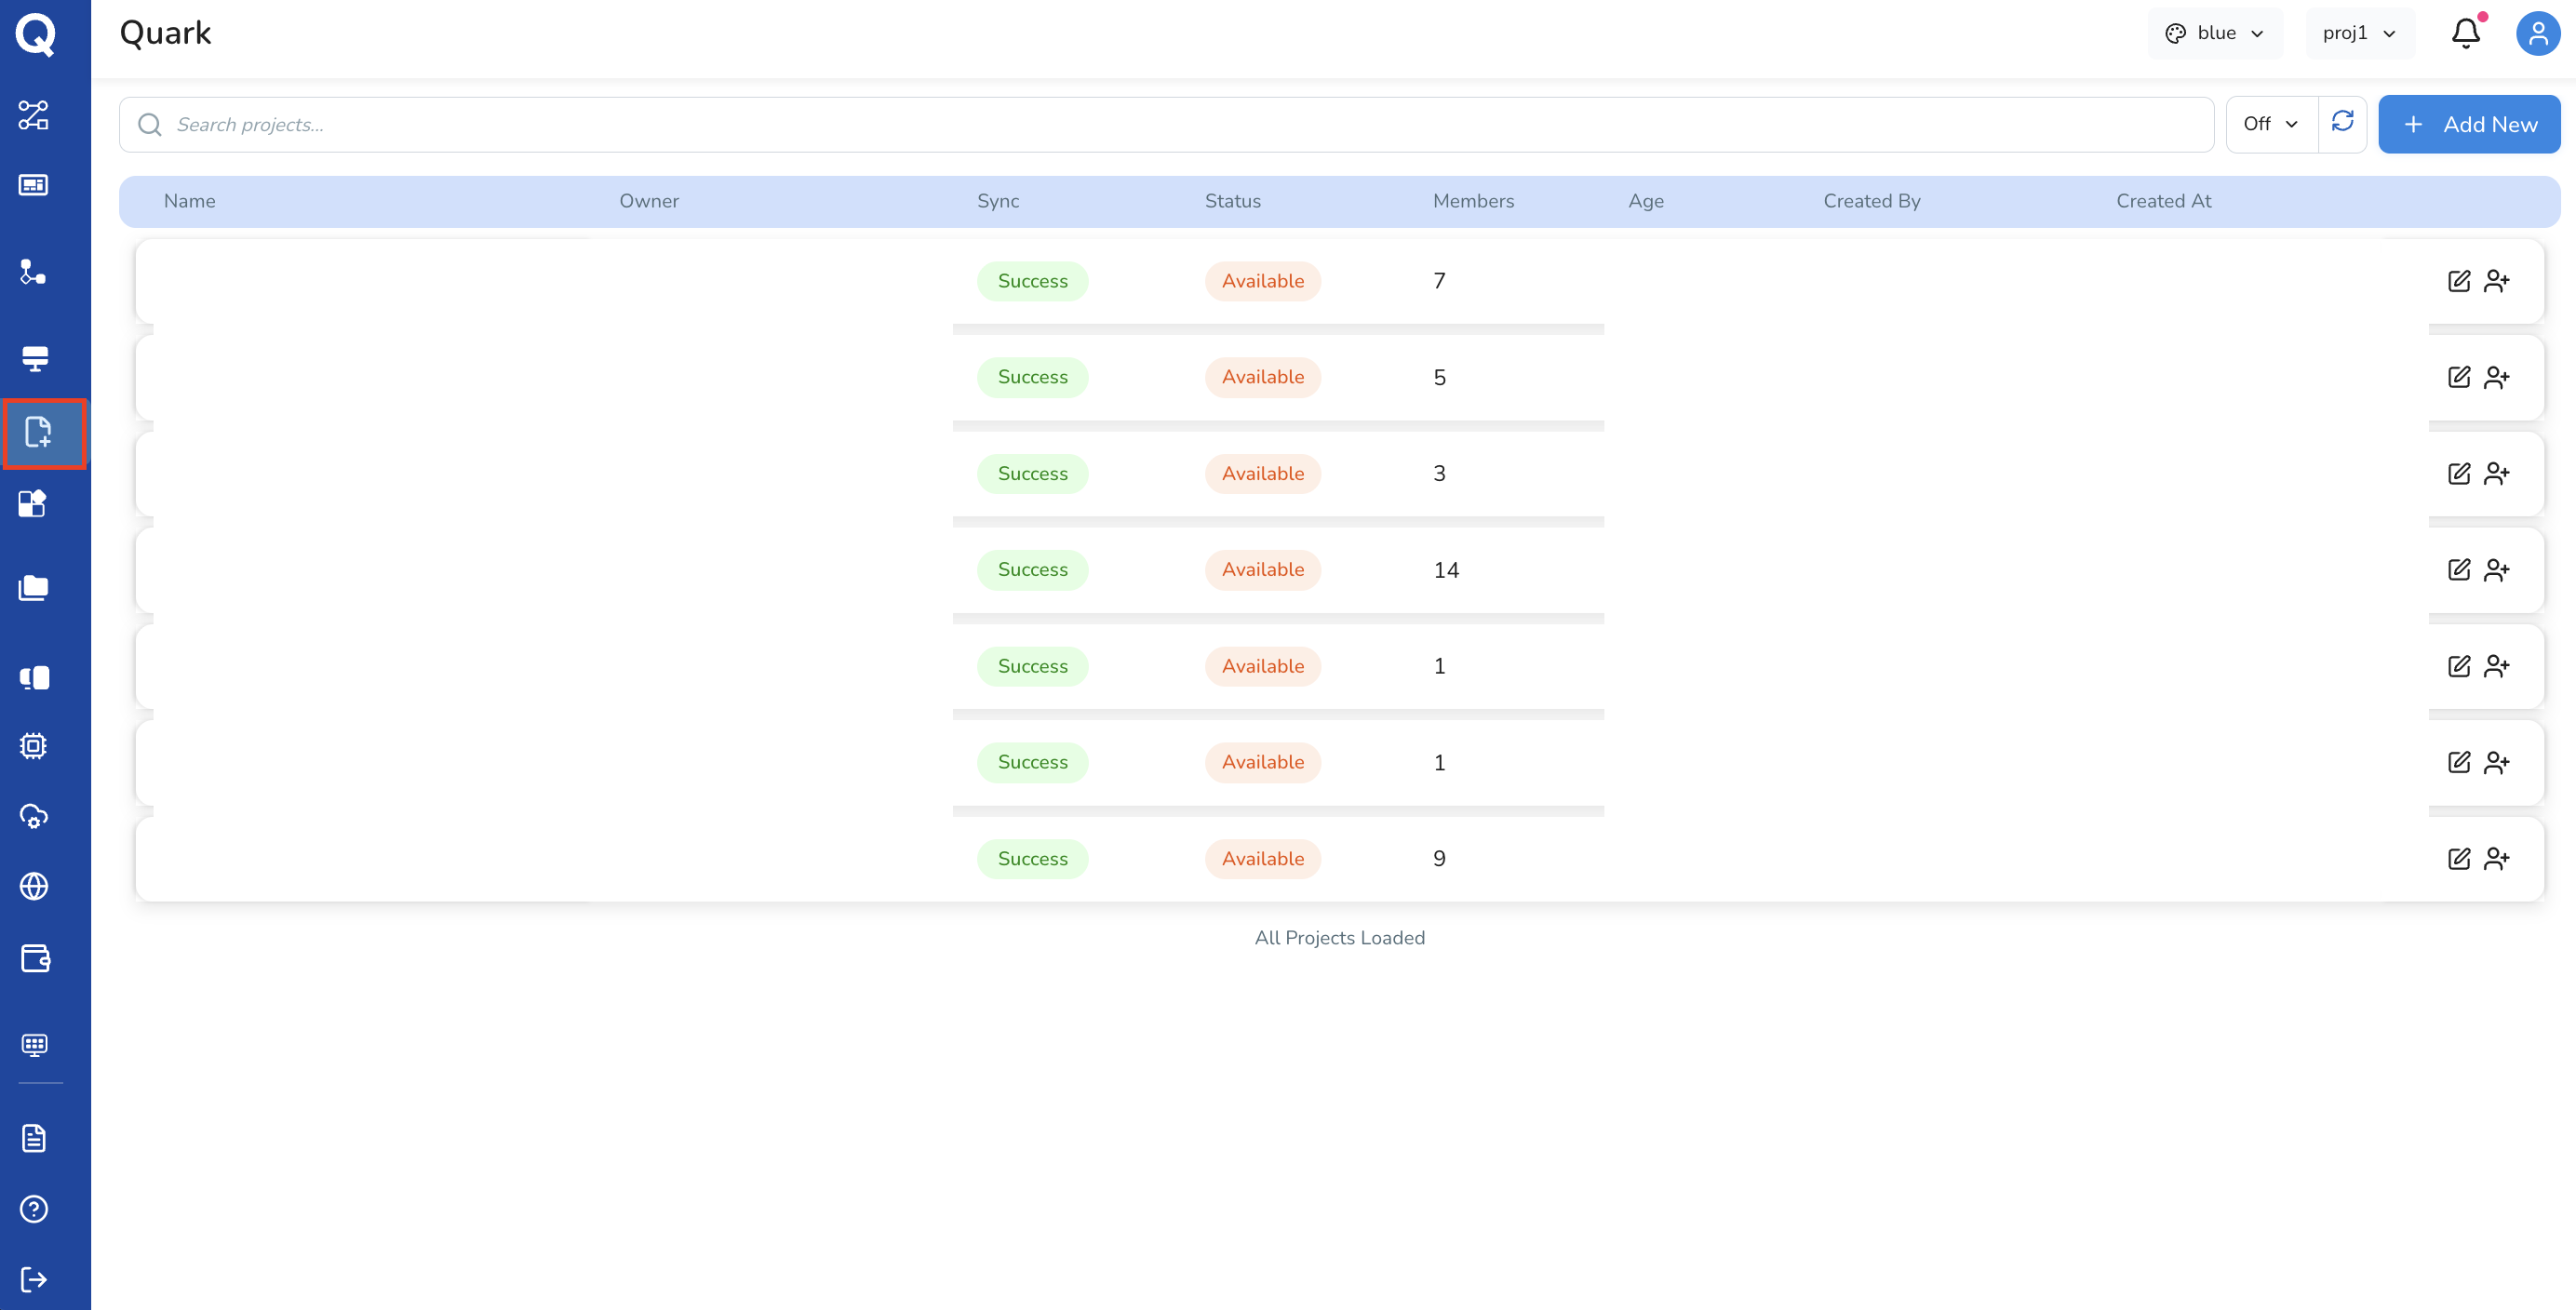
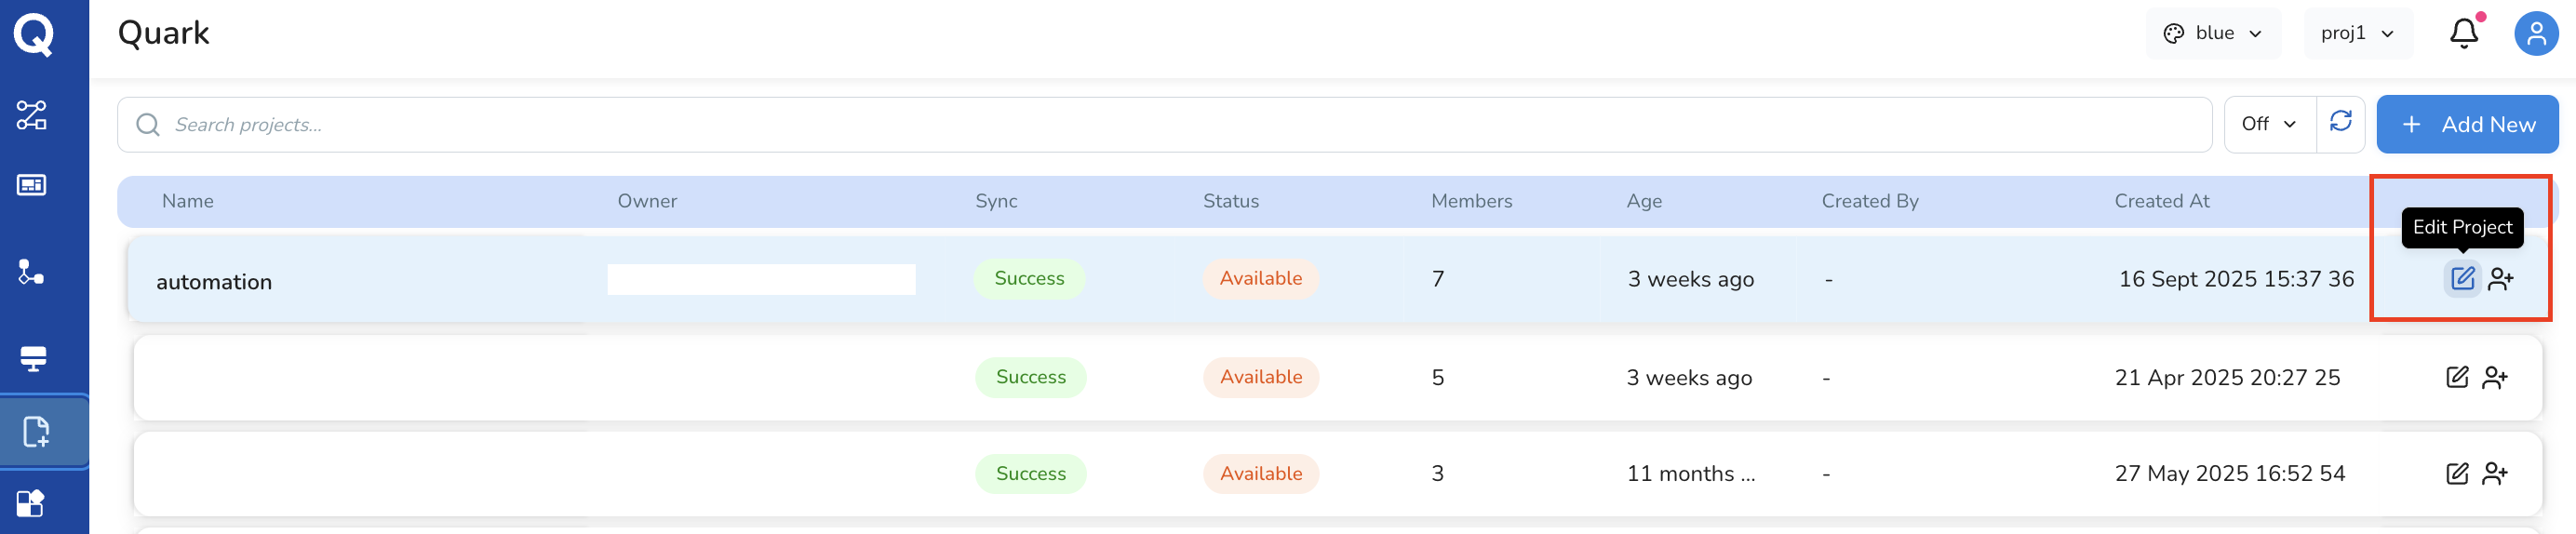
Managing Projects
Once created, projects appear in the Projects list. From here, authorised users can view, edit, or manage project settings.
Further Reading
- Workspaces — configuring compute environments within a project context
- Managing Files — uploading and downloading files to your Data on the platform