Onboarding Users
Overview
The Users section is where you onboard people onto the TRE platform and place them within the Organization Structure. Creating a user here adds them to the platform, but does not grant them access to any specific project — project membership is managed separately by the TRE Administrator through the Project Members workflow.
This activity assumes you have already defined at least one Group and one Business Unit or Department. If you haven't, complete Defining the Organization Structure first, since users must be placed within the hierarchy at creation time.
Steps to Onboard a User
1. Open the Users dashboard
Navigate to Users in the left-hand Navigation Menu.
The dashboard lists every user currently registered on the platform, along with their status, team, and onboarding details.
2. Create a new user
-
Click Add New in the top-right corner.
-
In the Create User form, fill in the following fields:
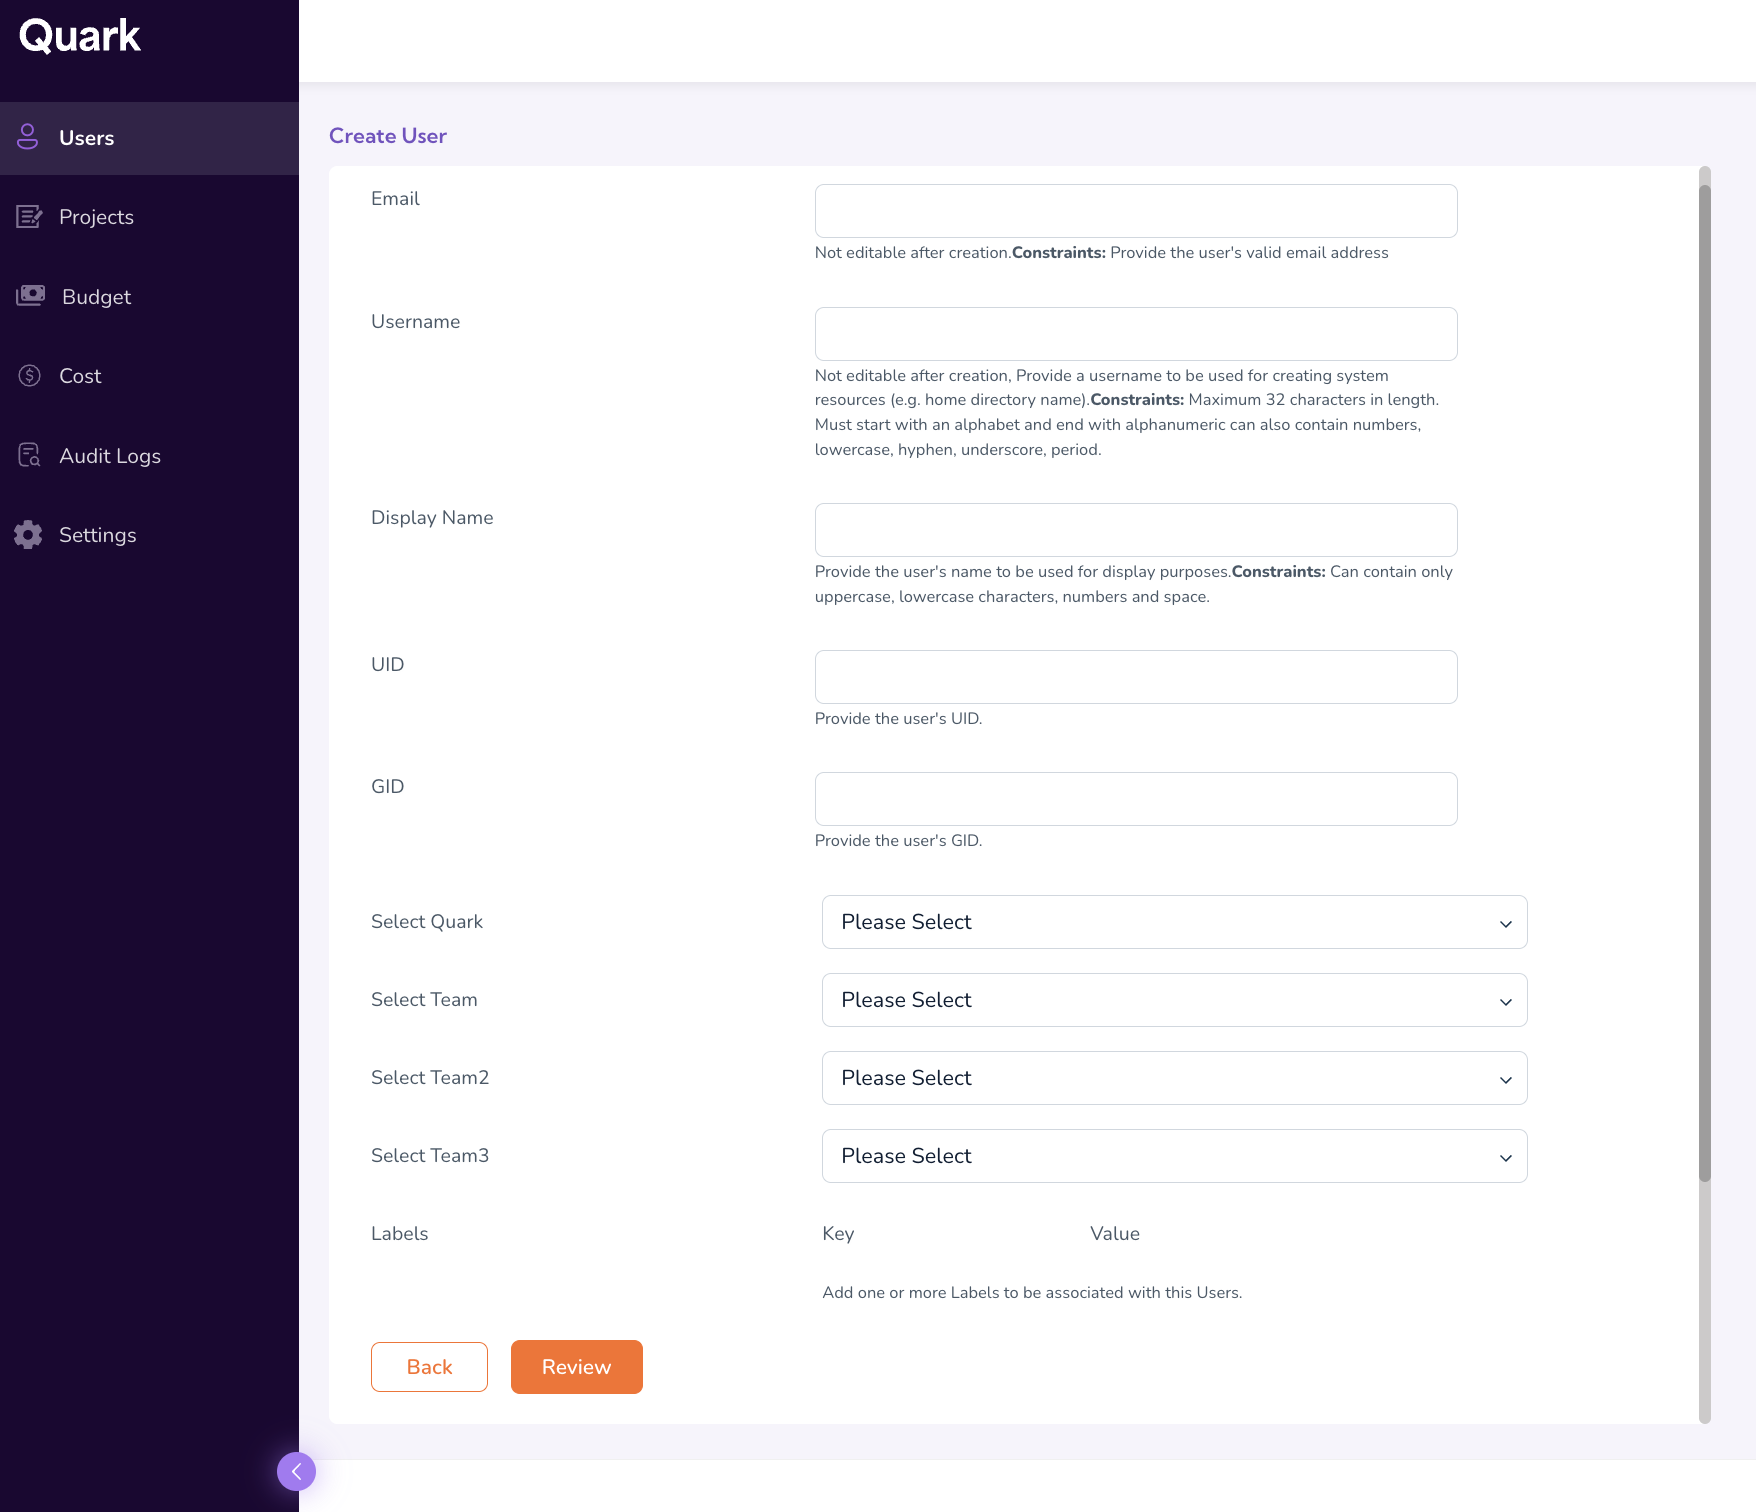
- Email (mandatory) — Must be a valid email address. This field cannot be edited after creation — verify it before submitting.
- Username — Used to identify the user across system resources. Must meet platform length and character constraints.
- Display Name — A human-readable name. Alphanumeric characters and spaces are allowed.
- UID & GID — Unique numeric identifiers used for authentication and access control on the underlying compute.
- Select Organization — Select the organization the user belongs to (this is the top-level entity you defined in the Organization Structure).
- Business Unit/Department — Select the user's placement within the hierarchy. These must exist in the Organization Structure before they can be selected here.
- Labels (optional) — Key–value tags used for filtering and search (for example,
role: postdoc). - Properties (optional) — Additional key–value metadata used for downstream policy decisions and reporting.
-
Review the entered details, then click Submit.
The newly created user appears on the Users dashboard with status (for example, Approved) and the associated details.
3. Edit a user later
To update an existing user:
- On the Users dashboard, locate the user and click the Edit button on their row.
- Modify the editable fields or selections.
- Review and save your changes.
Note: The Email field remains permanent and cannot be edited even from the Edit view. To change a user's email, you must delete the user and create a new one.
Additional Notes
- Users created here are not automatically added to any project. Project membership is managed by the TRE Administrator via the Project Members dashboard.
- The Email field is the user's permanent identity on the platform.
- A user can later be reassigned to a different sub-hierarchy by editing their profile.
What's Next
- Creating Projects — Once users exist, create the projects they'll work within.
- TRE Administrator Guide — Project Members — Hand off member-assignment to the TRE Administrator for the projects you create.