Creating Projects
Overview
Projects are the working containers in which research activity takes place on the TRE. As the Platform Administrator, you create projects here; the TRE Administrator then populates them with members, and the TRE Infra structure Administrator provisions the compute and workstation templates they consume.
Newly created projects appear as a dropdown selection for users in the top right-corner of their screen.
Onboard users who will own or contribute to the project by completing the Onboarding Users first.
Steps to Create a Project
1. Open the Projects dashboard
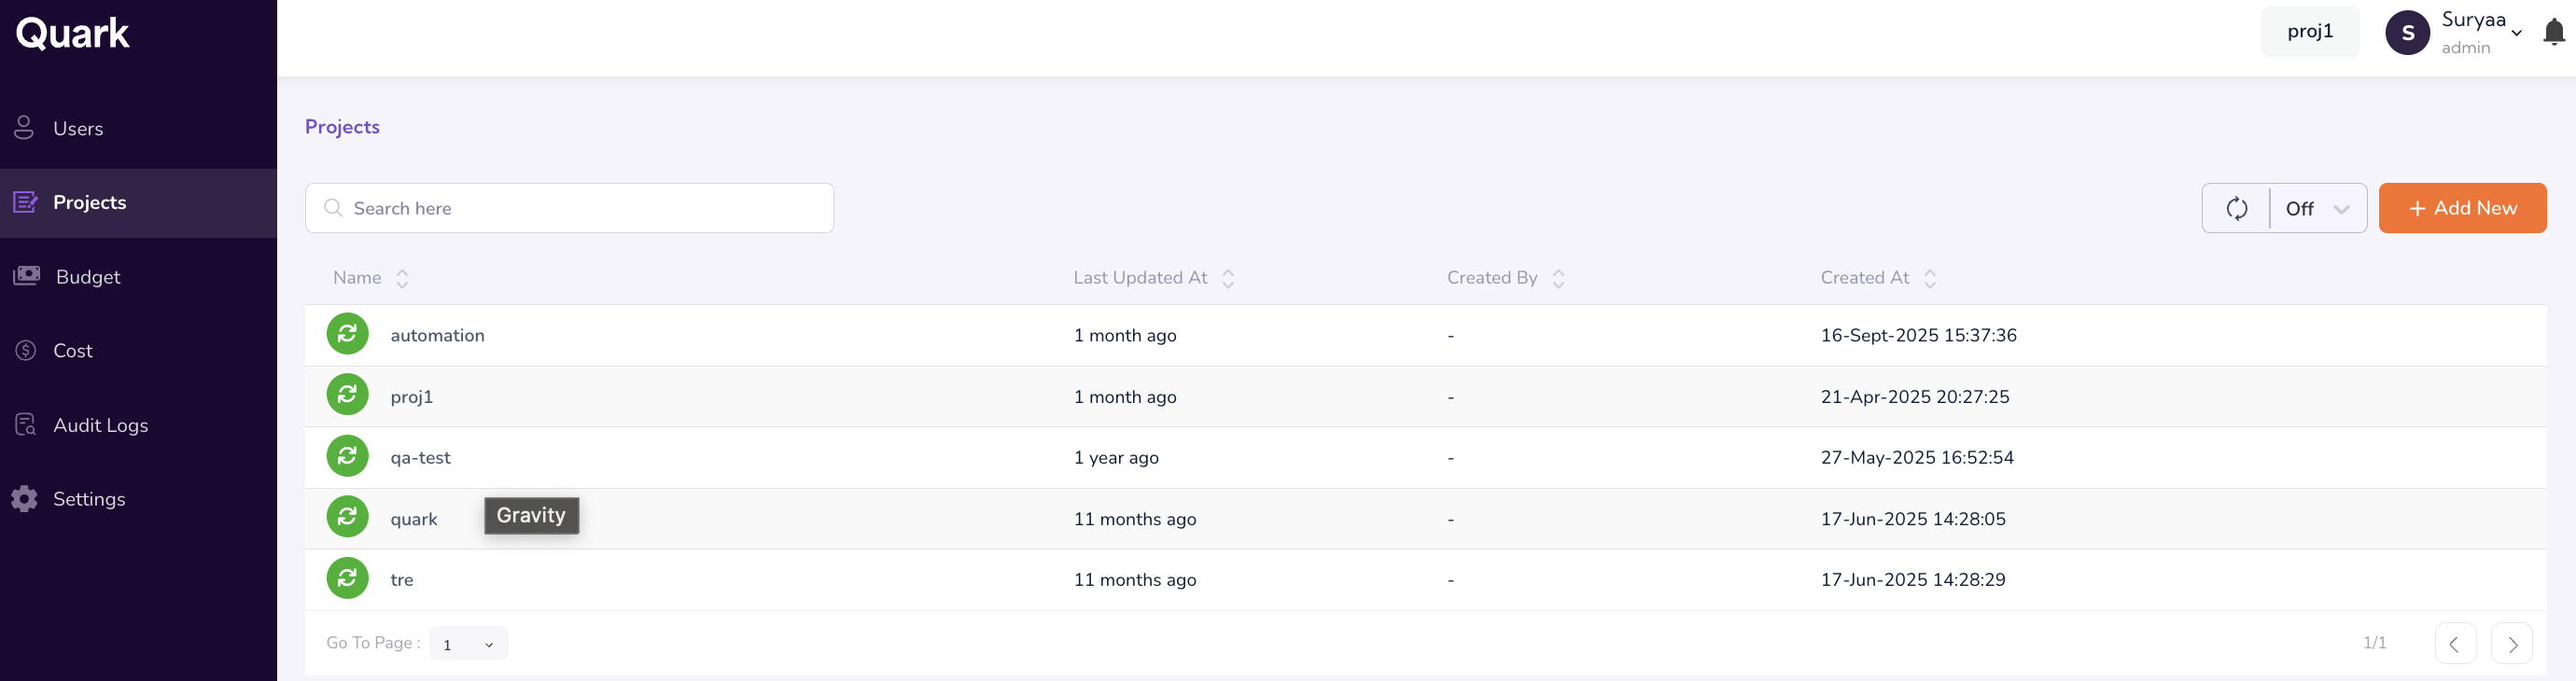
Navigate to Projects in the left-hand Navigation Menu.
The dashboard lists every project on the platform along with its Status, Last Updated date, Creation Date, and Creator.
2. Create a new project
-
Click Add New in the top-right corner.
-
In the Create Project form, fill in the following fields:
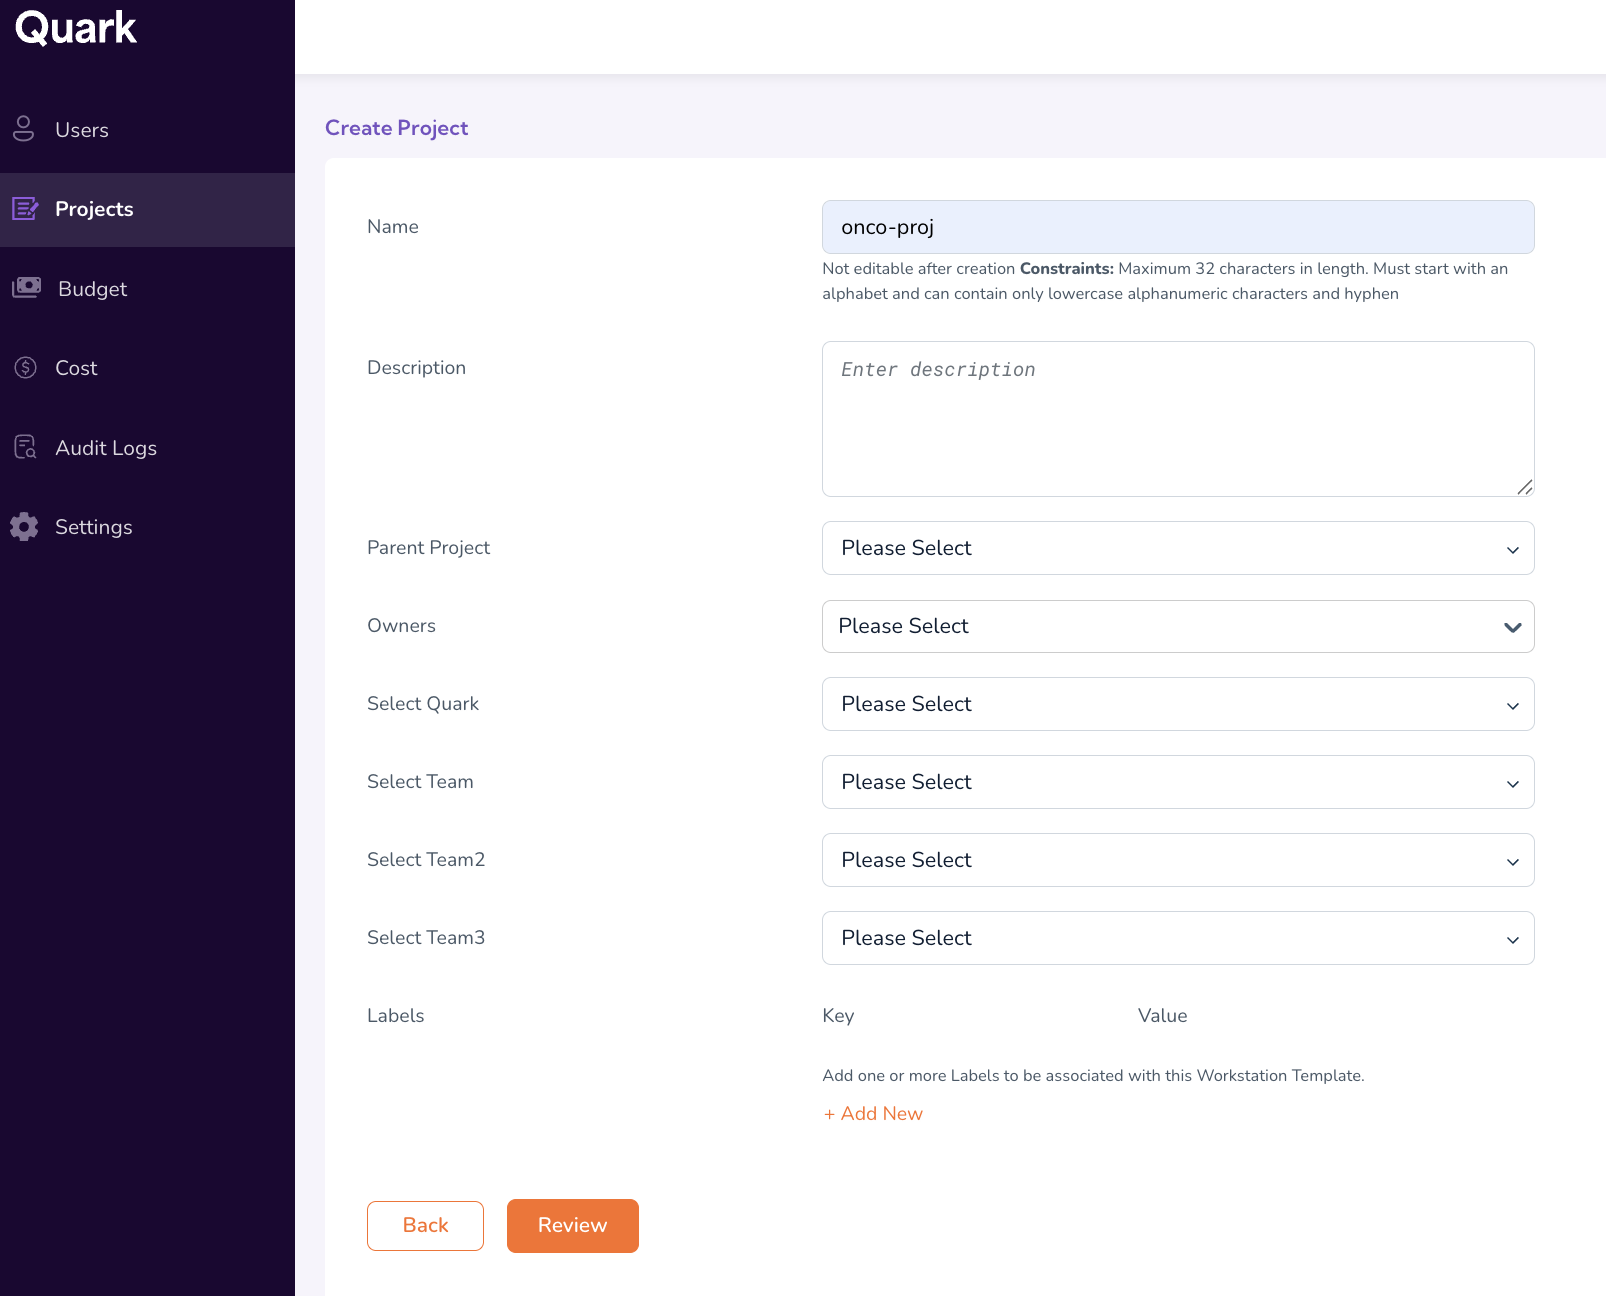
- Project Name (mandatory) — A unique, descriptive name as it will appear in dropdowns and listings across the platform.
- Description — A short summary of the project's purpose and scope.
- Parent Project (optional) — If this project is a sub-project of an existing one, select the parent. Useful for grouping related workstreams under a single umbrella.
- Owners — Select one or more users who will own this project. Owners must already exist on the platform via Onboarding Users.
- Organization — Select the organization this project belongs to (matches the top-level entity in your Organization Structure).
- Teams — Select one or more Business Units/Departments that the project is associated with. Members of these teams will be eligible for project membership.
- Labels (optional) — Key–value tags used to categorize and retrieve the project.
-
Review the entered details, then save.
The new project appears on the Projects dashboard with its status, creation date, and creator populated.
3. Confirm the project is available downstream
Once saved, the project becomes immediately available as a dropdown selection for users in the top-right corner of their screens. This allows: - TRE Administrators to assign members via the Project Members dashboard. - TRE Infrastructure Administrators to associate projects with computes and workstation templates.
Additional Notes
- The Owners you select are the project leads — they can typically have elevated permissions within the project.
- A project's Teams selection determines which users are eligible to be added as members; it does not automatically add them. Actual membership is assigned by the TRE Administrator.
What's Next
- Configuring Platform Controls — Configure approval workflows and notifications that will govern how researchers interact with this project.
- TRE Administrator Guide — Project Members — Hand off member assignment to the TRE Administrator.