Workstations Overview
Quark's Trusted Research Environment provides researchers with secure, cloud-based Workstations for performing data analysis. A workstation is a fully provisioned virtual machine equipped with the operating system and analytical tools required for your research — including JupyterLab and other software.
Workstations operate within the TRE's governance framework: every workstation must be approved by the TRE Administrator before it can be launched, and all data flowing in and out of the workstation is subject to controlled access and audit logging.
The platform supports both Windows and Linux (Ubuntu DCV) workstation images, allowing researchers to choose the operating system that best suits their analytical workflows.
Workstation Capabilities
Quark workstations provide the following capabilities:
- Requesting and Launching a Workstation — Submit a workstation request and launch a workstation.
- File Management — View data files and access output or result files generated by your analysis.
- Resource Monitoring — Monitor CPU usage, memory consumption, disk space, and other performance metrics in real time.
- Lifecycle Management — Define automated schedules for starting and stopping workstations to optimise resource usage and cost.
- Cost Tracking — View daily, weekly, and monthly cost breakdowns for your workstation usage.
- Event Logging — All workstation-related activities (creation, launch, start, stop, termination) are automatically logged with timestamps and user information.
Requesting and Launching a Workstation
Before you can use a workstation, you must submit a request for provisioning it, which will be reviewed by the TRE Administrator.
- Select Workstations from the Navigation Menu on the left.
-
Click the Add New button in the top-right corner of the screen.

-
Select the appropriate workstation image from the available options (e.g.,
Ubuntu DCVfor a Linux workstation). - In the right-hand pop-up pane, fill in the following details:
- Workstation Name — Enter a descriptive name for your workstation (e.g.,
ws-ubuntu-cohortanalysis). - Description — Provide a brief description of the workstation's intended purpose.
- Storage — Specify the disk storage size in GB (e.g.,
30). - Capacity — Select the appropriate compute capacity (CPU and memory). Your TRE Administrator will advise on the available capacity options.
- Workstation Name — Enter a descriptive name for your workstation (e.g.,
- After verifying all parameters, click the Request icon.
-
Click Submit to send the provisioning request.

The workstation request will now appear on the Workstations screen with a status of Pending Approval.
Note: Notify your TRE Administrator if your request requires expedited review.
Launching a Workstation
Once the TRE Administrator approves your workstation request, you can launch and connect to it.
- Navigate to Workstations from the Navigation Menu.
- Confirm that your workstation status has been updated to Approved.
-
Click the Launch icon next to your workstation.

-
A confirmation prompt will appear. Copy the prompt text, paste it into the verification box, and click Start.

-
The workstation status will update to Progressing. Wait approximately 5–7 minutes for the workstation to be provisioned.
- Once the status updates to Running, the workstation is ready for use.
Connecting to a Workstation
Once the workstation is in a Running state, you can connect to it remotely.
- Click on your workstation name in the Workstations list.
- A pop-up pane will open on the right, displaying all the details of your workstation.
-
Scroll to the last row of the details pane to locate the Password. Copy this password.

-
Click the Connect icon next to your workstation.
- Enter the username as
ubuntu(for Linux workstations) orwsadmin(for Windows) and paste the copied password. - Click Sign in.
- If prompted again, re-enter the password to complete the connection.
You will now see the workstation's desktop environment in your browser.
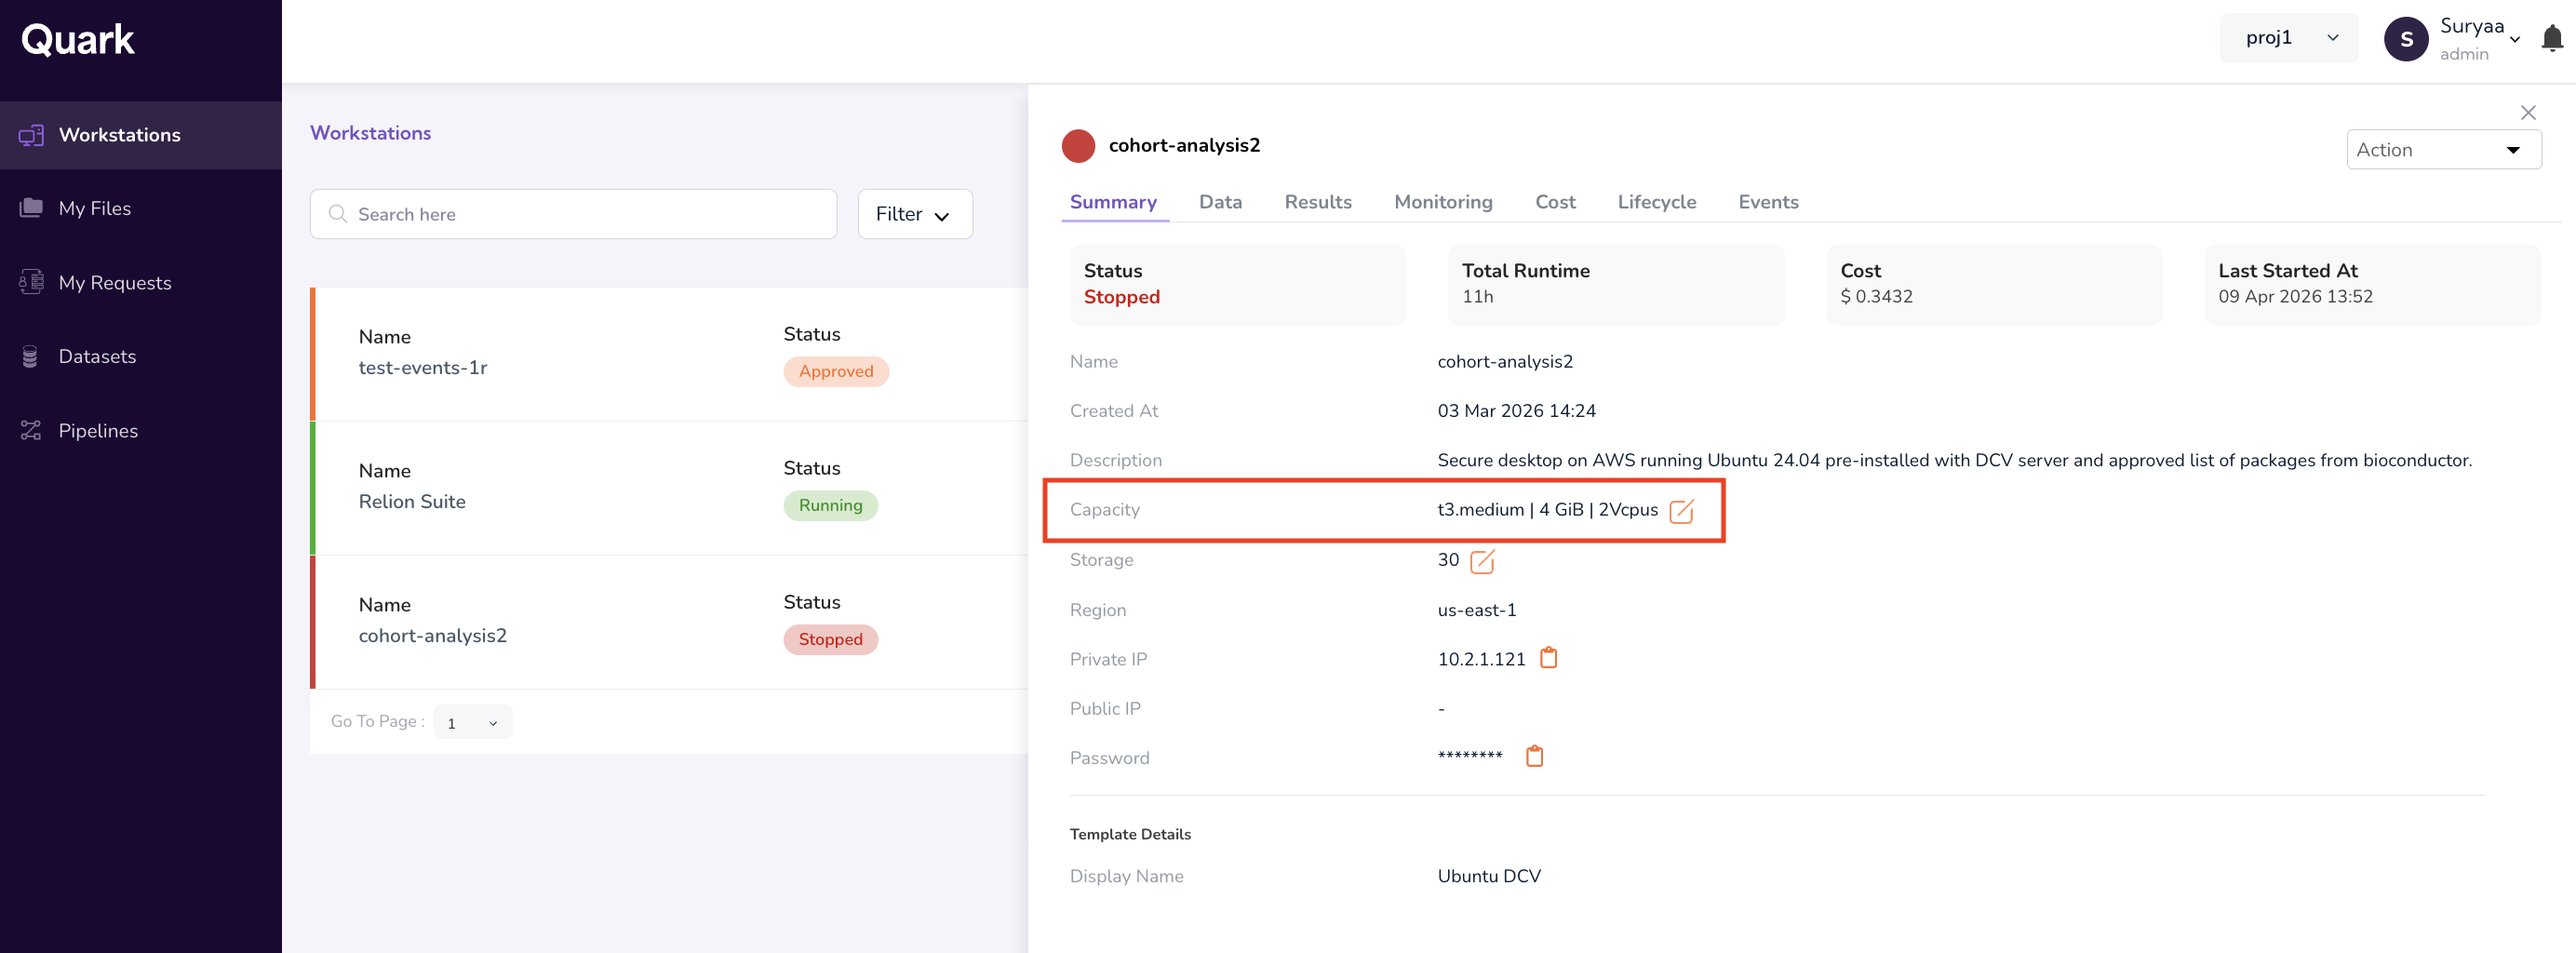
Changing the Instance Type
If your workstation requires more (or fewer) compute resources after it has been created, you can change the instance type:
- Navigate to the Workstations tab and select your workstation.
- In the right-hand details pane, navigate to the Summary tab.
- Locate the pencil (edit) icon next to the Capacity.
-
Click the pencil icon and select a new instance type from the available options.
Starting and Stopping a Workstation
Researchers can manually start or stop their workstations at any time to manage resource usage and costs:
- Stop a workstation when it is not actively in use to reduce costs.
- Start a stopped workstation when you are ready to resume work.
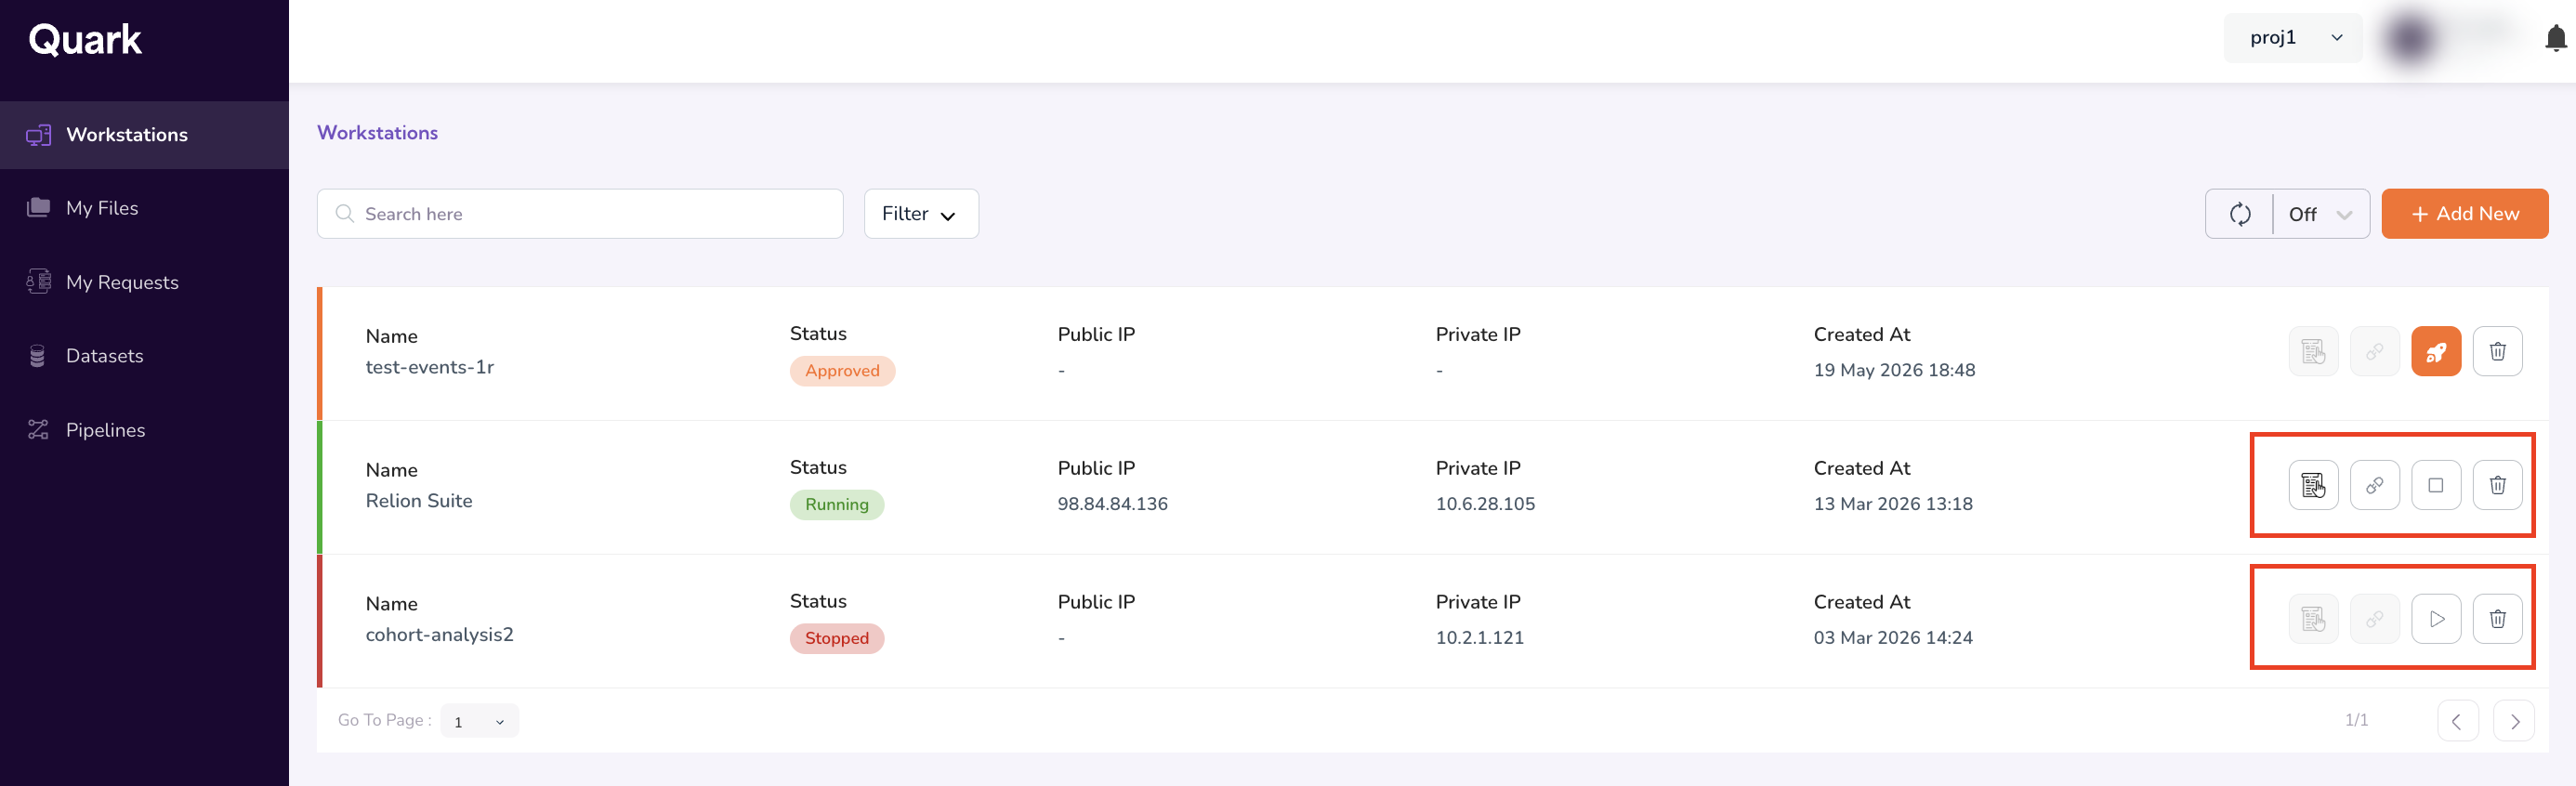
These controls are available from the Workstations interface.
What's Next
- Running Cohort Queries — See Running Cohort Queries from Ubuntu Workstations.
- Running Data Analysis from Workstations — Refer to a tutorial on running Cohort Analysis from Ubuntu Workstations.